
What is Export data from Tableau to Excel?
Tableau allows you to export the data in a Tableau data source to Excel format. You can download the entire data or a subset of the data in your data source into Excel compatible formats which can be further used for data analysis or sharing with other users.
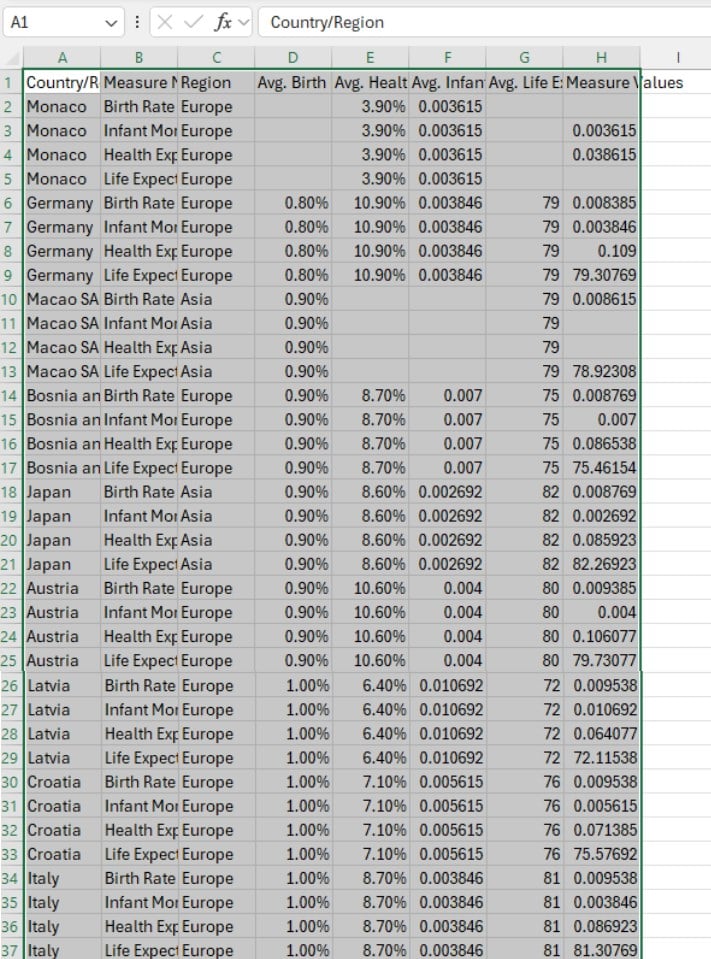
A sample sorting in Tableau visualization looks like the one provided below

Key Takeaways
- Tableau allows you to export the data in a Tableau data source to Excel format.
- You can download the entire data or a subset of the data in your data source into excel compatible formats which can be further used for data analysis or sharing with other users
- There are 5 different methods using which you can export data from Tableau to Excel
- You must consider the limitations before you recommend using the export feature in Tableau
- You can export Tableau Prep output to Excel for sharing and analysis
- In case export features are not working as expected, consider the troubleshooting options to mitigate the issues.
5 Methods to Export Data from Tableau to Excel
Tableau allows you various ways of exporting your data to Excel format. We have outlined the 5 different methods using which you can export your data into Excel.
#1 – Export crosstab of data in the view to Excel
- Tableau provides a functionality using which you can directly export the data used in your visualization as a Crosstab to Excel.
- When you export any Tableau view as a crosstab, it export data from Tableau to Excel automatically by
- triggering the Excel application
- then pasting a crosstab version of the current view of your visualization to a new Excel workbook
- Tableau Desktop provides a prompt asking the user if they want to table to Excel with formatting, in case they are exporting any Tableau that is data-rich and voluminous.
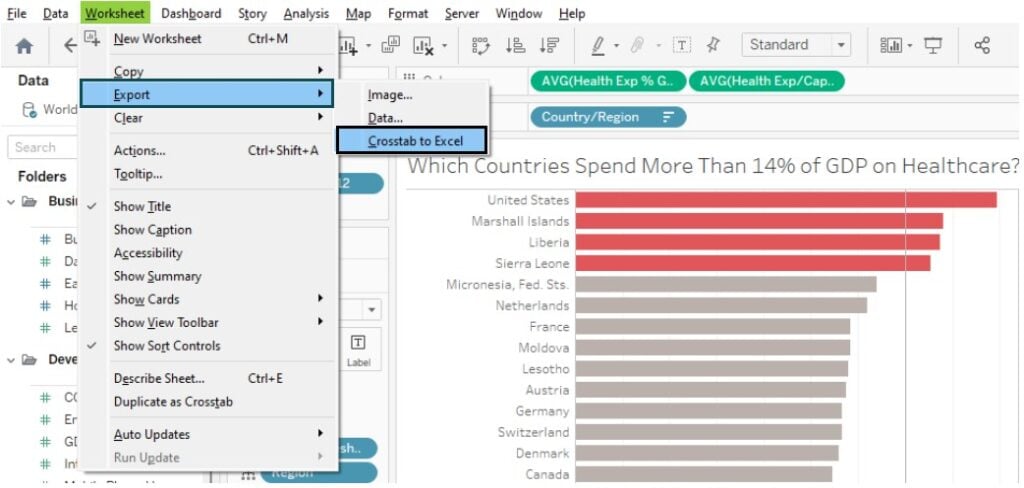
- To export the crosstab of data in the Tableau view to Excel, follow the steps below:
- For Tableau Desktop users in Microsoft Windows, navigate to Worksheet – Export – Crosstab to Excel.
- For Mac users, you may follow the same step mentioned above, however, this option will open a dialog box using which you can save the file and then open it using Excel
- For users of Tableau Server or Tableau Cloud, you can navigate to your Tableau view or Tableau export to Excel from the dashboard and then choose Download – Crosstab. You will have to provide a selection on which worksheet you want to export data.
#2 – Export data from Data Source
- You can export data from the underlying data source in Tableau by following the steps below:
- Navigate to the Data Source tab
- On the Data Source page, choose Data – Export Data to CSV – <Data Source>
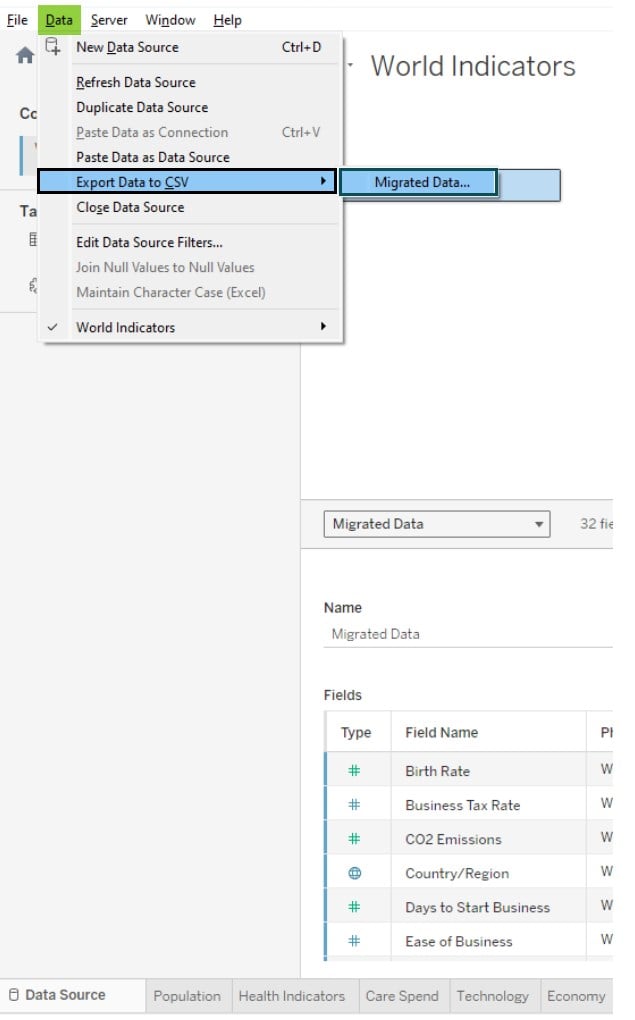
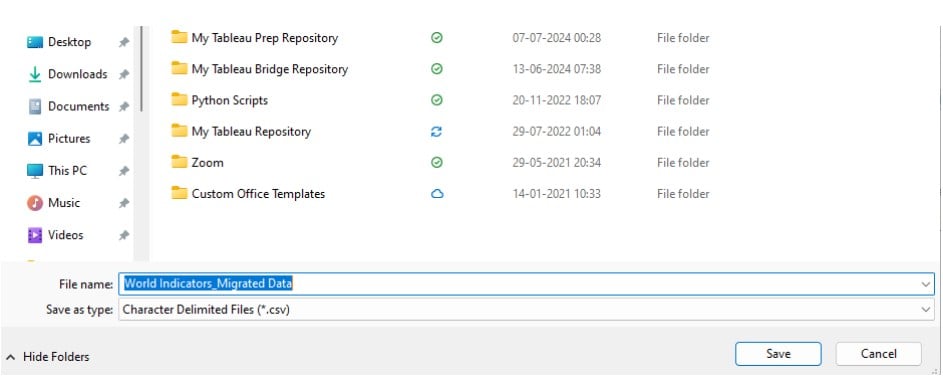
You will see a window asking you to save the file to a location on your machine. Save into a location. Tableau will export the data into the specified location in a CSV format.
#3 – Export data from Tableau view
- You can also export data from a Tableau view by following the steps provided below:
- Navigate to a Tableau worksheet containing data visualization
- In the Data pane, click on View Data
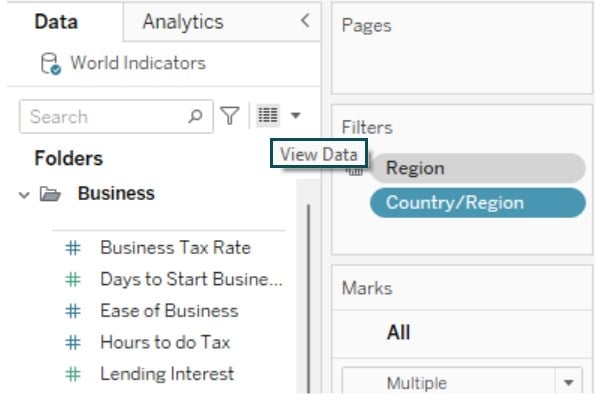
On the View Data dialog box, click on the Download button to export all the data used in the Tableau view.

Note: If the view contains any filters, then the export data will not include those filtered data.
#4 – Copy data in the view to the clipboard
- To copy data in the view to the clipboard,
- Create a data visualization in tableau
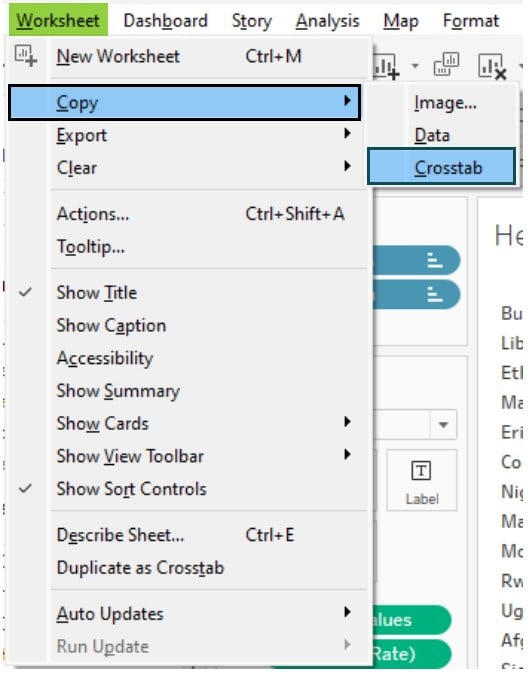
- Navigate to Worksheet – Copy – Data

Launch the Excel application on your machine and paste the data
#5 – Copy the crosstab of data in the view to the clipboard
- Tableau provides a feature where you can copy crosstab of data in the view to the clipboard by using the steps below
- Create a data visualization in your Tableau worksheet using the Tableau Desktop
- Navigate to Worksheet – Copy – Crosstab
Open Excel on your machine and paste it into a tab.

How to Export the Data from the Underlying Data Source?
You can export the data from an underlying data source by following the steps highlighted below:
Follow one of the 5 methods specified in the previous section to export the data.
Alternatively, you can also create an extract by following the steps below:
Step 1: In the Data Source tab, click on Extract and then Edit.

Step 2: In the Extract Data window, expand the Data Storage and choose either Logical Tables or Physical Tables.
Further expand, the Number of Rows and specify whether to export all the rows or any specific subset of the dataset. Then click on Save Settings.

Tableau will create an extract of the underlying data source.
Note that Tableau export to Excel without merged cells.
Examples
Let’s now look at some of the examples to understand more about exporting data from Tableau to Excel.
Example #1 – Tableau export interactive Tableau dashboard
In this example, we will explore whether you can export an interactive Tableau dashboard. For this example, we have used the WorldIndicators dataset that contains different indicators across the world such as GDP, Energy consumption, Population Density, Death Rate, Child mortality, Fertility, Age, Life Expectancy, etc.
To create an interactive dashboard in Tableau, follow the instructions below:
Step 1: Launch Tableau Desktop on your machine and import the WorldIndicators dataset. You will be able to view the imported data in the Data Source tab as shown below.

Step 2: In a new worksheet, drag Pop Density to the Columns shelf and Country name to the Rows shelf. Change the SUM(Pop Density) to Average by right-clicking on the measure and choosing Average from the context menu. Tableau will create a horizontal bar chart in the view as shown below.

Step 3: Drag the Country name to the Filters pane. In the Top tab, select the By field option and then choose Top 10 by Average Pop Density. Click on OK.

This will display the top 10 countries by average population density in the Tableau view.

Step 4: Similarly create another visual in the Tableau view by dragging the Child mortality rate and Country name to the view. Apply filters on the Country name as per the previous step.

Step 5: Now create a dashboard by dragging both the sheets to the Dashboard view. You can view the dashboard view as per below.

Step 6: Select a dashboard view and navigate to Worksheet – Export – Crosstab to Excel.

Step 7: Now paste the data into an Excel sheet. You will see only the screenshot is copied from the Tableau dashboard. This indicates that Tableau export to Excel from the dashboard can only have the static views and not interactive ones.

Note: Even if you use data export, you will only see the underlying dataset, not the Tableau export to Excel with formatting or interactivity.
Example #2 – Tableau export calculated fields
In this example, we will show how you can export calculated fields in Tableau. For this purpose, we have used the Olympic Medals dataset which contains a list of countries, and their medals split as gold, silver, and bronze.
To export calculated fields in Tableau, follow the instructions below:
Step 1: Import the Olympic Medals into Tableau using the Tableau Desktop interface.

Step 2: Navigate to a new worksheet. Right-click on the Data pane and choose Create Calculated Field from the context menu.

Step 3: In the Calculation Editor, specify a meaningful name and logic for the calculated field.

Step 4: Drag the calculated field to the Columns shelf and Total measure to the Rows shelf. We have dragged the Count of team to the Color pane on the Marks card.

Step 5: Right-click on the visualization and click on View Data.

Step 6: In the View Data window that opens, click on the Download button. This will export all the underlying data including the calculated field as well.

Example #3 – Tableau export users
In this example, we will explore if you can export the Tableau users using Tableau Desktop.
Note: Tableau Desktop doesn’t provide any features to export the list of Tableau users. However, you can export the list of Tableau users from Tableau Cloud. We have outlined the key steps to achieve so.
Step 1: Launch Tableau Desktop on your machine and navigate to Server – Sign In…

Step 2: Provide the details of the Server and click on Connect.

Step 3: Once you have connected with Tableau Server, in the search box, type “TS”. This will display all the list of Admin Insights data sources
Step 4: Choose [TS Users] and then click on connect.
Step 5: Drag the User Email and User Site Role to the Tableau Dashboard
Step 6: Click on Worksheet – Export – Excel to export the list of users to excel
Limitations
Some of the key limitations of Export data from Tableau to Excel include:
- Using export crosstab of data in the view to Excel may impact the performance of the export due to the simultaneous processing of both copying and formatting of your underlying data.
- Exporting of data doesn’t include formatting or interactivity of Tableau visualization to the Excel spreadsheet
- You can’t export interactive dashboards to Excel or other formats
Important Things to Note
The important things to note about the export data from Tableau to Excel include:
- It is recommended that if you are using export crosstab of data in the view to Excel, then you should consider excluding the Tableau export to Excel with formatting from the export to improve the performance of the export
- Export data to Excel only includes the data visible in the view. Hence if there are any filters on the dataset then they won’t be exported
- You must consider maintaining consistent data types between Tableau and Excel
Frequently Asked Questions (FAQs)
Yes, you can export a Tableau Prep output to Excel. Tableau Prep allows you to apply data cleaning and transformation to your underlying dataset. Once you have completed the data operation, you can export the output to Excel and other formats.
You can customize the Tableau data export to Excel by applying the below customization.
• Determine whether you want to full or a subset of the data in the dataset.
• Choice of Excel formats such as .CSV or .XSLX.
• Specify the Tableau export to Excel with formatting options.
Yes, you can automate the process of exporting Tableau data to Excel using various options. These include:
• Use tabcmd command-line utility to export a view or workbook from the Tableau Server.
• Use customized software (UIPath) or create your API to generate an extract from Tableau data to Excel.
There are several reasons why your exported Excel file looks different from what you see in Tableau.
• The presence of any data filters may cause data mismatch.
• Tableau version compatibility with Excel.
• Inconsistent data formats across the data fields in Tableau.
• Complex aggregated calculations in Tableau may not directly translate into Excel.
You can try the below-provided troubleshooting options for issues with exporting data from Tableau to Excel
• Ensure the Tableau Desktop version you are using is compatible with the latest Excel version.
• Use the 5 methods to export the data from Tableau to Excel.
• Ensure there are no Tableau export to Excel with formatting issues. Otherwise, your data may get truncated or mismatched.
• Consider rebooting your system if the issue persists.
• Seek help from the Tableau community for any specific concerns or questions you may have.