
What Is XML in Excel?
Extensible Markup Language (XML) is a widely used data storage format on the web. Generally, users work with XML structure data in Excel in certain circumstances. In simple terms, XML is the form of storing the data in a pre-defined structure that the apps and systems can easily read. However, we need to convert it into a format that can be read easily.
Also, XML is the widely accepted file format for storing and transmitting data on the web. For example, consider the following sample data of XML data structure of two records.
Use this XML in Excel Template to follow along with the examples in this article.
Download Excel TemplateRecord 1:
<record>
<Mobile Brand> Samsung </Mobile Brand >
<Units Sold> 5000 </Units Sold >
<Make Year> 2009 </Make Year>
</record>
Record 2:
<record>
<Mobile Brand> Apple </Mobile Brand >
<Units Sold> 3000 </Units Sold >
<Make Year> 2009 </Make Year>
</record>
Likewise, the next row of records starts with the word <record> and ends with </record>. Also, the record will appear like the following table in Excel.

Key Takeaways
- We can import data from the XML source file using the Developer tab or the Power Query feature.
- XML data is also available in web URLs, and the Power Query can easily load and transform the data.
- Creating a connection from a power query makes the connection dynamic. Whenever changes happen in the source XML file, we have to click on the Refresh button of the connection created by the power query, and all the changes will be updated dynamically.
- Also, XML data stores each information where headers of the data are tagged in brackets on either side of the actual value.
How To Import And Convert XML File To Excel?
We can import XML in Excel in two ways, the first is by using an XML extension file stored in our system, and the second is directly from the web.
Let us have a look at the following examples to understand both the ways.
Import XML File Saved On Your System:
First, we need to save the XML structured file in our system. Before that, let us design the XML file schema.
To begin with, add the following code to the notepad file.
<data-set xmlns:xsi=”http://www.w3.org/2001/XMLSchema-instance”>
It is the standard set of lines. We need to add it the beginning of the XML data.

Once we add the set of lines, copy the following XML structured data to the same notepad file.
<record>
<FullName>Andy Flower</FullName>
<Salary>10000</Salary>
<Country>UK</Country>
<Age>23</Age>
</record>
<record>
<FullName>Andy Bitchel</FullName>
<Salary>12000</Salary>
<Country>USA</Country>
<Age>25</Age>
</record>
</data-set>

Now, click on the Save option and save the file in the XML format, as shown in the following image.

Next, click on the Save button. We can see that the file is saved in XML format.

After saving the file, we need to import this in Excel under the Developer tab.

Though the Developer tab in Excel is unavailable, we can use the following steps to enable it.
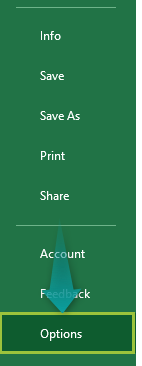
Step 1: To begin with, go to the File tab.

Step 2: Next, click on Options.
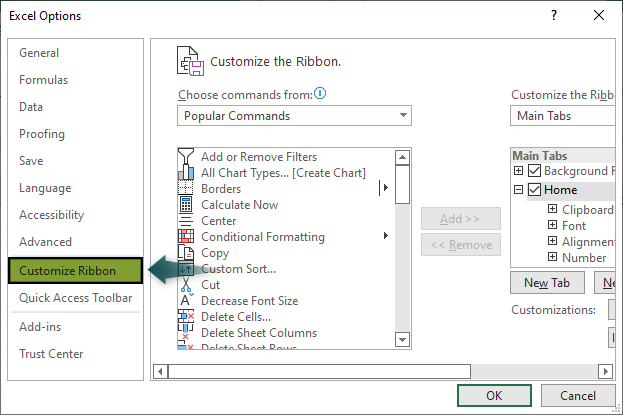
Step 3: The Excel Options window opens up. Now, click on Customize Ribbon.
Step 4: Then, check the Developer tab box under Main Tab.
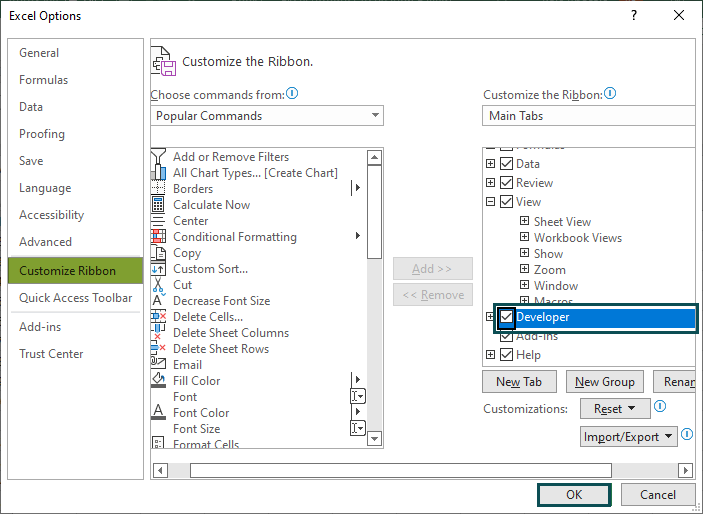
Step 5: Next, click OK.
Now, we will be able to see the Developer tab.
Once the Developer tab is enabled, click on the Source option under this tab.

Now, the XML Source window opens on the right side of our Excel screen. Click on the XML Maps… option in this window.

Next, it will open another window, as shown in the following image. Click on the Add button.

Now, we need to choose the XML saved file from our computer. Navigate to the folder and choose the XML file.
Click on Open, and Excel will prompt the following message. Click OK.

Now, we are back to the previous window. Next, click OK in this window.

Now, we can see all the column names in the selected XML table in the XML window on the right side.

Next, select all the columns in the above window. Then, drag and drop the selected columns to the worksheet.

Once we drag and drop the columns, Excel will create an empty table. Now, under the Developer tab, click on the Import option.

Next, it will ask us to choose the XML file from our saved folders. Then, choose the same file that we have saved in the subsequent steps.

Next, click on Import, and XML data will be stored as shown in the following image:

In this way, we can import XML in Excel. Next, let us look into the second method.
Import XML File using the Web URL
If the XML data is from the web, then we can import it from the web using a Power Query.
For instance, the following URL contains the data in XML format.
The data will appear like the following image:

We will import this by using a power query.
First, go to the Data tab.
Next, click on the drop-down list of Get Data, hover on From Other Sources, and choose From Web.

Now, we should enter the URL in the From Web window.

Then, click OK. Now, Excel will create a connection from the mentioned URL.
Power Query preview data will be displayed as shown in the below image:

Click on Load, and XML data will be downloaded to the Excel file.

Import With Power Query
We can easily import the data using a Power Query. Under the Data tab, we have a group called Get & Transform Data.

To begin with, click on Get Data select From File and choose From XML.

Now, we should choose the file from the desired folder.
Next, click on Import. It will display the data preview as shown in the following image.

Click on Load.
Now, Excel creates a connection between the XML and Excel files.

Meanwhile, importing the data through a power query is best because, whenever we make a change, we can get the updated data easily to Excel with just a click of a button.
For instance, add the following record to the existing XML file.
<record>
<FullName>Andy Robert</FullName>
<Salary>15000</Salary>
<Country>USA</Country>
<Age>30</Age>
</record>

Now, save and close the XML file.
Next, right-click on the already created connection in Excel, and click on the Refresh button.

As soon as we press Refresh, the data will be updated automatically.

Likewise, we can use power query and make it easier to work with XML data.
How to Add XML Map to Excel?
Once the source XML file is connected to Excel, we can map the required columns in Excel. For instance, we have loaded the following XML file already to Excel.

There are 4 columns in the XML data file. However, we do not necessarily need to load all 4 columns to Excel.
Out of these 4, we can choose the columns we want to see in the Excel worksheet.
Now, right-click on the column we want to map and click on Map Element.

Now, we should choose the targeted cell in the worksheet.

Next, click OK to create a mapping column in the selected cell.

Similarly, we can choose only the necessary columns and create a mapping in Excel.
For instance, we have mapped the following 3 columns, which are bold in the XML source window.

We can also map columns. Select the column and double-click on the column to map it.
Important Things To Note
- XML stands for Extensible Markup Language.
- We should add the code, <data-set xmlns:xsi=”http://www.w3.org/2001/XMLSchema-instance”> at the top of every XML file.
- Also, XML data should always contain the word </data-set>
- XML format data should not contain any space in its headers, and each header should be included within the tag (<>).
- Each header should contain the backward slash (/) to close the particular entry.
- XML data can be stored in a notepad, but while saving the file, we need to give the file extension as .xml.
Frequently Asked Questions (FAQs)
If we have the XML file in our system, we can import it with a few steps.
For instance, we have the following sample data in the XML file.
Now, let us learn how to use XML in excel.
The steps required to use XML in excel are as follows:
Step 1: First, go to the Developer tab and click on Source.
Step 2: Next, click on XML Maps.
Step 3: Then, click on the Add… button.
Step 4: Choose the file from the saved folder.
Step 5: Next, click on OK. We can see that the XML file is mapped to the Excel file.
Step 6: Then, select all the columns and right-click on the same.
Now, click on Map element… option from the available options.
Step 7: Next, excel will create a table format, as shown in the following image.
Step 8: Then, under the Developer tab, click on Import.
Step 9: Next, import the same file that we imported earlier.
Step 10: Once the import is done, we will see the data in table format.
Likewise, we can use XML in excel.
To open XML in excel by default, we need to make some changes.
Step 1: First, type Windows + R and run regedit.exe.
Step 2: Next, navigate to the folders in the following path.
hkey_current_user/Software/Microsoft/Windows/CurrentVersion/Explorer/FileExts/.xml/OpenWithList/
Step 3: Then, choose EXCEL.EXE
Step 4: Next, restart the computer.
Likewise, we can open XML in Excel.
XML file opens with notepad, and we can import the data into Excel. However, if there is a problem opening the XML file with Excel, then we need to change the default settings in our system.
Use this XML in Excel Template to follow along with the examples in this article.
Download Excel TemplateRecommended Articles
Continue with these related resources when you want the next practical step in this topic.
- Features of MS Excel
- Uses Of MS Excel
- Ribbon In Excel
- Keyboard Shortcuts In Excel
- Quick Analysis Tools In Excel
Explore the full Excel Productivity and Shortcuts guide or browse Excel Resources.