
What Is Excel Date Picker?
Excel Date Picker is a powerful tool that allows users to select dates from a calendar in Microsoft Excel conveniently. With its user-friendly interface, this add-in simplifies data entry and analysis by allowing users to easily choose valid dates while preventing any potential errors associated with human input. The Excel Date Picker offers a variety of features, such as customizable formatting options, selectable date ranges, and language support, making it appropriate for international users. It seamlessly integrates into the Excel interface, providing a comprehensive solution for managing dates within spreadsheets and improving overall productivity.
Download FREE Excel Date Picker Template and Follow Along!Use this Excel Date Picker Template to follow along with the examples in this article.
Download Excel Template
To access the Add-Ins group, navigate to the Developer tab and select the Add-Ins option. From there, locate and add the “Mini Calendar and Date Picker” add-in from the Office Add-Ins collection. Once added, the Mini Calendar will appear within Excel.

To input a date, position the cursor at the desired location. Then, select the desired date from the Calendar. The cell will display the date which we selected from the calendar.

Key Takeaways
- Excel date picker is a tool or add-in that allows users to select dates from a calendar interface within an Excel spreadsheet. This feature provides convenience and accuracy when working with dates, eliminating the need for manual input and reducing the chances of errors.
- To successfully insert the drop-down calendar, select the Microsoft Date and Time Picker Control 6.0 (SP6) from the “more controls” box.
- To ensure the VBA code runs smoothly, saving the file with the “.xlsm” extension is crucial, indicating it is macro-enabled.
- Within the drop-down calendar, we can modify the date, month, and year by utilizing the various arrow buttons.
How To Insert Date Picker In Excel?
To insert a date picker in Excel, we can follow these steps.
-
First, open Excel and go to the worksheet where we want to add the date picker.
-
Next, click the Developer tab in the toolbar at the top of the window. If we don’t see this tab, enable it by going to File – Options – Customize Ribbon and checking the box next to Developer.
-
Then, find and click on the Insert button in the Controls group.
-
Now, select More Controls from here and scroll down until we find Microsoft Date and Time Picker Control.
-
Next, click on it and draw a rectangle on our worksheet where we want the date picker to appear.
-
Finally, save our workbook before testing out our new date picker by clicking on a cell within the date picker area and selecting a date from the drop-down calendar that appears.
These steps should successfully insert a functional date picker into our Excel worksheet for easy data entry or tracking of dates.
Examples
Example #1 – The Date Picker Insertion
We possess comprehensive student data for our esteemed university. The various fields encompass the following: Students, Admission Date, and Course.
For the use of Date Picker, follow the below instructions;
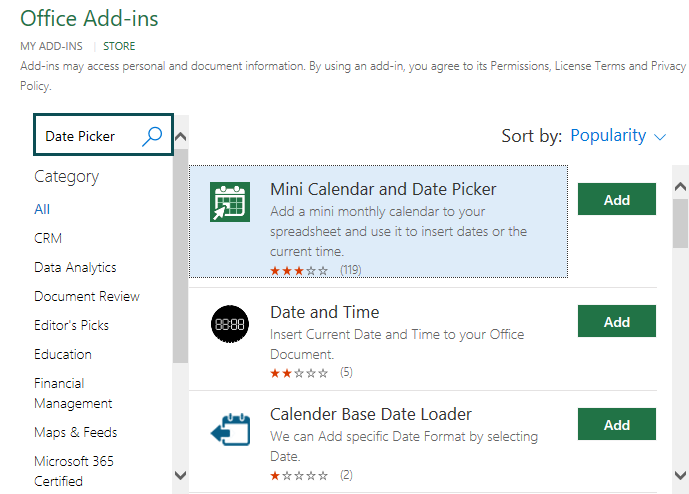
Step 1: First, to access the Developer tab, navigate to the ribbon at the top of the screen and click on it. From there, locate the Add-Ins group and select the option labeled Add-Ins.

Step 2: Similarly, to access the Office Add-ins window, open it. Once opened, navigate to the Store section and search for the Date Picker add-in. We will find the Mini Calendar and Date Picker add-in upon searching. To incorporate this add-in into our Excel, click on the Add button.
Step 3: Now, our meticulously designed Excel spreadsheet now features a convenient and visually appealing Mini Calendar.

Step 4: To enter the date, first, position the cursor at the desired location. Next, choose the date from the Calendar. Once selected, the date will appear in the designated cell, such as B2 in this particular instance.

Step 5: Column B displays all the Admission Dates selected from the calendar.

Example #2 – The Code Explanation
The explanation, followed by the code within a block, is provided as follows:

Step 1: The first statement instructs the Excel compiler to execute the code whenever a new cell is selected, indicating a selection change. The selected cell is passed to the sub-procedure as a target.
Private Sub Worksheet_SelectionChange(ByVal Target As Range)
Step 2: The next statement sets the height and width of the date picker to 20 points in Excel.
With Sheet1.DTPicker1
.Height = 20
.Width = 20
Step 3: The If clause establishes the following criteria:
The date picker becomes visible if we select any cell in column C. The Intersect function returns the address if we select a cell in column C; otherwise, it returns null.
If Not Intersect(Target, Range(“C:C”)) Is Nothing Then
.Visible = True
Step 4: The top property of the date picker is set equal to the top property value of the selected cell, aligning it with the upper border of the selected cell.
.Top = Target.Top
Step 5: The next statement sets the left property of the date picker equal to the next right cell’s left property (of the selected cell). This represents the distance of the left border of column D from the extreme left of the worksheet.
.Left = Target.Offset(0, 1).Left
Step 6: This statement links the date picker with the target cell, enabling the selected value from the drop-down calendar to be displayed in the cell.
.LinkedCell = Target.Address
Step 7: The else statement instructs the compiler to hide the date picker if a cell other than the one in column C is selected.
Else
.Visible = False
Step 8: Finally, we conclude the if statement.
End If
Step 9: Additionally, we conclude the with statement.
End With
Step 10: At this point, the sub-procedure comes to an end.
End Sub
Example #3 – The Date Picker Operation
We have a team of employees in our company who are responsible for submitting projects. These projects include important information about our employees and submission dates.
To utilize the Date Picker feature, please follow the instructions below:
Step 1: Access the Developer tab by navigating to the ribbon at the top of the screen and clicking on it. From there, locate the Add-Ins group and select the option labeled Add-Ins.

Step 2: Search for the Date Picker add-in in the Office Add-ins window. If the add-in is searched before it is present in the My Add-Ins section, the Mini Calendar and Date Picker add-in. To incorporate this add-in into our Excel, click on the Add button.

Step 3: Our Excel spreadsheet is meticulously designed to include a convenient and visually appealing Mini Calendar.

Step 4: To enter a date, position the cursor at the desired location and choose the date from the Calendar. Once selected, the date will appear in the designated cell, such as B2 in this particular instance.
Step 5: Column B displays all the Project Submission Dates selected from the calendar.

Important Things To Note
- The drop-down calendar in Excel is technically referred to as the Microsoft Date and Time Picker Control.
- However, it is important to note that the Microsoft date picker is not compatible with the 64-bit version of Excel.
- To insert the drop-down calendar, we can utilize the ActiveX Controls found in the Controls group of the Developer tab.
Frequently Asked Questions (FAQs)
An Excel Date Picker is a tool or feature that allows users to select and insert dates into an Excel spreadsheet easily.
We can add multiple calendars to an Excel sheet effortlessly. To access the Add-Ins group, navigate to the Developer tab and select the Add-Ins option. Within this menu, we will find the Office Add-Ins collection, where we can easily locate and add the Mini Calendar and Date Picker add-ins. Once successfully added, the Mini Calendar will seamlessly integrate into our Excel interface, enhancing its functionality. We can repeat these steps to add multiple calendars to a single sheet, allowing for efficient organization and scheduling.
To begin, place the cursor at the desired location within the spreadsheet. Then, we can easily select the desired date from the Calendar provided by the Mini Calendar add-in. Choose the Start date from the first calendar, which displays the month of August, and proceed to select the End Date from the second calendar, showcasing the month of September. Consequently, the selected date will promptly appear within the respective cell.
• Firstly, it offers a user-friendly interface, allowing for quick and effortless selection of dates within the specified range. This eliminates the possibility of human error that may arise from manual entry.
• It provides consistency in date format across worksheets and workbooks. Therefore, there is accuracy and compatibility when sharing or referencing data.
• Moreover, the Excel Date Picker enhances productivity by saving considerable time that is otherwise spent on searching for specific dates within large datasets.
• Additionally, it improves data visualization by enabling users to apply filters based on specific periods or ranges easily.
• Firstly, the date picker is only available in newer versions of Microsoft Excel, such as Excel 2013 and later. This means that if we use an older version of Excel, we will not have access to this feature.
• Additionally, the date picker is limited to selecting dates within a specific range. By default, it allows dates from January 1, 1900, to December 31, 9999. If we attempt to select a date outside of this range, the date picker will display an error message.
• Furthermore, the date picker does not support selecting time values along with dates; it can only be used for selecting dates exclusively.
Use this Excel Date Picker Template to follow along with the examples in this article.
Download Excel Template