
What Does Split Panes In Excel Mean?
The Splitting Panes in Excel is useful for dividing a workbook into different sections. This feature can be found in the “View” tab’s “Windows” section. We can split panes horizontally or vertically or even create a cross-split. The horizontal and vertical splits are visible in the middle of the worksheet, while a cross split can be achieved by simply dragging the panes.
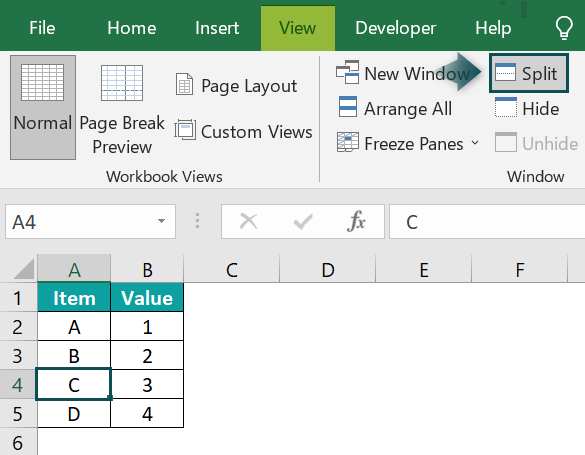
For example, the image depicts the set of values. We want to perform the following tasks in Excel to understand the mechanism of the Split Panes in Excel.
Use this Split Panes in Excel Template to follow along with the examples in this article.
Download Excel TemplateThe steps to perform the given tasks are listed as follows:
Add the data to the sheet. Go to the View tab. Choose Split from the Window group. Select cell A4 and press the Split button.
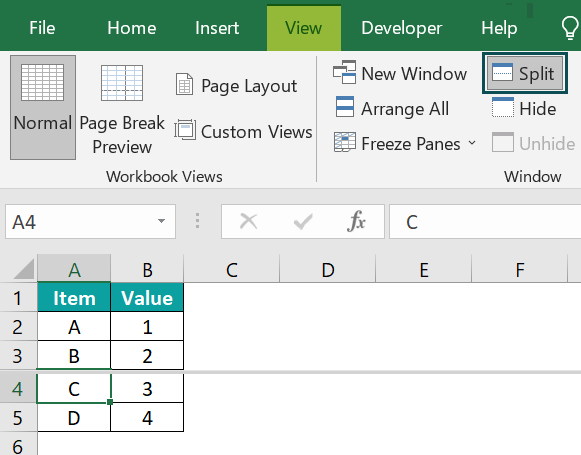
The spreadsheet shows the split in two after the selected cell A4, and we can scroll down and up, as shown in the below image.
Key Takeaways
- Split panes in Excel are a powerful tool that allows users to view and work with large amounts of data easily.
- The split panes feature helps us compare and analyze data from different parts of our workbook without having to scroll back and forth constantly.
- To split panes horizontally, click on the cell where we want to split the worksheet and select “Split” from the “Windows” section.
- We can save time and increase productivity when working with large data.
- To activate split panes in a worksheet, use the shortcut keys “ALT + W + S.”
- With split panes, we can view multiple worksheet sections simultaneously, increasing productivity and efficiency.
How To Split Panes In Excel?
Step by step representation of the use of the Split Panes in Excel is as follows;
- Go to the View tab in Excel.
- Choose Split from the Window group. It will divide the window into different panes that each will scroll separately.

Examples
Example #1 – Split Panes Horizontally
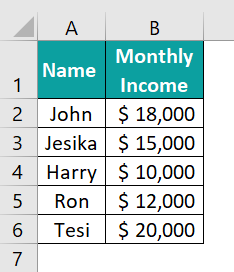
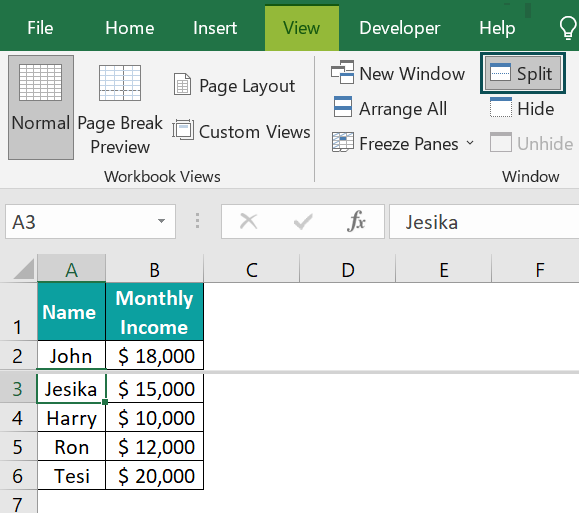
The succeeding image depicts the name and monthly income of people. We want to perform the following tasks in Excel to understand the mechanism of the Split Panes Horizontally in Excel.
In the table,
- Columns A and B shows the name and monthly income, respectively
The steps to perform the given tasks are listed as follows:
- Step 1: Add the data to the sheet.
- Step 2: Go to the View tab.
- Step 3: Choose Split from the Window group.
- Step 4: Select cell A3 and press the Split button.
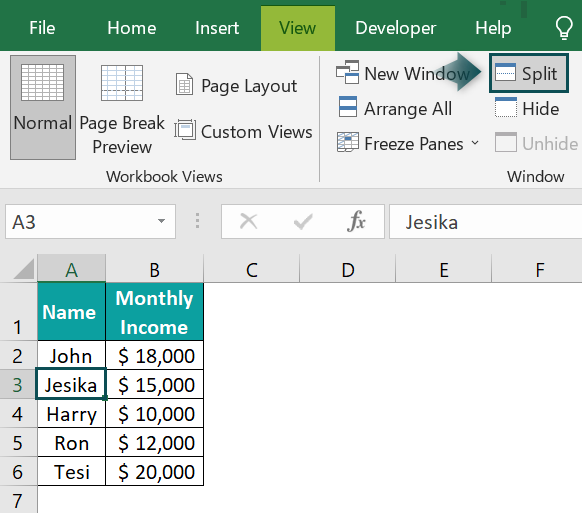
- Step 5: After applying this feature, the spreadsheet is split in two after the selected cell A3, and we can scroll down and up, as shown in the below image.
Example #2 – Split Panes Vertically
The succeeding image depicts the name and monthly income of people. We want to perform the following tasks in Excel to understand the mechanism of the Split Panes Vertically in Excel.
In the table,
- Columns A, B and C shows the name, monthly sale and country respectively

The steps to perform the given tasks are as follows:
- Step 1: Add the data to the sheet.
- Step 2: Go to the View tab.
- Step 3: Choose Split from the Window group.
- Step 4: Select column B and press the Split button.
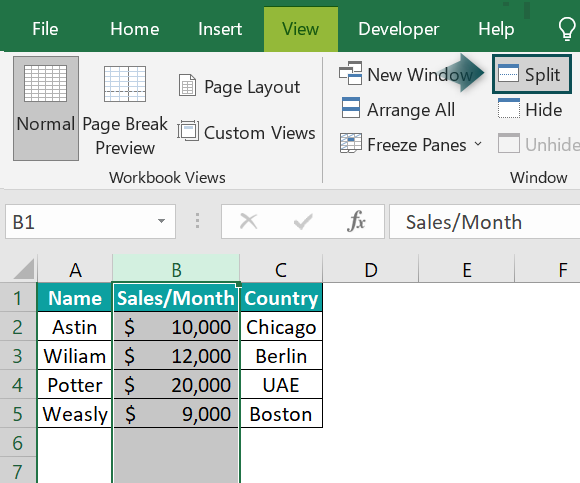
- Step 5: After applying this feature, the spreadsheet is split in two after the selected column B, and we can scroll left and right, as shown in the below image.

Example #3 – Insert A Cross Split Pane Into A Worksheet
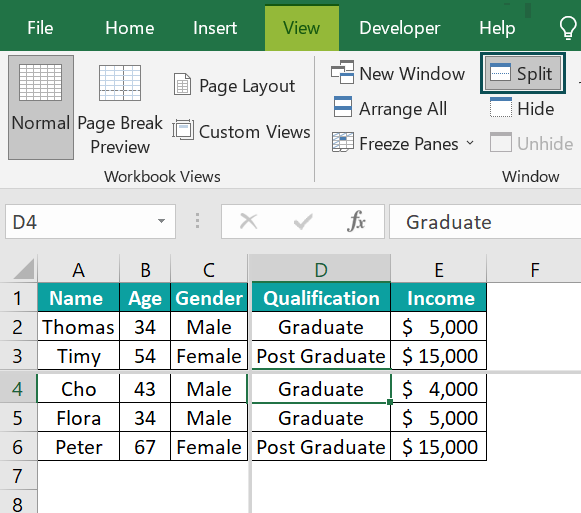
The succeeding image depicts the name and monthly income of people. We want to perform the following tasks in Excel to understand the mechanism of Inserting a cross Split Pane into a Worksheet in Excel.
In the table,
- Columns A, B, C, D, and E shows the name, age, gender, qualification and income, respectively

The steps to perform the given tasks are listed as follows:
- Step 1: Add the data to the sheet.
- Step 2: Go to the View tab.
- Step 3: Choose Split from the Window group.
- Step 4: Select cell D4 from the middle of the data and press the Split button.

- Step 5: After applying this feature, the spreadsheet is split into four after the selected cell D4, and we can scroll left and right as well as up and down, as shown in the below image.
Example #4 – Unsplit The Panes
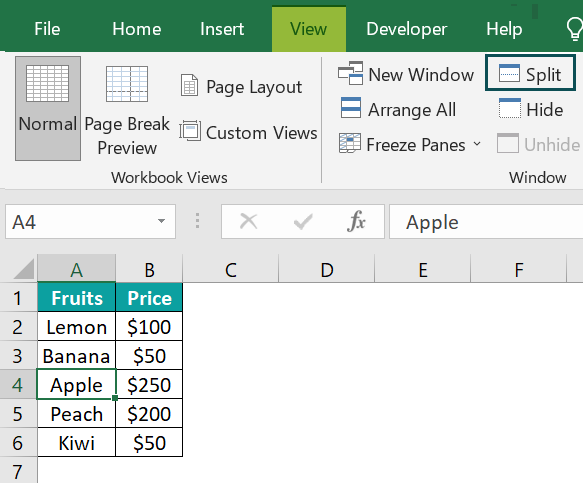
The succeeding image depicts the price of the fruits. We want to perform the following tasks in Excel to understand the mechanism of the Unsplit the Panes in Excel.
In the table,
- Columns A and B shows fruits and price, respectively

The steps to perform the given tasks are listed as follows:
- Step 1: Add the data to the sheet.
- Step 2: Go to the View tab.
- Step 3: Choose Split from the Window group.
- Step 4: Select cell A4 and press the Split button.
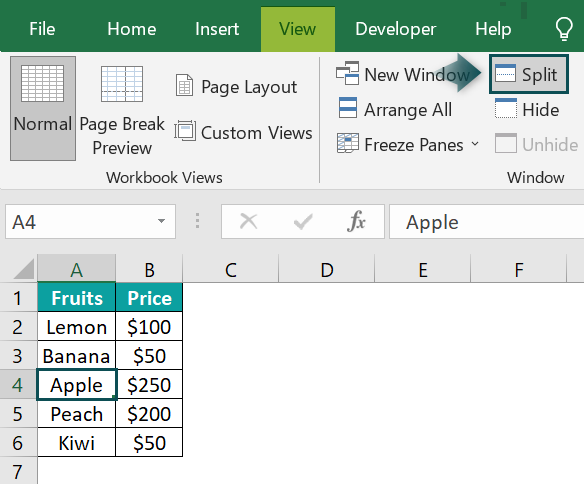
- Step 5: After applying this feature, the spreadsheet is split in two after the selected cell A4, and we can scroll up and down, as shown in the below image.

- Step 6: Go to the View tab to Unsplit panes.
- Step 7: Choose Split from the Window group.
- Step 8: After applying this feature, the spreadsheet unsplit the panes, as shown in the below image.
Important Things To Note
- To split the worksheet vertically into two panes, it is necessary to move the active cell to row 1. This action will allow for a more organized and efficient data view.
- To split the worksheet horizontally into two panes, we must relocate the active cell to column A. This action will allow for a seamless worksheet division, providing a more organized and efficient workspace.
- The selected cell is within a worksheet and will appear as four panes or cross panes. This occurs regardless of the cell’s location within the worksheet. The four panes refer to the worksheet’s four sections divided by horizontal and vertical scroll bars in excel.
- Split panes in Excel provide a versatile and valuable solution for organizing data quickly and effectively.
Frequently Asked Questions (FAQs)
Splitting panes in large spreadsheets can effectively improve navigation and make it easier to access information. We can view multiple spreadsheet parts using split panes simultaneously, making comparing data across different document sections easier. This feature makes sense of context when working on larger projects, as they will be less likely to get lost or confused while navigating through complex spreadsheets. The Split Panes can be useful for managing data and improving overall efficiency by reducing the amount of scrolling required to find specific information.
The multiple users to manipulate sets of Split Panes simultaneously is a valuable feature that enhances collaboration and productivity in various industries. This function allows several individuals to simultaneously work on a single project and view different aspects of the same document or application. With the help of Split Panes, users can divide their screens into two or more sections allowing them to have a broader perspective of their data while working within confined spaces.
This feature is particularly useful in collaborative projects where various team members need access to the same dataset but require autonomy. By using Split Panes, teams can easily organize their work and collaborate effectively while maintaining control over their contributions.
Excel can be split into two or more panes. The number of panes Excel can split into depends on the version used. In Excel 2019, up to four panes could be created by going to the “View” tab and then choosing “Split.” This feature is particularly useful when working with large data sets as it lets users compare information easily without scrolling through different worksheet parts. Splitting panes in Excel is also commonly utilized to keep certain cells visible while navigating through different sections of the worksheet; this helps ensure accuracy and saves time in locating important data points within a spreadsheet.
Use this Split Panes in Excel Template to follow along with the examples in this article.
Download Excel Template