
What Is VBA Input Box In Excel?
VBA Input Box creates a pop-up window where the users are allowed to enter something based on the requirement. When we develop VBA projects at various stages, we may have to collect a few inputs from them to proceed further in the project. So, in those cases, we can design the input box.
Also, we can create an input box based on various criteria as well. For example, if we want the user to enter only numerical numbers, we can design the input box that way. Similarly, we can restrict the user to enter only date values.
Use this VBA Input Box Template to follow along with the examples in this article.
Download Excel TemplateKey Takeaways
- VBA Input Box is a pop-up window and is used to get the inputs from the users.
- The VBA Input Box types are Generic Input Box and Application.InputBox with data validation options.
- Remember, there are various kinds of data validation techniques available with the Application.Input box.
- Also, we can restrict the user to choose the input value only from the cell reference or range of cells by giving the type argument value as 8.
- Variable can hold only the assigned data type value.
Syntax Of VBA Input Box
The syntax of VBA Input Box comes in two ways.
The first one is as follows:
INPUT(Prompt, [Title], [Default], [XPos], [YPos], [HelpFile], [Context])
Prompt: It is a mandatory argument. We can intimate the user about the kind of data they need to enter in the Input Box.
[Title]: We can give the title for the input box in this argument. It is an optional argument, and therefore, if we ignore this, we will get the application name as the title of the input box i.e., Microsoft Excel.
[Default]: In the input area of the input box, we can show the default value as per the requirement.
[XPos]: This is an optional argument. In this argument, we will enter a number that will position the coordinate of the input box on the X-axis.
[YPos]: This is an optional argument. In this argument, we will enter a number that will position the coordinate of the input box on the Y-axis.
[HelpFile]: In this argument, we will give the location of the help file that will be used with the input box. It is an optional argument however it becomes mandatory if we use the [Context] argument.
[Context]: This argument contains the context ID number associated with the help file. It is an optional argument however it becomes mandatory if we use the [HelpFile] argument.
The following image shows the typical input box in VBA.

The syntax of the input box we have seen so far is the basic one with limited features. To get the advanced features of controlling the data validation in excel we need to use the “Application.InputBox” function.

The syntax is as same as the generic input box as we have seen in the previous section. The additional feature we get when we use the Application.InputBox is the Type argument.
[Type]: This will allow us to do the data validation. Meanwhile, this is an optional argument.
For example, if we want the user to enter values only from the cell reference in excel, then we can put this validation in place. This is a lifesaver for all the developers because as a developer, we need not have to write multiple lines of code to do the data validation.
The following numerical values can be entered based on the requirement.
- 0 – Only a formula can be entered.
- 1 – Only a number can be entered.
- 2 – Only a text string can be entered.
- 4 – Only a logical value can be entered either TRUE or FALSE
- 8 – Only a cell reference can be given as input.
- 16 – Only an error can be entered such as #N/A.
- 64 – An array of values can be entered.
Once the above data validations are put in place, users are still able to enter any of the data. However, the input box will do the data validation after the user clicks on OK and does not allow them to proceed further if the data entered is not as per the validation put in.
The VBA Input Box With A Variable
The best way to work with Input Box is through a variable. Now, let us see some examples using VBA input box.
Example #1 – The String Variable With An Input Box
Follow the steps listed here to create our first input box.
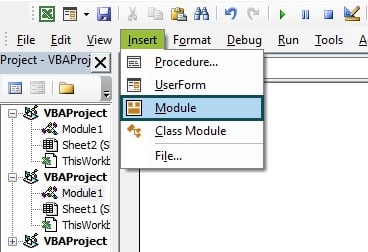
Step 1: First, select the Visual Basic Editor window by pressing the ALT + F11 shortcut keys.
Step 2: Next, go to the Insert tab and then, click on Module.
Step 3: Now, this will insert the module and then, start the sub-procedure by giving a name to it.
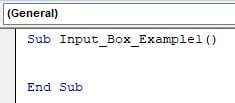
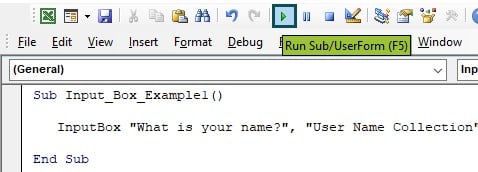
Step 4: Then, enter the input function (do not open brackets).
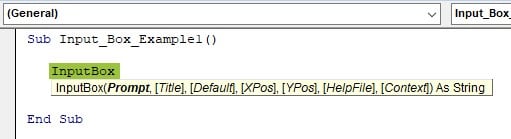
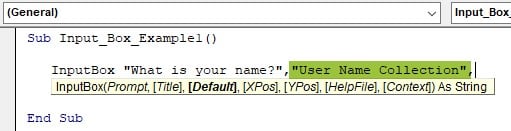
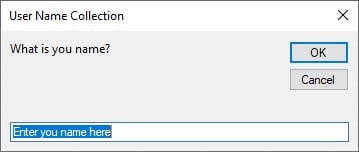
Step 5: Next, for the prompt argument of the input box, we need to give a message to the user about what they need to enter. For example, assume we are collecting usernames; then, we can give a question such as What is your name?.

Step 6: Similarly, for the Title argument of the input box, we need to give a title that is suitable for the context. Now, in this case, it will be User Name Collection.
Step 7: Next, give the name default message to the user, like Enter your name here.

Now, run the macro either by clicking on the Run button or pressing the shortcut key F5.
Meanwhile, when we run this button, we will get the following input box window.

As we can see, it has selected the default message. Thus, to enter, we need to press the backspace or delete button.

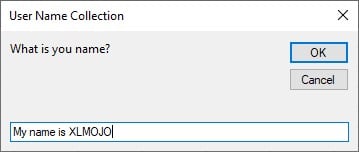
Now, enter the name in the input space.
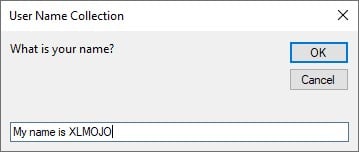
Next, click on OK and the input box will be disappeared.
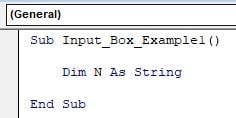
However, to store the input received from the input box, we need to define a variable with the kind of data it can hold.
Since we are collecting names, we can assign the string data type like the following.
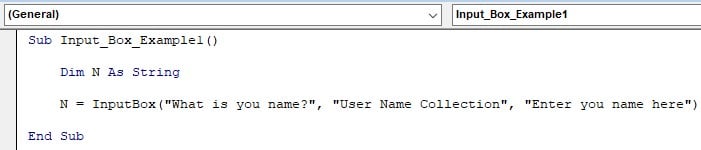
Now, enter this variable name along with an equal (=) sign then place the input box after the equal sign.

But, we are getting an error with all the text or code in red color.
The reason for this is whenever we assign a value given by the input box, we need to enter the input box function with closed parenthesis.
Clearly, we can see a parenthesis has normal functions.
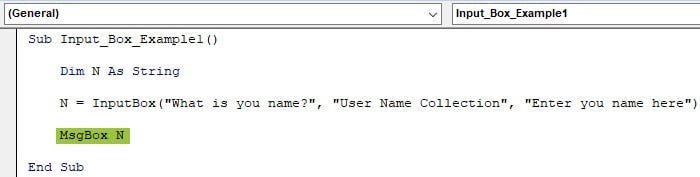
Now, let us show the variable value in the message box as shown in the below image.
Then, run the code, and we will get the below input box.
Next, enter the name as required.
Now, click on OK and a message box will show the value entered in the input box.

Now, we have got the output to show somewhere. So, to store the value entered in the input box, use the following code.
Sub Input_Box_Example1()
Dim N As String
N = InputBox(“What is you name?”, “User Name Collection”, “Enter you name here”)
Range(“A1”).Value = N
End Sub
This will store the value entered in the input box in cell A1.
Example #2 – Number Variable With An Input Box
If we want to allow the user to enter only the numerical value, then we need to assign a data type that can hold the numerical data.
There are different numerical data types available. They are:
- Byte – It can hold 0 to 255.
- Integer – It can hold numbers from -32768 to 32768.
- Long – It can hold numbers from -2,147,483,648 to 2,147,483,648
- Single – It can hold numbers from -3.402823E+38 to -1.401298E-45 for negative values 1.401298E-45 to 3.402823E+38 for positive values.
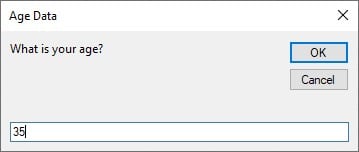
For example, if we are collecting age data from users then, we need to use the Byte data type because it can hold values from 0 to 255.

Next, assign the value of the input box by designing the input box like the following.
Sub Input_Box_Example2()
Dim N As Byte
Age = InputBox(“What is your age?”, “Age Data”, “Enter you age here”)
Range(“A1”).Value = Age
End Sub
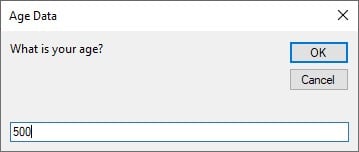
Now, when we run this code, we will get the following input box.

Next, enter the age between 0 to 255.
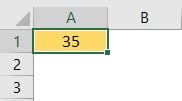
Now, click on OK, and we will get the entered value in cell A1.
Now, let us assume that we enter the age number, not within the range of 0 to 255.
Next, click on OK
Now, we will get the following error message.
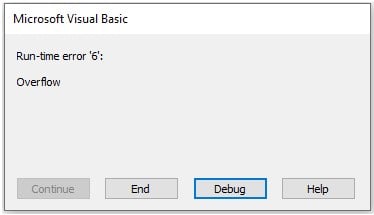
Clearly, we can see that the error says Overflow since the number we have entered is over the capacity of the data type that we have assigned.
Now, to fix these errors we need to use the data validation technique in the form of an Application.InputBox method.
Validation Of Input From User
We get more out of the VBA Input Box when we use it with the Application method. When we use this method, we will get the following syntax.

The syntax looks the same as the generic input box, but we have an extra syntax called Type at the end.
By using the Type argument, we will restrict the user entry. Now, we will see all types of validation codes in the following section.
#1 – Only Numerical Value
Now, let us assume we need to allow the user to enter only numbers, then, we can set the type equal to 1 like the following code.
Sub Input_Box_Example2()
Dim Age As Byte
Age = InputBox(“What is your age?”, “Age Data”, “Enter you age here”)
Range(“A1”).Value = Age
End Sub
This code will not take any input values other than numbers. For example, when we run this, we have entered a value other than a number.
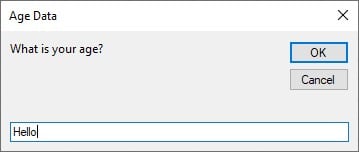
Next, click on OK to see the error message.
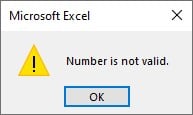
As we can see the error message says Number is not valid i.e., the entered value in the input box is not a number.
#2 – Only Logical Values (TRUE Or FALSE)
Similarly, if we want the users to enter only the logical value, we can set the type argument to 4.
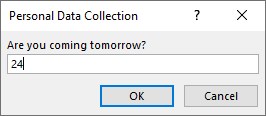
Sub Input_Box_Example4()
Dim Question As String
Question = Application.InputBox(Prompt:=”Are you coming tomorrow?”, Title:=”Personal Data Collection”, Type:=4)
Range(“A1”).Value = Question
End Sub
Now, let us enter a value other than the logical value in the input box.
Next, click on OK, and we will get the following error.

Since we have entered a value other than TRUE or FALSE, we have the error message saying, Logical value is not valid. Hence, we need to enter only either TRUE or FALSE.
#3 – Only Cell References
If you want the users to select only cell reference as the input value, then, we need to set the type argument to 8.
Code:
Sub Input_Box_Example5()
Dim Price As Long
Price = Application.InputBox(Prompt:=”What is the SP Value?”, Title:=”Product Selling Price”, Type:=8)
Range(“A1”).Value = Price
End Sub
Remember, the above code will allow the user to select the input value only in the form of a cell reference. Therefore, if we enter an input value other than the cell reference, we will get the following error message.


It says the reference is not valid.
Now, we can either choose the cell, or we can directly enter the cell address.
Important Things To Note
- Syntax of VBA Input Box has only one mandatory argument i.e., Prompt.
- Remember, if we ignore the title of the input box, we will get the application name as the default title i.e., Microsoft Excel.
- Also, when we assign the value of the input box by entering an equal sign, we need to use parenthesis.
- Now, we can give input for any argument of the input box by entering the argument name followed by a colon and an equal sign. For example, to give input for the “Default” argument we can enter it like this “Default:=”
Frequently Asked Questions (FAQs)
The purpose of VBA Input Box in Excel is to design the input box such that, we can collect the value from the users based on the data required to proceed further in the coding based on the input given by the users in the input box.
We can use generic INPUTBOX and APPLICATION.INPUTBOX to create multiple input boxes.
VBA input box requires brackets to be used when we assign a value to a variable if we do not enter argument values without the parenthesis VBA input box will not work.
If we use the Application.InputBox method, we will get an additional feature like the TYPE argument to apply various data validation rules that make the user’s entry more or less error-proof.
Use this VBA Input Box Template to follow along with the examples in this article.
Download Excel Template