
Selecting A Range In Excel Using VBA
VBA selection Range is used to select a cell, cell range, or all the cells. The range is nothing but the cells that we use in Excel worksheets. Since data is stored in cells, it is very important to work with these cells, and we need to get comfortable with maneuvering with a range of cells in VBA. One such concept in VBA is VBA Selection Range.
Selection is a property; Range is an Object. Hence, these two are different topics in VBA. However, there is one more term called Select which is a method available with a range object to select any range of cells in the worksheet.
Use this VBA Selection Range Template to follow along with the examples in this article.
Download Excel TemplateKey Takeaways
- VBA Selection Range is used to select a cell/range of cells.
- Using the Range object, we can select multiple ranges of cells.
- Variable size range can be handled by finding the last used row and column dynamically and selecting the range.
- We can assign a range of cells to a variable and use the variable name to reference the assigned range of cells as a named range.
- By using a loop, we can perform a similar set of actions on all the cells of the given range.
Selecting A Fix Sized Range
First, let us learn how to select the fix sized ranges in the worksheet through VBA. Fix sized range means the range of cells address is fixed, and we cannot change this automatically. We can change it only by editing the code.
For example, cell ranges A1 to A6 is a range of cells i.e., more than one cell address is there. If we want to select the cell range A1 to A6; then, first, we need to enter the RANGE object name inside the sub-procedure, as shown in the following image:
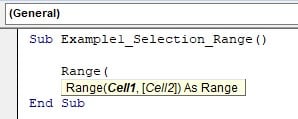
The argument of the VBA RANGE object is cell1 i.e., what cell do we need to use in the RANGE object?
The cell address should be provided in double quotes as shown below:
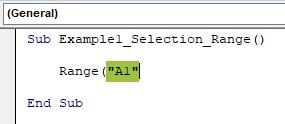
In the above image, we have given only one cell address. If we want to select more than one cell, then, we need to provide the starting and ending cell address of the range that we need to work on.
In this case, we are selecting the cells from A1 to A6, so let’s provide the range of cell addresses in double quotes as shown below:
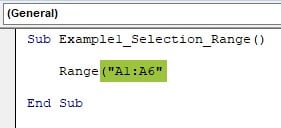
Between the start and end of the range, we have a colon (:). The start of the range is A1, and the ending is A6. Between these two cells range, all the cells are included i.e., A2, A3, A4, and A5, are included in this range.
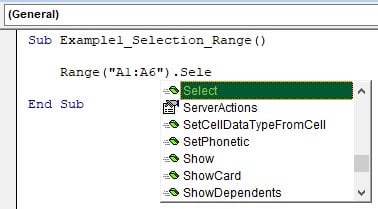
Once the cell range is entered in double quotes, close the parenthesis and enter the dot to see the IntelliSense list of properties and methods associated with the RANGE object.
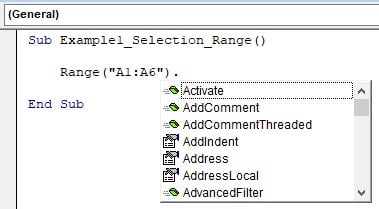
We can see all the available properties and methods available with the RANGE object. Choose the Select method from the list.
Let’s run the code by pressing the shortcut key F5.

As soon as we run this code, it has selected the range of cells A1 to A6.
Here, the range is fixed i.e., A1 to A6. If any new data is added to the list, it will not be considered when we re-run the code. Any time we run the code, it keeps selecting the range A1 to A6.
We will see how to work with the variable ranges in VBA in the next section.
Selecting A Variably Sized Range
To work dynamically with worksheet cells, we need to know how to select variable ranges dynamically without worrying about the addition or deletion of the data.
We have different techniques to work with, let’s explore some of them now.
#1 – Select Using CurrentRange Property
Current Region is the property of VBA used to select the range of cells starting from the given cell until it finds the blank row or column.
When we use the current region property, we need not have to worry about the data range. For example, look at the following data in Excel.
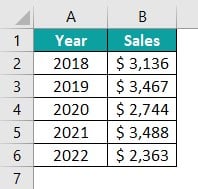
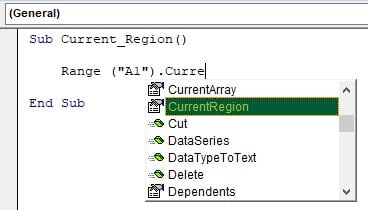
The starting cell of this date range is cell A1; So, to use the current region property, first, we need to specify the starting cell of the data table i.e., cell A1 using the RANGE object.

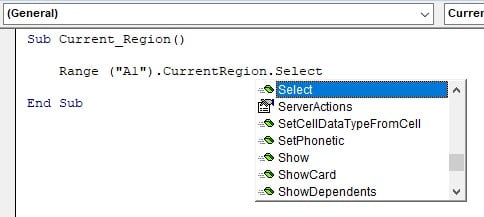
Once the starting cell is provided, we need to enter the dot and choose the current region property.
Once the current region property is selected, we need to decide what we need to do with the current region. Since we are selecting the current region data table, let’s choose the selected method of the current region.
Now, let’s run this code and see what happens.

It has selected the current region data range starting from cell A1.
Now, to understand the functionality of the current region property, let’s alter our data range a little.
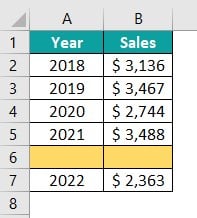
We have inserted a blank row in row number 6.
Now, let’s run the same current region code and see what happens.
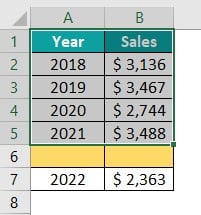
This time, it has selected the current region till the 5th row only. Because, after the 5th row, it has found a blank row; hence, anything that comes after the blank row will not be considered in the current region property.
Now, enter something in one of the cells in the blank row.

We have entered some values in cell B6, and cell A6 remains blank.
Now, run the code and see what happens.
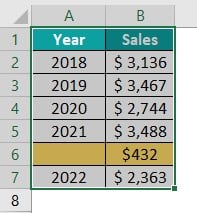
This time it has considered the entire data range in the current region property.
The learning from this current region is ‘If any blank row or column comes, then only the current region will not consider for the current data range. Even a single cell value is continuous either in a row or column will be treated as the current region.’
#2 – Select Using UsedRange Property
Used Range is another property available to play around with the data range in the worksheet. It is nothing but the complete data range used in the worksheet, even though there are multiple blank rows and columns.
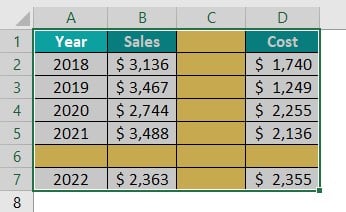
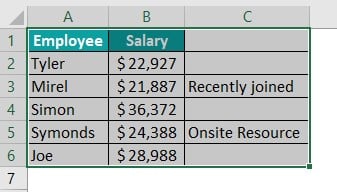
For example, look at the following data in Excel.
We have a blank row in the form of row number 6 and a blank column in the form of column C.
Used Range property is available with the worksheet, not with the range. So, to use the used range, either we have to use the Active Sheet object or the Worksheets object.

We have used the select method of the used range property. Let’s run the code and see what happens.
It has selected the entire range of cells that are used in the active worksheet even though it has blank rows or columns.
#3 – Select Using The End Property
END is the important property we need to master when we work with the range of cells. END property is similar to the arrow shortcut keys (right, left, up, down) used to select a range of cells in the worksheet.
For example, look at the following data.
Starting from cell A1, if we need to select all the data cells to the right, we hold Shift and Ctrl keys and press the Right Arrow key to select all the cells.
Similarly, to select the below cells, we again hold the Shift and Ctrl keys together and press the Down Arrow key.
It has stopped here because the very next row is a blank row
It has selected all the cells below until it finds the blank row.
A similar task can be done in VBA using the END key.
By using the RANGE object, mention the starting cell as A1.

From the IntelliSense list, choose the END key and open the parenthesis.

With the END property, we have all the arrow keys available.
Choose the xlToRight and then choose the SELECT method.
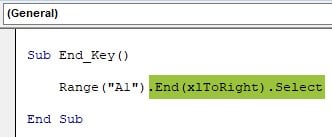
This will select the last cell before the blank cell to the right of cell A1 starting from cell A1 i.e., cell C1.

However, to select all the cells to the right, we need to write the code in the following way.

This will select all the cells starting from cell A1 to the right side.

To select all the cells to the right as well as the downside, we can write the code in the following way.
This will select all cells to the right and down, starting from cell A1.
However, to work efficiently, we need to bypass the blank rows or columns with the END key. To eliminate this limitation, we can use the variables to find the last used row and column and then, use those variables to select the entire data RANGE without having to worry about the blank rows or columns.
The following code will find the last used row and last used column and then, selects the entire data range within this range.
Sub Entire_Range()
Dim LR As Long
Dim LC As Long
Range(“A” & Columns.Count).End(xlToLeft).Select
LR = Cells(Rows.Count, 1).End(xlUp).Row
LC = Cells(1, Columns.Count).End(xlToLeft).Column
Dim Rng As Range
Set Rng = Range(“A1”).Resize(LR, LC)
Rng.Select
End Sub
This will select the complete data range without having to worry about blank rows or columns.

Difference Between Using CurrentRegion And END
As we have seen, we can select the data range by using the Current Region property as well as the END property. Let’s look at the differences between them.
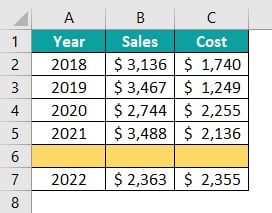
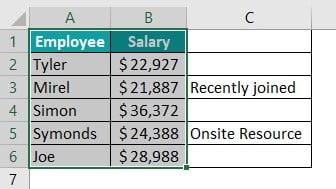
We will use the following data.

First, we will use the current region property to select this data range and see what happens. The following code is using the current region property.
Sub Current_Region()
Range(“A1”).CurrentRegion.Select
End Sub
Starting from cell A1, we are selecting the current region. Let’s run the code and see what data range it selects.
It has selected the entire data range even though we have a blank cell in between the data range A1 to C6.
Now, let’s use the following END property code.
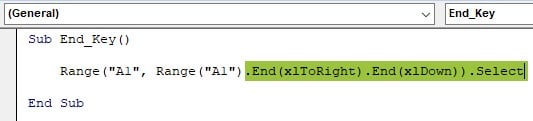
Sub End_Key()
Range(“A1”).End(xlToRight).End(xlDown)).Select
End Sub
This will select all the cells to the right starting from cell A1 until it finds the blank cell in that row.
This has excluded column C because starting from cell A1 it moved to the right side and stopped at cell B1 because, after this cell, there is a blank cell. So, even though we have the data in that column, it did not move to cell C1.
Next, starting from excel cell reference B1, it selected all the cells down until it finds the blank cell again i.e., until the B6 cell.
The main difference between the Current Region property and the END property is that the current region selects all the data range cells even though we have blank cells and are connected to one or other data range cells.
The END property stops the selection as soon as it finds the blank cell, and only non-blank cells will be considered for selection when we use the END property.
Copy Ranges Using VBA
Now, let’s look at how to copy ranges using the VBA.
#Copying A Fix Sized Range
We have used the fixed data range to select the range; similarly, we can use the copy method instead of the select method to copy the data range.
For example, if we want to copy the data range A1 to C6, then, we can use the following code:

This will copy the data range A1 to C6. Here, the data range is fixed i.e., A1:C6.
Once we copy the data, we need to paste it somewhere. So, to paste it, we need to provide the target data range and use the paste special method to paste the copied data.
Sub Copy_Fixed_Range()
‘This will copy the data range A1 to C6
Range(“A1:C6”).Copy
‘This will paste the copied data starting from cell E1
Range(“E1”).PasteSpecial xlPasteAll
End Sub
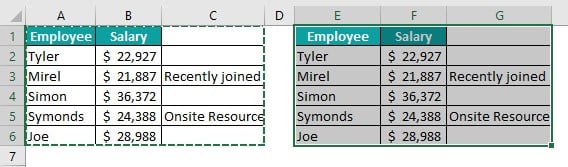
When we run this code, it will copy the data range from A1 to C6 and paste it in starting from cell E1.
#Copying A Variable Sized Range
In the above example, we were aware of the data range i.e., A1:C6. However, not all the time we will be knowing the data range, so to work dynamically, we need to design the code in such a way that it automatically finds the last row and last column used in the data range.
For example, look at the following data.
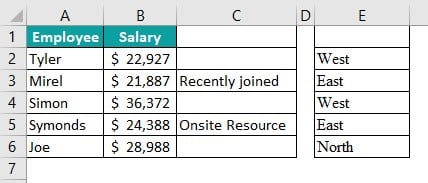
Here, we have many blank cells, and we have a blank column as well i.e., Column D. We need to write a code that can ignore all the blank rows and columns and finds the last used cell in the worksheet.
The following code will copy the data range dynamically, irrespective of the blank cells or rows.
Sub Copy_Variable_Range()
Dim LR As Long
Dim LC As Long
LR = Cells.Find(What:=”“, _ After:=Range(“A1″), _ LookAt:=xlPart, _ LookIn:=xlFormulas, _ SearchOrder:=xlByRows, _ SearchDirection:=xlPrevious, _ MatchCase:=False).Row LC = Cells.Find(What:=”“, _
After:=Range(“A1”), _
LookAt:=xlPart, _
LookIn:=xlFormulas, _
SearchOrder:=xlByRows, _
SearchDirection:=xlPrevious, _
MatchCase:=False).Column
Dim Rng As Range
Set Rng = Cells(1, 1).Resize(LR, LC)
Rng.Copy
End Sub
This code dynamically finds the last used row and column by ignoring all the blank cells, rows, and columns. Then, it will copy the entire data range.
Assigning Ranges To Object Variables
Using object variables to assign the data range to those variables is the best practice. Because we need not have to keep writing the range of cell addresses all time; instead, we can use the variable name all the way in the code.
For example, look at the following code.
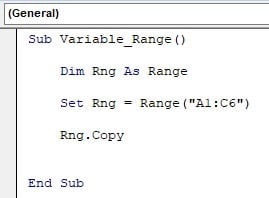
Dim Rng As Range
First, we have defined the variable Rng and assigned the object data type Range to it.
Set Rng = Range(“A1:C6”)
Next, for the defined variable, we are assigning the data range as A1:C6 by using the SET keyword. Whenever we use an object as the data type for any variable, we need to use the SET keyword to assign the object.
Rng.Copy
Assuming we need to copy the range A1:C6, we need to provide the data range like this Range(“A1:C6”).Copy rather, we can make use of the variable Rng and use all the properties and methods associated with the RANGE object.
Loop Through Ranges
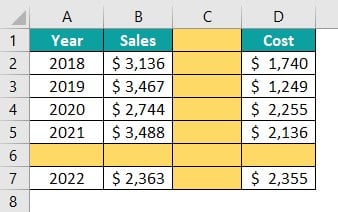
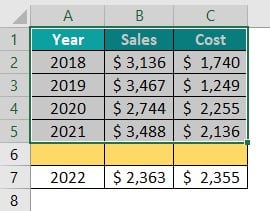
Next, we need to know how to go through each cell and perform a similar set of actions. For example, look at the following data.

In column D, we need to find the profit value by deducting the cost value (column C) from the sales value (column B).
We cannot really write to arrive at the profit value for each and every cell; rather, we will use the loops to loop through each cell in the given range and perform the same set of actions.
The following code will loop through all the cells and calculate the profit value.
Sub Loop_Range()
Dim LR As Long
LR = Cells(Rows.Count, 1).End(xlUp).Row
Dim K As Long
For K = 2 To LR
Cells(K, 4).Value = Cells(K, 2).Value – Cells(K, 3).Value
Next K
End Sub
This will arrive at the profit value in column D by looping through all the cells.

Important Things To Note
- Select is a method, and Range is an object.
- The range is used to reference more than one cell and work with multiple ranges of cells.
- The Used Range property is available only with the worksheet level.
- In the fixed range, once the cell address is provided, it always refers only to those range of cells.
Frequently Asked Questions (FAQs)
If we want to select multiple ranges of cells, we need to provide the range of cell addresses in double quotes, one after the other, each separated by a comma (,).
For example, if we want to select the multiple ranges of cells like A1:A5, C1:D5, then we can write the code like the following:
Range(“A1:A5”, “C1:D5”).Select
To select the data range dynamically, we need to find the last used row and column and then, select the range.
The following code will dynamically select the range of cells in the active worksheet.
Sub Dynamic_Range()
Dim LR As Long
Dim LC As Long
LR = Cells.Find(What:=”*”, _
After:=Range(“A1”), _
LookAt:=xlPart, _
LookIn:=xlFormulas, _
SearchOrder:=xlByRows, _
SearchDirection:=xlPrevious,
LC = Cells.Find(What:=”*”, _
After:=Range(“A1”), _
LookAt:=xlPart, _
LookIn:=xlFormulas, _
SearchOrder:=xlByRows, _
SearchDirection:=xlPrevious, _
MatchCase:=False).Column
Dim Rng As Range
Set Rng = Cells(1, 1).Resize(LR, LC)
Rng.Select
End Sub
To select a relative range, we need to use the OFFSET function in VBA. For example, if we want to select the cell 2 rows down and 4 columns right of the active cell; then, we can use the following code:
ActiveCell.Offset(2,4).Select
Use this VBA Selection Range Template to follow along with the examples in this article.
Download Excel Template