
What is Tableau DateDiff function?
The DateDiff function in Tableau is used to find the difference between two dates with the difference in either day, month, year, or hour, even including the Tableau DateDiff minutes or seconds, provided you explicitly mention the difference as shown in the Tableau DateDiff days example below.
Since the DateDiff function returns an Integer value, any field created using this function will be automatically stored in the numerical fields. Here, the Airbnb dataset of Austin, Texas is used where you can find the number of days between the first and last reviews by creating a calculated field and calling the date features to find the difference between both days.

With that, you can see the number of days between the first and last reviews of that particular spot.

With that, you can use the DateDiff function to find the difference between both days, as shown.

Key Takeaways
- The DATEDIFF function in Tableau calculates the difference between two dates or datetimes, returning the result in a specified date part (e.g., days, months, years).
- The syntax of the DATEDIFF function is DATEDIFF(date_part, start_date, end_date). date_part specifies the unit of measurement for the difference (e.g., “day”, “month”, “year”), and start_date and end_date are the dates between which the difference is calculated.
- It is commonly used to calculate the duration between two dates, helping in analyzing trends, identifying gaps, or determining ageing metrics in datasets.
- The DATEDIFF function returns an integer representing the difference between the dates in the specified date part.
- When using DATEDIFF, it’s important to ensure that the start and end dates are formatted correctly and that the appropriate date part is chosen to accurately represent the difference being calculated.
Syntax
The syntax of using the Tableau nested CASE statement is:
DATEDIFF(date_part, date1, date2, [start_of_week])
Where,
date_part is the part you want to change to either day, month or year for the two given dates.
How to use Tableau DATEDIFF function?
Follow these easy steps to use the Tableau DateDiff function to your advantage.
Step 1: Open a New workbook in Tableau once you open it.

Connect the Sample-Superstore dataset to the workbook.

Step 2: Select “Order ID”, “Order Date”, and “Ship Date” and place them on the “Rows” component.

Step 3: Right-click on “Order Date” and select “Exact Date,” then right-click again and select “Discrete” under the drop-down.

This will show the full date. Similarly, do the same for “Ship Date.”

Step 4: In the “Data” tab, select the dropdown and click “Create Calculated Field.”

It will open a popup with which you can find the difference using Tableau DateDiff days.

Step 5: Rename the name of the field and call the DateDiff function.

Step 6: Drag and drop the feature in the calculated field. This is done so that you don’t need to manually type all the features, reducing spelling errors or misclassification.

Step 7: Select ‘day’ to find the number of days between the order date and the shipping date.

Step 8: Then, drag and drop the “Order Date” and “Ship Date” as shown in Step 5.

Step 9: Apply the changes. It will create a new field in the numeric fields.

Step 10: Drag and drop the field onto the Text section in the Marks tab.

Code:
DATEDIFF(‘day’, [Order Date], [Ship Date])
This shows the final table as shown.

Examples
Similar to the Excel DATEDIFF function, using the DATEDIFF function, you can find the difference between two datetime values in Tableau. Learn how to do that by following the steps below.
Example 1: Calculate number of months
Consider the fact that you have an Airbnb dataset. You want to find the first review of an Airbnb and see how long it took for someone to leave a review since they became a host. It can be done using the Tableau DateDiff months function to create a new field and compare the dates.
Step 1: In a new workbook, connect the Airbnb dataset recorded for Austin, Texas.

Step 2: Select the “Id,” “Host Since”, and then the “First Review” features.

Step 3: Change the dates by selecting “Exact Date” when you right-click the Host Since and First Review. Then right-click again and select “discrete.”

Now, the table looks like this.

Step 4: Filter the Host is Superhost by dragging them to “Filters” and set them as true.

Step 5: Create a new calculated field to find the difference in Months.

Step 6: Name the calculated field.

Step 7: Call Tableau DateDiff months in the calculated field.

Step 8: Select the features “Host Since” and “First Review” in the DateDiff function and click on “Apply.”

Step 9: Drag and drop the calculated field on the Text component in the Marks tab.

Code:
DATEDIFF(‘month’, [Host Since], [First Review])
The final table will look similar to this.

Example 2: Calculate number of years between two dates
Suppose you want to find out when the data of a particular Airbnb is updated since it has been a host. You can use the Tableau DateDiff years function to find it. Comparing from when Airbnb became a host till the last time the calendar was scraped will give you an idea of how many years of data is stored about that particular Airbnb.
Step 1: Add the “listings.csv” file containing information about the Airbnbs from Austin, Texas, in a new workbook.

Step 2: Select the “Id,” “Host Since,” and the “Calendar Last Scraped” features and place them on the Rows component in Tableau.

Step 3: Right-click on “Host Since” and select “Exact Date”. Then, select “Discrete” after right-clicking on the feature again.
Similarly, do that to the “Calendar Last Scraped” feature.
Step 4: Filter this worksheet and keep only the values where the host identities are verified as “True.” For this, drag the “Host Identity Verified” to Filters.


Step 5: Create a new calculated field in the Data Tab.

Step 6: In the calculated field, call the Tableau DateDiff years function.

Step 7: Drag and drop the features to be compared and click Apply.

Step 8: Drag and drop the calculated field on the Text component in the “Marks” tab.

Code:
DATEDIFF(‘year’, [Host Since], [Calendar Last Scraped])
This is the final table after finding the number of years between the dates.

Example 3: Calculate the number of hours between two datetime values
Suppose you have a job scheduling dataset. You have the time and dates, but you want to calculate the exact number of hours taken to complete the specific job. This can be done using the Tableau DateDiff hours function.
Step 1: Drag and drop or select the dataset for the new workbook.


Step 2: Select the “ID”, “Job”, “Start Time” and the “End Time” in the rows component.

Step 3: Show the total value of the features “Start Time” and “End Time” by right-clicking on them and selecting “Exact Date”, then right-clicking again and selecting “Discrete”.

The table looks like this.

Step 4: Create a calculated field.

Step 5: In the calculated field, select the Tableau DateDiff hours function.

Step 6: Drag and drop the “Start Time” and “End Time” features in the function and apply it. It creates a new Field “Hour”.

Step 7: Drag and drop the “Hour” field in the “Text” component in the “Marks” tab.

Code:
DATEDIFF(‘hour’, [Start Time], [End Time])
This is the final table.

Important Things To Note
- Ensure that your date fields are properly formatted to avoid errors in the DATEDIFF calculation.
- Incorporate DATEDIFF within calculated fields to create new metrics or measures based on date differences.
- Don’t overlook data quality issues such as missing or inconsistent date values, as these can lead to inaccurate DATEDIFF calculations.
- Avoid using inappropriate date parts that don’t align with the context of your analysis, as this can lead to misleading insights.
- Don’t misinterpret DATEDIFF results without considering the underlying data and context of the analysis.
- Consider the specific needs of your audience or stakeholders when interpreting and presenting date-difference information.
Frequently Asked Questions (FAQs)
Yes, you can use DATEDIFF to calculate the difference in business days, but it doesn’t inherently exclude weekends.
DATEDIFF function does not inherently handle leap years or daylight saving time changes, so accuracy in these cases depends on how the dates are handled in the dataset.
Yes, DATEDIFF can be used in both calculated fields and calculated table calculations in Tableau.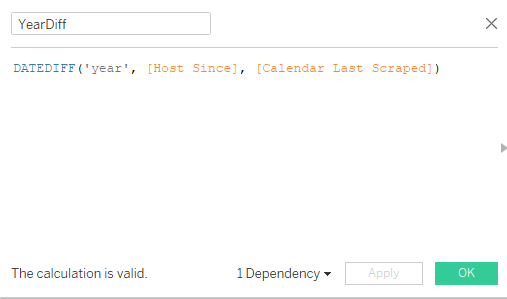
Yes, DATEDIFF can be combined with other functions in Tableau calculations.
See this example:
DATEDIFF(‘day’, [Start Date], [End Date]) / 7
You can use the division function in Tableau with the DateDiff function.