Excel VBA Offset Function
VBA OFFSET is a function that helps us to navigate from one cell to another cell bypassing a specified number of rows to the down or top from the given cell and a specified number of columns to the right or left from the reference point cell.
For the VBA OFFSET function, we need to give the starting cell or reference cell by using the RANGE object, then we need to enter the number of rows to move down or up, and the number of columns to move right or left. Based on the numbers provided for the rows and columns, the VBA OFFSET function will take us to the corresponding cell from the starting cell.
If you have already used the OFFSET excel function in the worksheet, then it will be much easier for you to understand the same in VBA as well.
Table of contents
Key Takeaways
- VBA OFFSET helps us to navigate to a specific cell by skipping the required number of rows and columns.
- OFFSET can select or copy the cells based on the method that we choose along with the OFFSET property.
- For the OFFSET function starting cell reference should be given outside the OFFSET function, unlike the worksheet function OFFSET.
- By using the OFFSET, we can select or copy multiple cells as well.
- An active cell is nothing, but the cell which is selected in the worksheet.
Excel VBA 5-in-1 Course Bundle – (30+ Hours of Expert-Led Training)
If you want to learn Excel and VBA professionally, then the Excel VBA 5-in-1 Course Bundle (30+ hours) is the perfect solution. Whether you’re a beginner or an experienced user, this bundle covers it all – from Basic Excel VBA to Event Automation, Error Handling, Email Automation, and real-world applications with downloadable templates.
Offset With Range Object
If we have used the OFFSET function in the worksheet function, then we need to give the reference cell within the OFFSET function itself. However, in VBA, the case is different. In VBA, we need to give the reference cell with the RANGE object; then, we can access the OFFSET function.
First, we need to give the starting cell address by using the RANGE object as shown below:
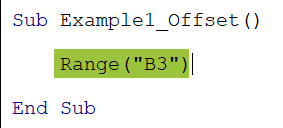
Next, enter the dot and type the word OFFSET. We can see the IntelliSense list shows the OFFSET function in its library.
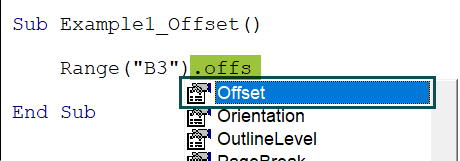
Likewise, VBA OFFSET and RANGE go hand in hand.
Syntax Of Offset In Excel VBA
The following is the syntax of the OFFSET function in VBA.
Range(“Cell Reference”).Offset([Row Offset], [Column Offset])
- Range(“Cell Reference”): To access the OFFSET function in VBA, first, we need to provide the cell’s address using the RANGE object.
- [Row Offset]: The number of rows we need to offset. If we provide a positive number, it will move down from the given cell and if we provide a negative number, then, it will move up from the given cell.
- [Column Offset]: The number of columns we need to offset. If we provide a positive number, it will move right from the given cell and if we provide a negative number, then, it will move left from the given cell.
Examples
Example #1 – Select a Cell using the OFFSET Function in VBA
We will use the following data for all the examples in this article.
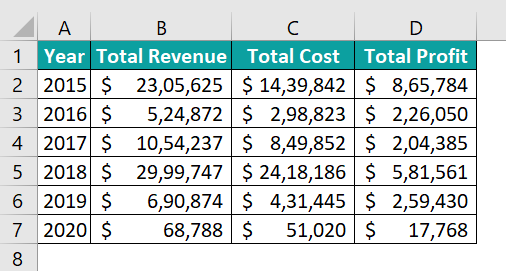
Assume we need to select cell B6 from cell A1. We will use the OFFSET function along with the RANGE object in VBA.
- Step 1: Enter the RANGE object.
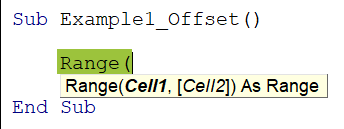
- Step 2: Enter the starting cell address as A1 in double quotes and close the parenthesis.
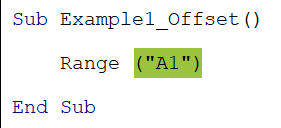
- Step 3: Enter the dot and choose the OFFSET function from the IntelliSense list.

- Step 4: The first argument of the OFFSET function is the row offset i.e., how many columns do we need to move down. Since, we need to select cell B6, we need to move down 5 rows from cell A1. Enter 5 for the rows offset argument.

- Step 5: Next, for the column offset argument, we need to mention how many columns do we need to move right from column A. Since we need to move to column B, it will be 1.

- Step 6: Now, we need to choose the select method of the offset property.

Now, let’s run this code and it should select cell B6.
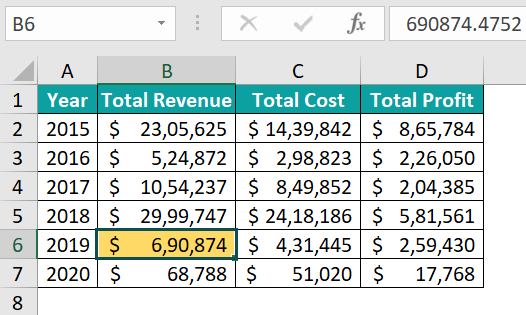
Sub Example1_Offset()
Range("A1").Offset(5, 1).SelectEnd Sub
Example #2 – OFFSET with Negative Numbers
We can move up rows and move left columns as well with the OFFSET function in VBA. For example, assume we are in cell C5. From this cell, we want to select cell A2.
- Step 1: First, reference the starting cell using the RANGE object i.e., cell C5.

- Step 2: Enter the OFFSET function by entering the dot after the RANGE object parenthesis.

- Step 3: From cell C5, we need to select cell A2. So, we need to move up 3 rows from row number 5. Whenever we need to move up rows, we need to provide the number of rows to move up in negative numbers.

- Step 4: From column C, we need to go to column A. When we need to move a column to the left of the current column (i.e., column C), we need to enter the number of columns to move left in negative numbers. In this case, we need to move to the left 2 columns i.e., -2.

This will select cell A2 from cell C5.
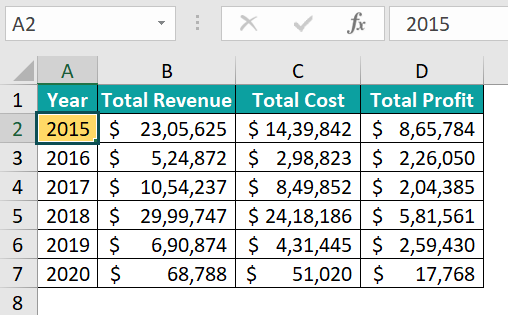
Sub Example2_Offset()
Range("C5").Offset(-3, -2).SelectEnd Sub
Example #3 – Select Range of Cells Using the OFFSET
So far, we have seen selecting a single cell using the OFFSET property in VBA. However, we can also select multiple cells using the OFFSET function in VBA.
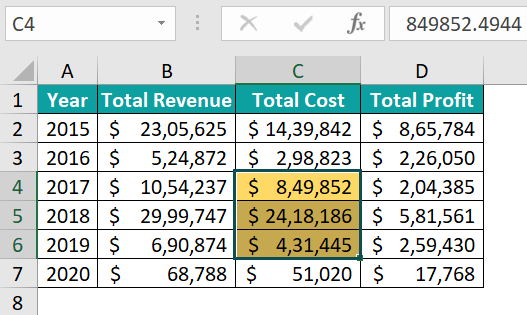
Assume we need to select the range of cells C4:C6 from range A1:A3. Then, first, we need to give the excel cell reference like the following using the RANGE object.
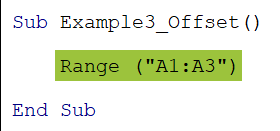
Next, choose the OFFSET property from the IntelliSense list.

Since we need to select the cells from C4 to C6, we need to move down 3 rows and 2 columns to the right.

This will select multiple ranges of cells i.e., C4:C6.
Example #4 – Copy Multiple Range of Cells
Assume we need to copy the data range from A2 to D7 starting from cell A1. Then, we need to use the following code:

We have segregated the code into 3 parts to understand it better.
- 1 – First, we have used the RANGE object along with the OFFSET function in VBA. Using the RANGE object, we have specified the starting cell as A1 and moved it down one row.
- 2 – Secondly, we are moving down 6 rows and 3 columns to the right. This is because we have 6 rows and 3 columns in our data.
- 3 – Since we are copying the data, we have used the COPY method to copy the given data range i.e., from A2 to D7.
Example #5 – OFFSET with CELLS Property
We can also use the OFFSET function with the CELLS property as well. For example, look at the following code.

Sub Example4_Offset()
Range(Range("A1").Offset(1, 0), Range("A1").Offset(6, 3)).CopyEnd Sub
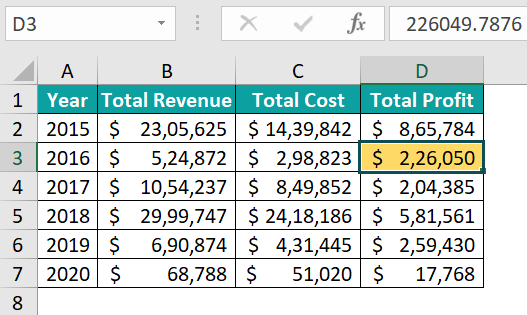
Using the CELLS property, we have given the starting cell as cell A1. Then, we have used the OFFSET function to move down 2 rows and 3 columns to the right and select cell D3.
This will select cell D3.
Important Things To Note
- OFFSET is a property or a function available with the RANGE object, CELLS property, and Active Cell Object.
- OFFSET function requires the number of rows and columns’ number in negative numbers when we need to move up or move left from the active cell in VBA.
- To select multiple cells, we need to start the cell reference with multiple cells with the RANGE object.

Frequently Asked Questions (FAQs)
Yes, we can offset a range in VBA using the OFFSET property of the RANGE object.
An active cell is nothing but the cell which is selected in the worksheet. For example, look at the following image:
In this image, the active cell is cell A1. From this cell, we want to move down 2 rows and 2 columns to the right. Then, we can use the active cell property.
ActiveCell.Offset(2,2).Select
This will select cell C3.
If we want to offset 2 rows from the active cell, then we can use the following code.
Range(ActiveCell.Offset(1,0), ActiveCell.Offset(2,1)).Select
To Offset 1 cell down from the active cell, then, we can use the following code:
ActiveCell.Offset(1,0).Select
Download Template
This article must be helpful to understand the VBA Offset, with its formula and examples. You can download the template here to use it instantly.
Recommended Articles
This has been a guide to VBA OFFSET. Here we learn how to use OFFSET function in Excel VBA, with RANGE object, examples & downloadable excel template. You can learn more from the following articles –

Leave a Reply