What is Excel VBA Progress Bar?
An Excel VBA Progress Bar is a graphical user interface element that provides visual feedback on the progress of a task being performed within an Excel workbook. When you’re running a time-consuming VBA macro or a process that takes some time to complete, such as importing data, calculations, or data analysis, using a progress bar can enhance the user experience by showing the user that something is happening and indicating how far the task has progressed.
Consider the following example:
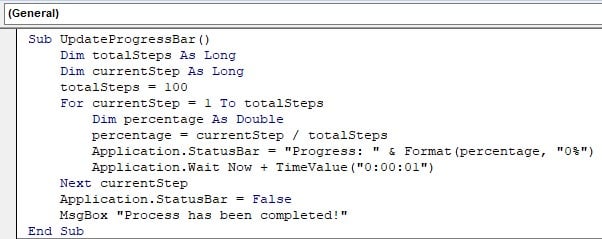
This example demonstrates implementing the VBA Progress bar without Userform by using the Application.StatusBar to display the progress.
This program counts the progress of 100 steps displayed in the status bar in a percentage format. The application is made to wait for 1 second after every time. After all the steps are completed, a message box pops up, indicating to the user that all progress has been completed successfully. The output is shown below:

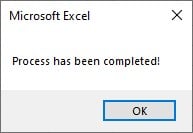
Table of contents
Key Takeaways
- The VBA Progress Bar offers visual feedback for task progression in Excel. It enhances user experience by making tasks feel responsive.
- The Progress Bar can be implemented using a UserForm and the progress appearance and status can be updated through VBA code.
- The width of the progress bar adjusts dynamically to show progress visually. The caption label on the progress bar displays the percentage or status.
- The DoEvents function ensures real-time updates without UI freezing.
Excel VBA 5-in-1 Course Bundle – (30+ Hours of Expert-Led Training)
If you want to learn Excel and VBA professionally, then the Excel VBA 5-in-1 Course Bundle (30+ hours) is the perfect solution. Whether you’re a beginner or an experienced user, this bundle covers it all – from Basic Excel VBA to Event Automation, Error Handling, Email Automation, and real-world applications with downloadable templates.
How to Create your own Progress bar?
To create your custom progress bar, follow the steps below:
Step 1: Go to the “Developer” section in the toolbar and click the “Visual Basic” option. Now, the VBA Editor opens to add functions and Sub procedures. Then, click the “Insert” and “Userform” buttons to create a new userform or blank page.


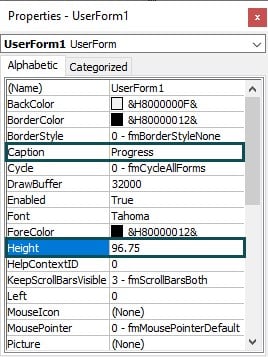
Step 2: Customize the properties of the UserForm as shown below:
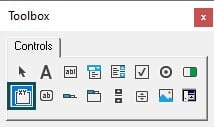
Step 3: Insert a Frame and customize its properties.
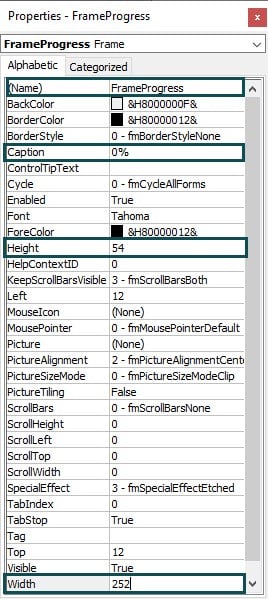

Step 4: Create a Label to simulate the progress bar.


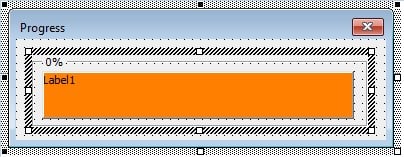
Step 5: Double-click the VBA Progress Bar UserForm to edit its private subroutines.

Go to the drop-down and change the functionality from Click to Activate. It will show the UserForm subroutine as:

Step 6: Initialize a FOR-loop to simulate a progress bar.

In the FOR-loop, we make the application wait for 1 second. To simulate the progress, we slowly increase the width of the progress label defined in Step 4. The caption in the frame also increments in the FOR loop.
For the width to change, use the DoEvents function to perform VBA Progress Bar Control in real time.
Code:
In the UserForm:
Private Sub UserForm_Activate()
For x = 1 To Me.RectProgress.Width
Application.Wait Now + TimeValue(“0:00:01”)
FrameProgress.Caption = x
Me.RectProgress.Width = x
DoEvents
Next x
End Sub
Step 7: Run the UserForm. The output will be displayed below:

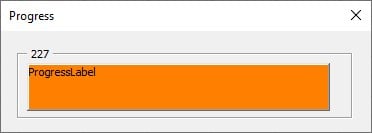

Now that we know how to create a progress bar, let us see some examples below.
Examples
Given below are some examples of how to use the progress bar to check the progress of our tasks.
Example #1
Consider an example where you need to find the progress bar of a function. It can be done by declaring a UserForm as a progress bar.
Step 1: Create a subroutine to multiply 100 numbers.

Step 2: Initialize a product variable to store the value of the product of 100 numbers and assign it as 1.

Step 3: Initialize a for loop to run through 100 numbers and multiply them with x.

Now that we have this function, let us see its progress bar.
Step 4: Go to the “Developer” tab in the toolbar and click the “Visual Basic” option. Now, the VBA Editor opens to add functions and Sub procedures. Then, click the “Insert” and “Userform” buttons to create a new userform or blank page.


Step 5: Customize the properties of the UserForm as shown below:

There are no changes made here.
Step 6: Insert a Frame into the UserForm in VBA and customize its properties.


Step 7: Create a Label to simulate the progress bar.

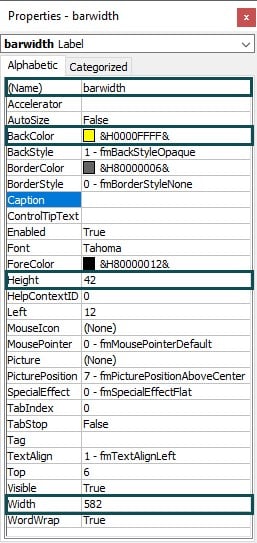

Step 8: Double-click the VBA Progress Bar UserForm to edit its private subroutines.

Go to the drop-down and change the functionality from Click to Activate. It will show the UserForm subroutine as:

Step 9: Initialize a FOR-loop to simulate a progress bar.

In the FOR-loop, we call the Multiplication function declared earlier. We then make it wait for 1 second to simulate the progress since it is too fast otherwise. To simulate the progress, we slowly increased the width of the progress label defined earlier.
For the width to change, use the DoEvents function to perform VBA Progress Bar Control in real-time.
Code:
In the Module:
Sub MultiplyTill100()
Dim x As Double
x = 1
For i = 1 To 100
x = x * i
Next i
End Sub
In the UserForm:
Private Sub UserForm_Activate()
Dim currentStep As Long
For currentStep = 1 To Me.barwidth.Width
barframe.Caption = “Progress: ” & i
Call MultiplyTill100
Application.Wait Now + TimeValue(“0:00:01”)
Me.barwidth.Width = currentStep
DoEvents
Next currentStep
End Sub
Step 10: Run the UserForm. The output will be displayed below:


Example #2
Consider an example where you must create 10 worksheets with ten columns each. It can be done with a progress bar customized for your usage.
Step 1: Click the “Insert” and “Userform” buttons to create a new userform or blank page.

Step 2: Go back to the Excel Worksheet and go to the “View” section. Here, tick off the gridlines.
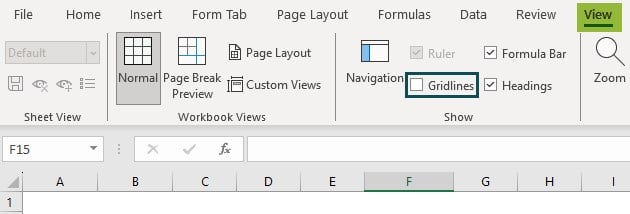
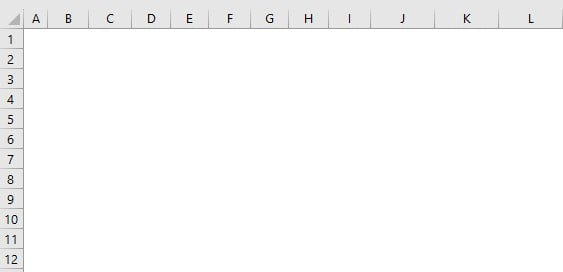
It will make the worksheet look like a blank unruled sheet.
Step 3: Go to the “Insert” Section in the workbook and select your preferred shape.

Step 4: After selecting the shape, add text to it by right-clicking it and clicking “Edit Text.”

Step 5: Go to the VBA Progress Bar UserForm created earlier and customize its properties.

It is important to keep “ShowModal” as “False.”
Step 6: Create a new frame and make it cover the userform.
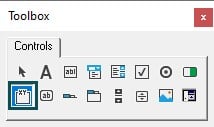
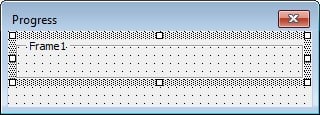
Step 7: Similarly, customize the properties of the frame in the Properties tab.

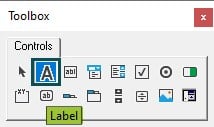
Step 8: Create a label to show the progress bar.
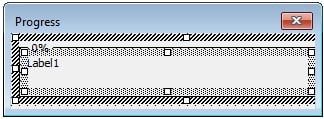
Step 9: Change the properties of the label.

Now the UserForm looks like this:

Step 10: Now, go to the “Insert” section and click the “Module” option.

Step 11: Create a subroutine to create 10 worksheets and rename them as WS1, WS2 and so on.

Step 12: Declare variables start, total number of sheets, the amount done, and the width of the label.

Step 13: Declare the total number of sheets and width of the progress bar with the name of the label you mentioned earlier.

Step 14: Initialize a FOR loop to add 10 worksheets from 1-10, and name ten columns in the sheets.

Here, the Application is made to wait for 1 second after every loop is complete. Also, change the worksheet names using the NAME function in Excel VBA.
Keep the progress bar value with the percentage done value.
Step 15: Change the width of the UserForm Progress label with the percentage done value. Also, change the caption of the Progress label as the progress increases.

Step 16: Create another subroutine to show the VBA Progress Bar UserForm.

Step 17: Now, go to the UserForm, and double-click it.
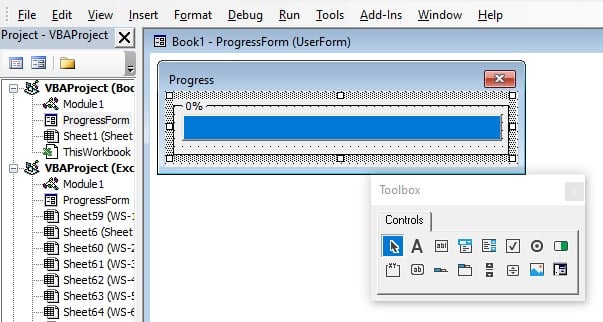
You will get Private Sub UserForm_Click(). Click the drop-down section and select Activate.

Now, you will get the subroutine as shown below:

Step 18: Set the width of the progress label as 0 and call the ActivityProcess subroutine.

Step 19: Go to the shape installed earlier in Step 4 and click Assign Macro.

Step 20: Select the Show_form() subroutine.
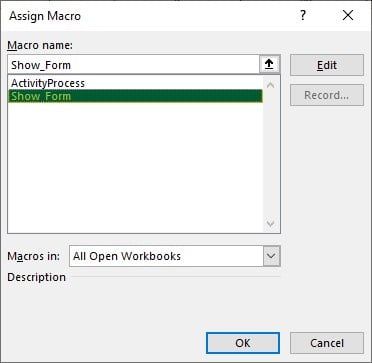
Now, if you click “Insert Worksheets”, you will initialize VBA Progress Bar while macro is running.
Code:
In the module:
Sub ActivityProcess()
Dim st As Integer
Dim totsheet As Integer
Dim pctDone As Single
Dim iLabelWidth As Integer
totsheet = 10
iLabelWidth = 240
For st = 1 To totsheet
Sheets.Add(after:=Sheets(Sheets.Count)).Name = “WS-” & st
Sheets(Sheets.Count).Range(“A1”).Value = “COLUMN 1”
Sheets(Sheets.Count).Range(“B1”).Value = “COLUMN 2”
Sheets(Sheets.Count).Range(“C1”).Value = “COLUMN 3”
Sheets(Sheets.Count).Range(“D1”).Value = “COLUMN 4”
Sheets(Sheets.Count).Range(“E1”).Value = “COLUMN 5”
Sheets(Sheets.Count).Range(“F1”).Value = “COLUMN 6”
Sheets(Sheets.Count).Range(“G1”).Value = “COLUMN 7”
Sheets(Sheets.Count).Range(“H1”).Value = “COLUMN 8”
Sheets(Sheets.Count).Range(“I1”).Value = “COLUMN 9”
Sheets(Sheets.Count).Range(“J1”).Value = “COLUMN 10”
Application.Wait Now + TimeValue(“0:00:01”)
pctDone = st / totsheet
ProgressForm.lblprogress.Width = iLabelWidth * pctDone
ProgressForm.FrameProgress.Caption = Format(pctDone, “0%”)
DoEvents
Application.Wait Now + TimeValue(“0:00:01”)
Next st
Unload ProgressForm
End Sub
Sub Show_Form()
ProgressForm.Show
End Sub
In the UserForm:
Private Sub UserForm_Activate()
Me.lblprogress.Width = 0
Call ActivityProcess
End Sub
Step 21: After clicking the “Insert Worksheets” button, the output is shown below.


As you can see from the progress bar, we can see how many worksheets have been printed with Columns 1-10.
Important Things To Note
- Ensure that the progress bar accurately reflects the progress of the task. You can use labels, tooltips, or other means to explain the task and why it might take time.
- If applicable, consider displaying progress in meaningful units rather than just percentages. For example, show the record number being processed if you’re processing records.
- Use the DoEvents statement after updating the progress bar to allow the UserForm to refresh in real time.
- Avoid progress bars that move too quickly or too slowly. The progress should accurately reflect the actual progress of the task.
- Avoid long operations that block the UI completely.

Frequently Asked Questions (FAQs)
• Incorrect Code: Check if your VBA code has errors or is not properly updating the progress bar.
• UI Blocking: If the task is blocking the UI, the progress bar won’t update until the task completes.
• Wrong References: Ensure you’re referencing the correct controls and objects in your code.
• Missing DoEvents: Without DoEvents, the UI won’t update in real-time during long tasks.
• Incorrect Properties: Verify the properties (width, caption) are being set correctly.
• Form Not Shown: If the form isn’t shown, the progress bar won’t be visible.
A progress bar in Visual Basic provides visual feedback on the status or completion of a task, improving user experience by showing ongoing processes and indicating how far along they’ve progressed.
• Select the progress bar.
• In properties, locate “BackColor” or “FillColor.”
• Choose a color using the color picker or go to the “Pallete” section.
Download Template
This article must be helpful to understand the VBA PROGRESS BAR, with its formula and examples. You can download the template here to use it instantly.
Recommended Articles
This has been a guide to VBA Progress Bar in Excel. Here we explain how to create our own custom progress bar to check the progress of task with examples and downloadable template. You may learn more from the following articles –

Leave a Reply