
What Is Status Bar In Excel?
The Status Bar in Excel is the bar found at the lower edge of the sheet. It displays the information about the functions performed on the Excel worksheet. The Status Bar displays the functions like sum, count, average, etc., used in the sheet. It also shows the status of the scroll lock in a separate sheet.
Use this Status Bar In Excel Template to follow along with the examples in this article.
Download Excel TemplateKey Takeaways
- The Status Bar in Excel is found at the bottom of the worksheet, by default. If it is not found, we can enable it from the Excel options in the File tab.
- It displays the worksheet views, such as Normal View, Page Layout View, and Page Break View.
- The different available on the Status Bar are, Ready, Enter, Edit, and Point Mode.
- We can also Zoom In and Zoom Out, i.e., increase or decrease the worksheet to view the data more clearly, using the Zoom Slider option present on the worksheet.
Modes On Status Bar
The different Modes on Status Bar are,
- Ready Mode.
- Enter Mode.
- Edit Mode.
- Point Mode.
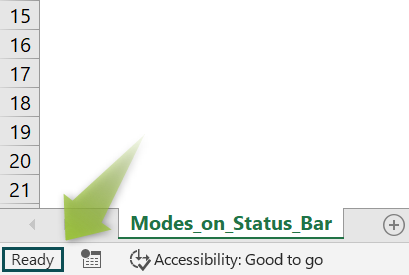
#1 – Ready Mode
Ready Mode on Status Bar appears at the bottom of the left corner of the Status Bar. It explains that the worksheet is ready with the values, and we can enter the next commands as required.
#2 – Enter Mode
Enter Mode on Status Bar shows that the sheet is ready to enter the values, which means we have started entering the data into the cell.

#3 – Edit Mode
Edit Mode on Status Bar shows that we are editing the cell values.

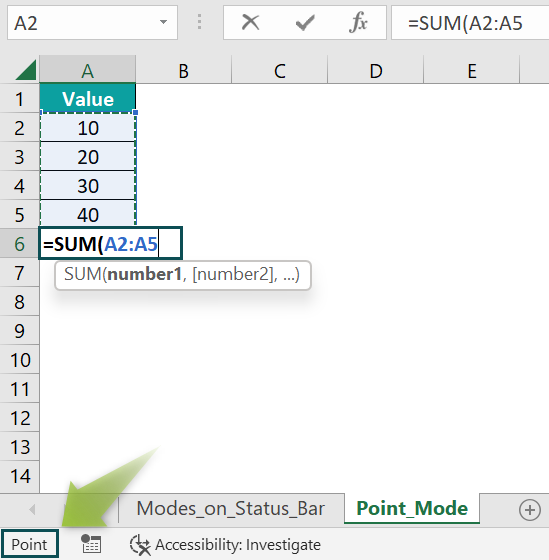
#4 – Point Mode
Point Mode on Status Bar gets active when we enter the formula in a cell and will reference the other cells with input data.
Worksheet Views
The worksheet has three default view options at the bottom right corner of the Status Bar, namely,
- Normal View,
- Page Layout View, and
- Page Break Preview.
#1 – Normal View
In the normal view, the worksheet displays multiple rows and columns.

#2 – Page Layout View
The worksheet is displayed to check the page header and footer in Excel sheet and how the sheet will look before printing it out.

#3 – Page Break Preview
The worksheet displays the page breaks in Excel sheet we are working on.

Zoom Slider
The Zoom Slider increases or decreases the size of the worksheet for clear data visibility. The Zoom Slider is present on the right corner of the Status Bar.
- The Slider has “-” (Zoom Out) and “+” (Zoom In) buttons on the worksheet.
- The Zoom In button magnifies the current working worksheet to look closely at the data.
- The Zoom Out reduces the worksheet’s magnification to view the data in a single shot.
- The Zoom Slider allows the quick zoom in or zooms out of the worksheet we are working on.
- We can adjust the page’s visibility by sliding the zoom key in both directions.
- Zoom In – At 308%, the text on the worksheet looks as shown below.

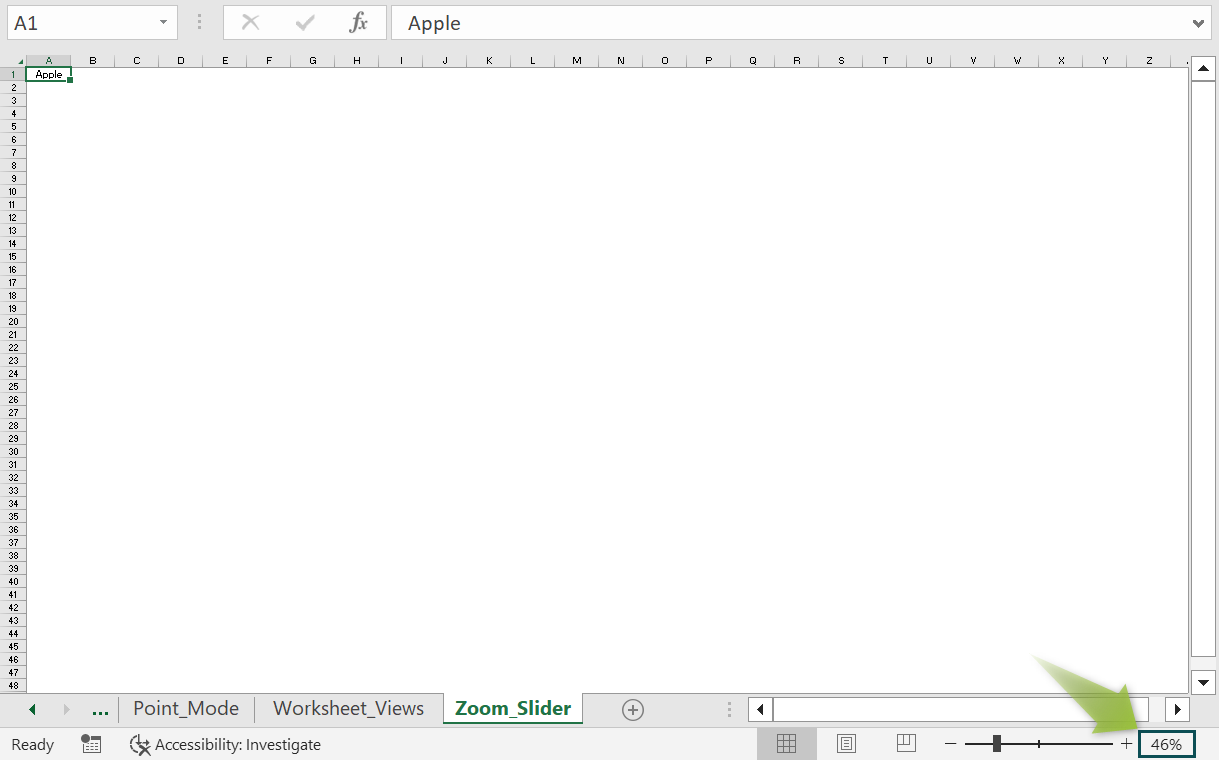
- Zoom Out – At 46% – the text on the worksheet looks as shown below.
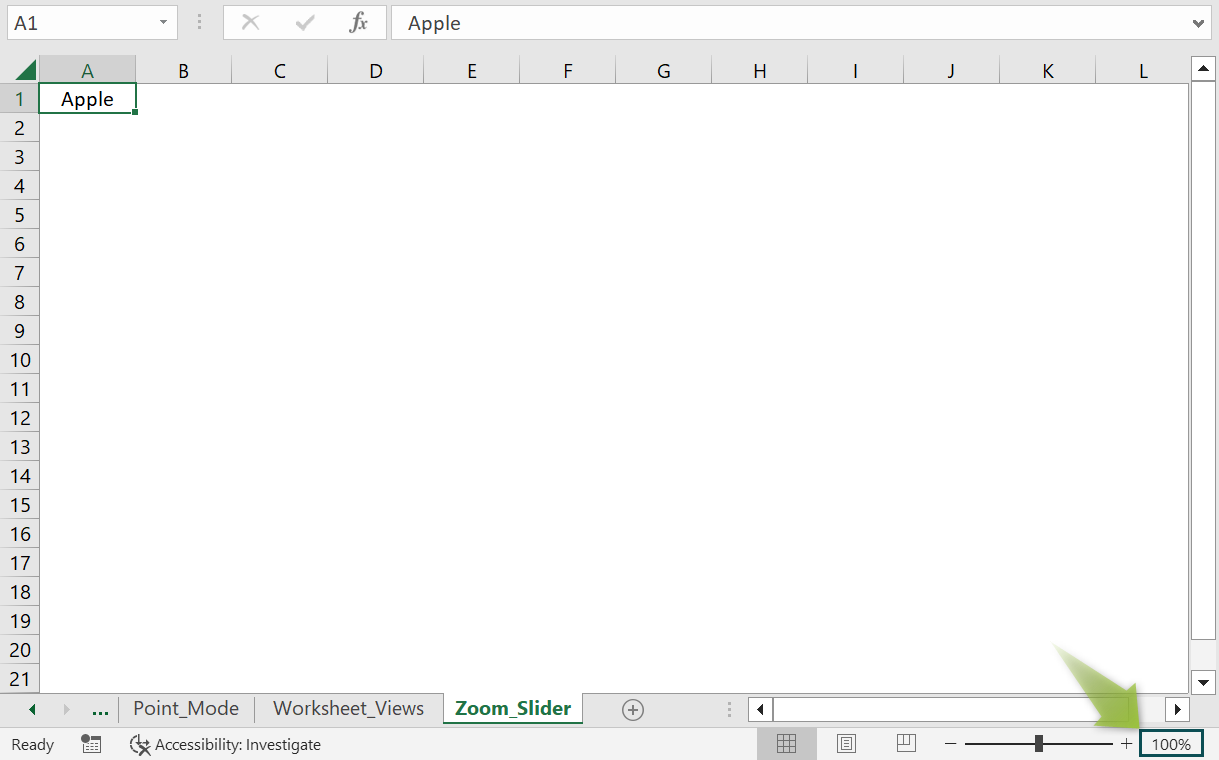
- Zoom Normal – At 100% – the text on the worksheet looks as shown below.
- Zoom Percentage
- Zoom Percentage magnifies the worksheet and works the same as the Zoom Slider. It is found next to the Zoom Slider, as shown in the below image.
- When we click the Zoom Percentage, the zoom dialog box opens, where we can select the zoom-in percentage in a worksheet, as shown in the image below.

Functions Using Status Bar
Some of the Excel functions available for quick use on the bar are Average, Count, Minimum, Maximum, and Sum, as shown below.

We must check or uncheck the required option, and it will reflect on the Status Bar, as shown below.

Let us consider how to work with some Functions Using Status Bar, such as,
- SUM function.
- AVERAGE function.
SUM Function Using Status Bar
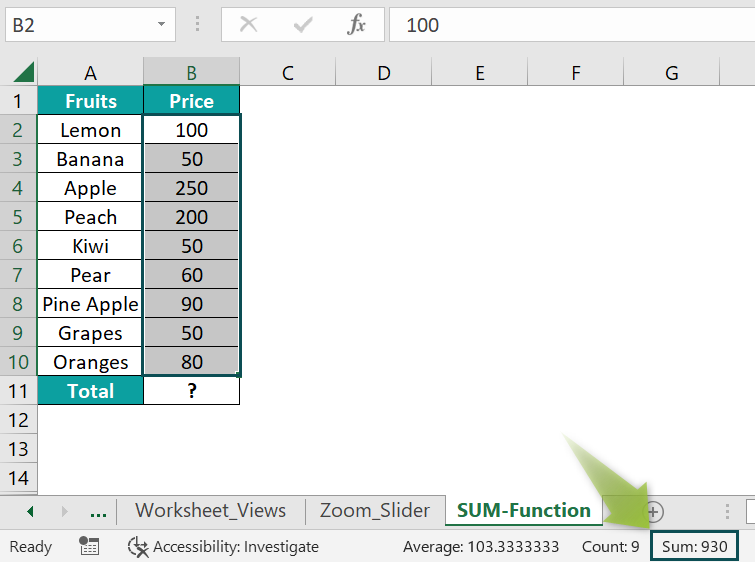
For example, the image below depicts the fruit’s names and prices. Here, we will attempt to calculate the sum of the cells using the SUM excel function.
In the table, the data is,
- Column A shows the fruit names.
- Column B contains the prices of fruits.

The procedure to calculate the total amount is,
Select cell B11, enter the formula =SUM(B2:B10), and press “Enter”. The result is 930, as shown below.

Alternatively, since the “SUM” function option is available on the Status Bar, when we select the cells B2 to B10, the SUM calculation result displays automatically on the Status Bar at the bottom of the worksheet, as shown below.
AVERAGE Function Using Status Bar
The image below depicts a series of numbers 2, 3, 4, and 5. We will calculate the average of the numbers using the AVERAGE excel function.
In the table, the data is,
- Row 1 shows numbers – 2, 3, 4, 5
- Cell B2 calculates the average.

The procedure to calculate the average is,
Select cell B2, enter the formula =AVERAGE(B1,C1,D1,E1), and press “Enter”. The result is 3.5, as shown below.

Alternatively, since the “AVERAGE” function option is available on the Status Bar, when we select the cells B1 to E1, the AVERAGE calculation result displays automatically on the Status Bar at the bottom of the worksheet, as shown below.

How To Customize The Status Bar In Excel?
The Status Bar in Excel shows some options like Count, Sum, Average, etc., and some not selected.
We can Customize the Status Bar in Excel to activate or use the other available options.
- Right-click anywhere on the Status Bar, and then the Customization Bar pops up, as shown in the image below.

Some options are as follows:
- Workbook Statistics
It is a dialog box that displays all the information about the current worksheet we are working on. It is enabled when we click it, shown with the tick mark, and it appears on the Status Bar.

On clicking the Workbook Statistics, the Workbook Statistic dialog box pops up, showing the count of cells with data and other information about the workbook.

- Caps, Num, and Scroll Lock
This option displays whether any of these functions are active. It gets activated by clicking on it, as shown with the tick mark, and it appears on the Status Bar.

When we select the Caps Lock, Num Lock, and Scroll Lock in Excel, the Status Bar shows that they are active. The “Caps Lock, Num Lock, or Scroll Lock” message is active on the left side of the Status Bar, and on deactivating the “Caps Lock, Num Lock, and Scroll Lock,” the Status Bar removes the function.

- Page Number
This option displays the page number of the active worksheet. It gets activated by clicking on it and shown as the tick mark on it and appears on the Status Bar.

When the worksheet is in the Page Layout view, present on the right corner of the Status Bar, the Page number appears next to the “Ready” Mode on the Status Bar. The total number of pages with the selected page number is displayed in the worksheet.

- Statistical/Mathematical Options
Select the Excel functions from the Customize Status Bar dialog box, to get quick calculated results of the numeric data, as shown below.

- Average: This calculates the average of all the selected numeric cells in the worksheet.
- Count: This calculates the number of selected non-empty cells.
- Numerical Count: This calculates mixed data in worksheets and displays the count of those cells with numeric values.
- Sum: This calculates the sum of values from the selected numeric cells.
- Minimum: This calculates the lowest value from a large amount of selected numeric data.
- Maximum: This calculates the highest value from a large amount of selected numeric data.
Important Things To Note
- The appropriate options are selected to display the functions like sum, average, minimum, and maximum on the Status Bar,
- Not all the options are active or enabled by default; they can be customized by the Status Bar in Excel.
- Select the range of data to view the calculated results on the Status Bar of the worksheet.
Frequently Asked Questions (FAQs)
Whenever we open an Excel workbook, the Status Bar is found at the bottom of the Worksheet. To customize the Status Bar, right-click it and click the options we want to activate.
We press ALT + V or U to get Excel into full-screen mode. In this mode, the worksheet takes up the maximum possible space on the screen. In this mode, the Status Bar is not displayed on the screen, and we can get out of this viewing mode by pressing the Esc key at any time.
The Status Bar is an element that is an information area found at the bottom of the worksheet. It can be divided into sections to group information. It displays information about the current state of the worksheet such as, the page number, worksheet views, zoom-in and zoom-out, and the results of mathematical calculations like Sum, Average, Count, etc.
Use this Status Bar In Excel Template to follow along with the examples in this article.
Download Excel Template