What Is Excel Open XML File?
Excel Open XML is an option to convert an XML file to Excel. It enables importing XML data from external databases and programs into Excel, where the XML elements from an XML schema get mapped to the spreadsheet cells.
Users can use XML in Excel to access, manage, and transfer data, such as invoices or previous year’s revenue results reports, between Excel and other programs.
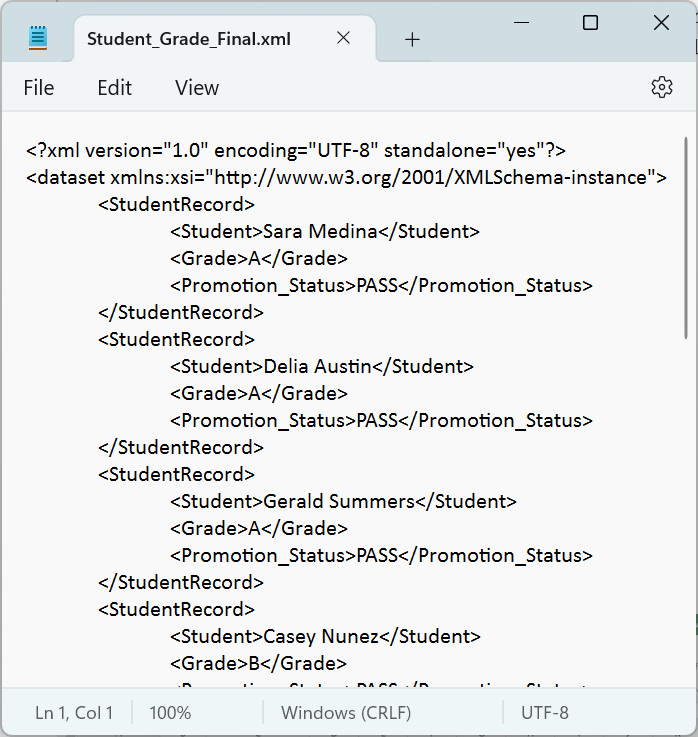
For example, the below image shows an XML file, Student_Grade_Final.xml, in Notepad. And it contains students’ names, grades, and promotion status details.
To open and view XML in Excel, as shown above, we can import the XML data using the Get Data option from the Data tab.
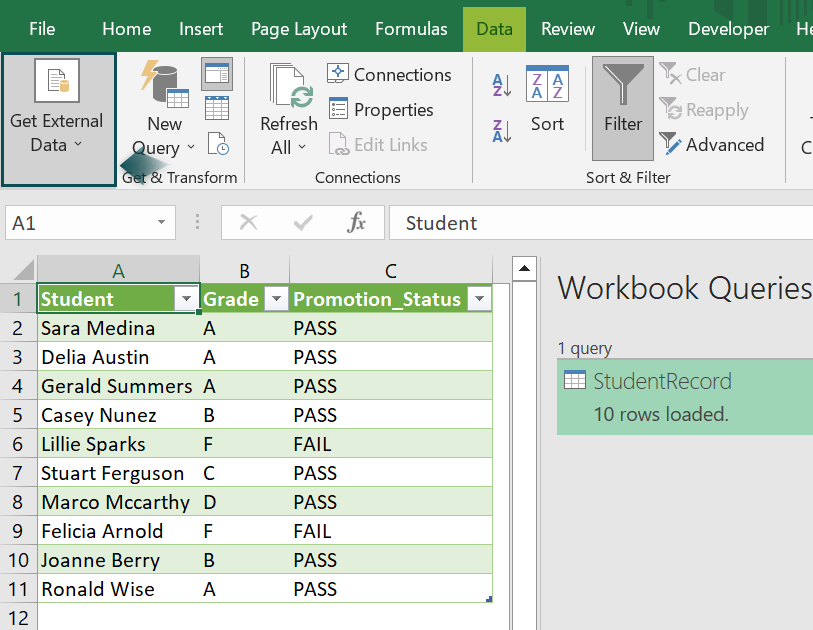
- The Get Data feature helps to select the required XML file, Student_Grade_Final.xml.
- Then, it gives the option to load XML in Excel.
- Also, the Workbook Queries pane on the right shows the table name used in the XML file from where the data gets imported.
Thus, we can view the given XML file data as an Excel table in a worksheet.
Table of contents
Key Takeaways
- The Excel Open XML opens a file formatted as XML in Excel.
- It enables us to import and export XML data to and from Excel. And as the XML schema gets mapped to the cells, we can manage XML data between Excel and other applications.
- Users can use XML in a worksheet to conveniently access and manage data such as customer details in invoices between Excel and external databases.
- We can convert Excel data into XML format using the Source and Export options in the Developer tab in Excel.
- We can import XML data into Excel from the Developer tab using the Import option, the Data tab using the Get Data feature, and the web.
What Is XML File?
- The XML, or the Extensible Markup Language file, enables one to manage and share structured information in an easy-to-read text format. And the file format adheres to industry standards and is compatible with different applications. The file format enables application experts to develop customized tags, schemas, and other XML elements.
- An XML file works on a set of standard XML rules, and the below-shown rules help in mapping XML in Excel.
- The first line in the XML file should be the following declaration.
- <?xml version=”1.0″ encoding=”UTF-8” standalone=”yes”?>
- While XML version 1.0 indicates the file adheres to XML standard, the UTF-8 encoding denotes that the file uses UTF-8 Unicode. And the standalone value, yes, indicates that the file does not require additional XML files for interpretation.
- The next lines should contain the table name’s head, the columns’ values between the columns’ names, and the table name’s tail.
- The first line in the XML file should be the following declaration.
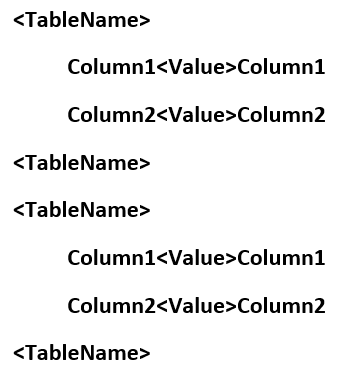
Finally, loading the file containing the data in the above-defined structure in Excel will enable us to view XML in Excel.
Example Of Converting Excel Data To XML File Format
Consider we have the following data in a worksheet.

The steps to convert the given Excel data into XML file format are as follows:
- Step 1: Enter the lines for the XML data’s schema in an empty Notepad file, as shown below.
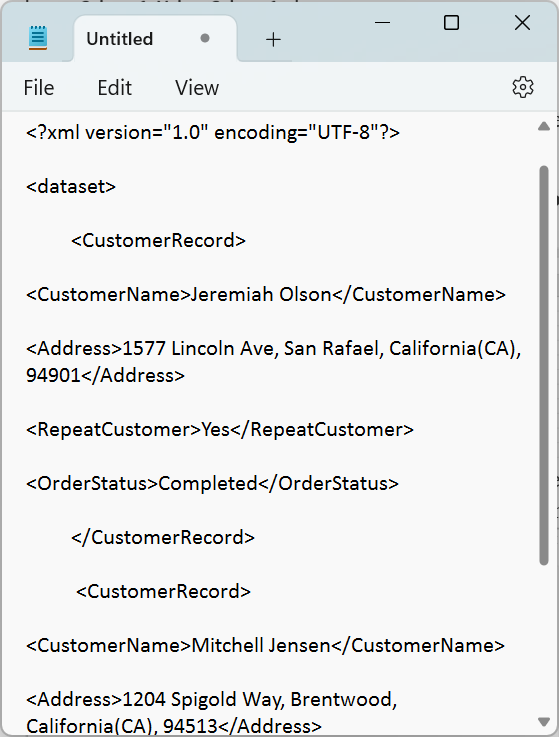
- The first line will be the mandatory declaration. And in this illustration, we will not include the standalone value in the declaration as we do not require it.
- The next line shows the object dataset, which indicates the data is in XML, and the schema included inline in the display is in the XML Schema Definition language.
- Next, we provide the table name CustomerRecord head, following which we must provide the XML data’s schema for the row 2 information in the Excel data. And for that, we enter the columns’ headers, the first values in the specified columns from the Excel data, and the columns’ headers, followed by the table nametail.
- Likewise, we enter the lines for the row 3 information in the Excel source data. Thus, we now have two samples, with the schema structure ending with the dataset tail.
- Step 2: Click on File → Save As to save the file.
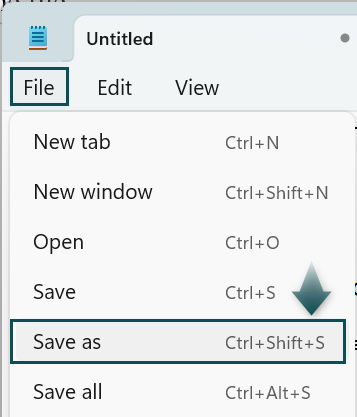
Name the file and save it with the .xml extension. Click Save to complete the action.


Next, we require to use the Developer tab options for the conversion. And if the ribbon does not show the Developer tab, as shown below.
Then, the steps to enable the tab in the ribbon are as follows:
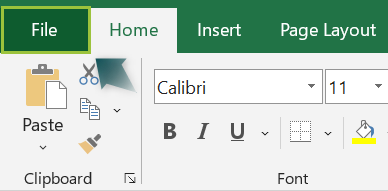
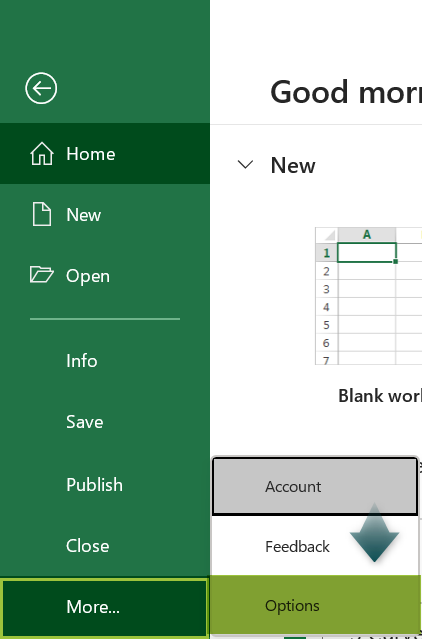
- Step 3: Click File → Options to access the Excel Options window.
- Step 4: Choose the Customize Ribbon tab, and check the Developer box from the Customize the Ribbon field.
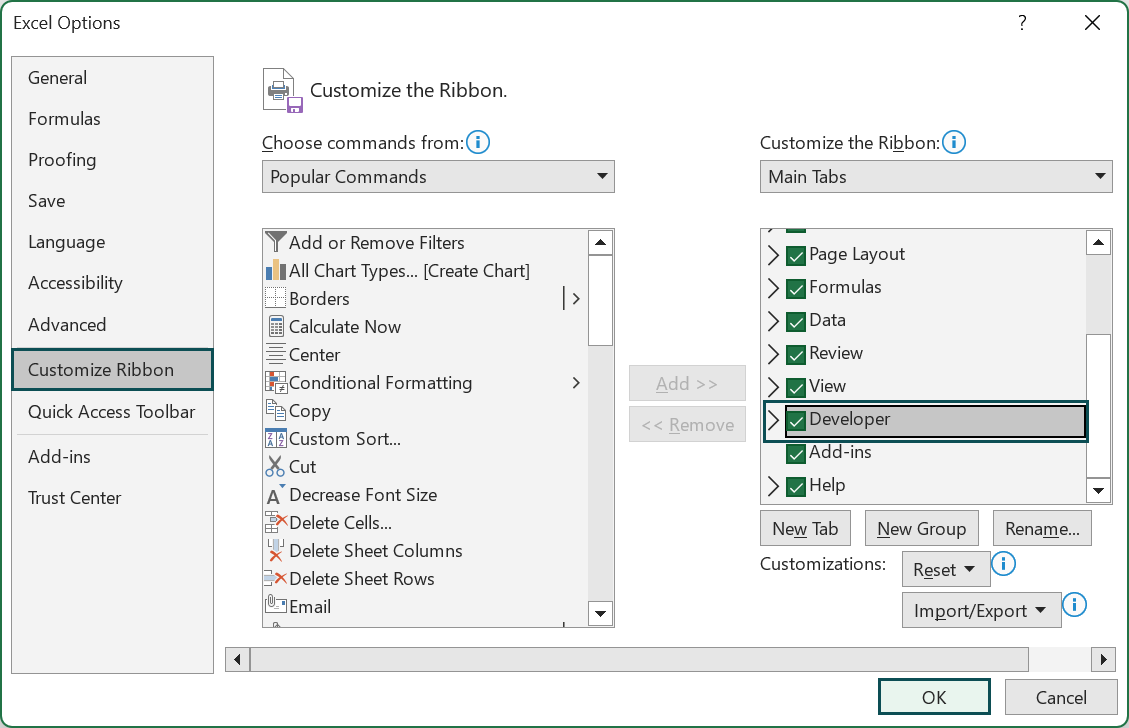
And clicking OK will show the Developer tab in the ribbon.
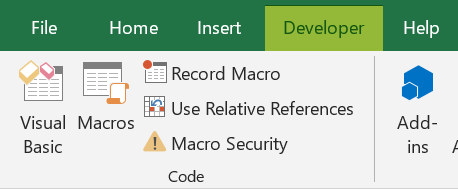
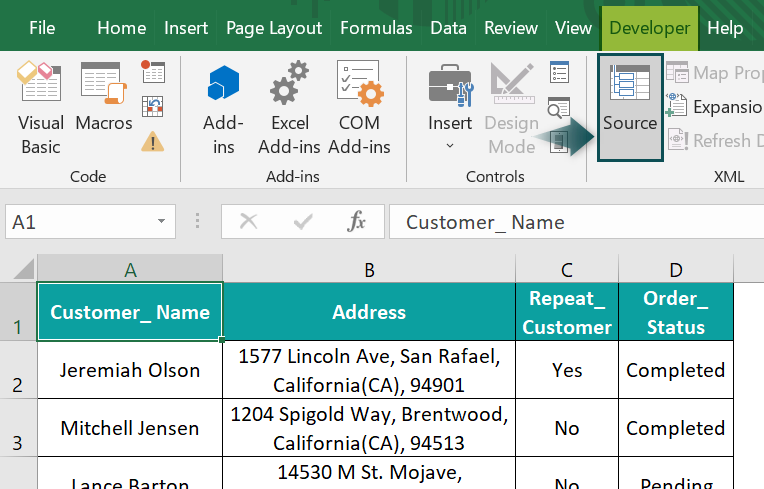
- Step 5: Click on Developer → Source.
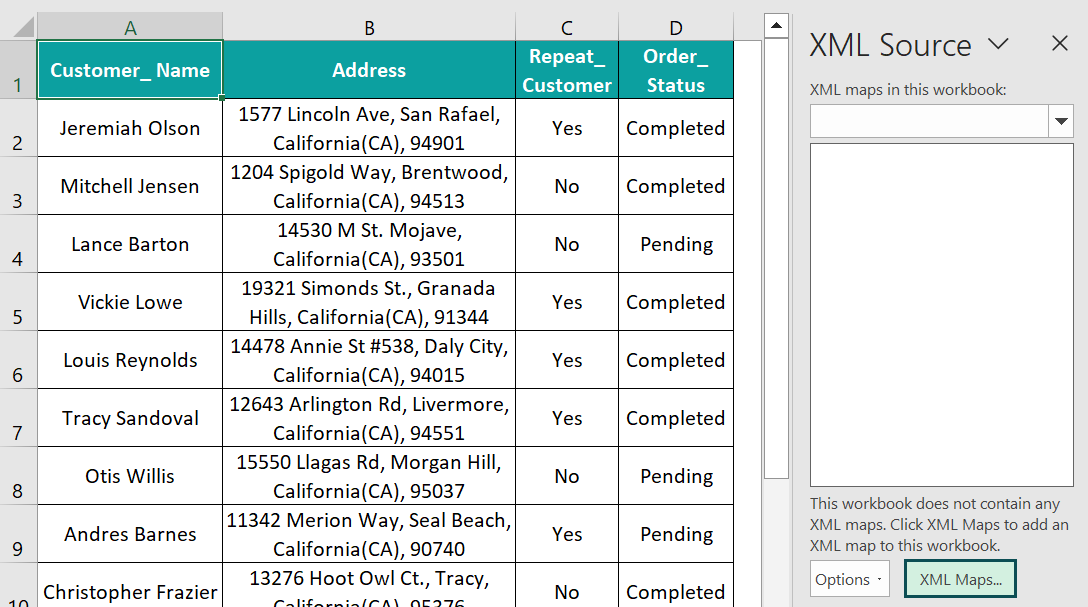
The XML Source pane opens, where we must click the XML Maps option.
The XML Maps window will open.
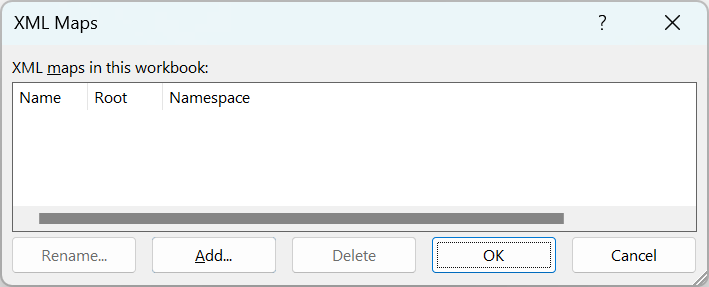
- Step 6: Click Add in the XML Maps window.

The Select XML Source window will open, where we must select the required XML file to apply the XML schema to the Excel data.
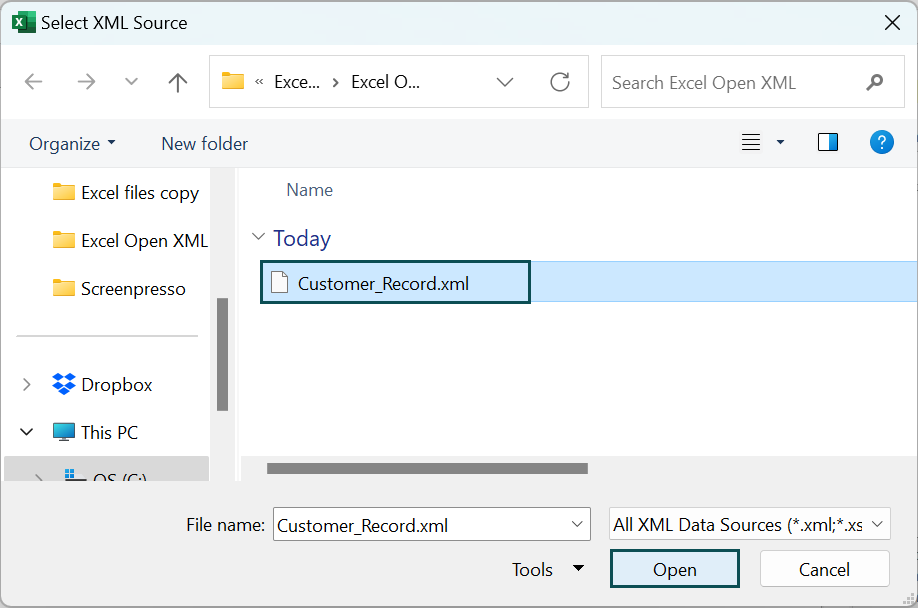
Clicking Open will show a warning message stating that Excel will develop a schema based on the chosen XML source data. Click OK to proceed.

And click OK to continue with mapping XML in Excel.

Clicking OK will show the chosen XML map dataset_map in the XML Source pane.
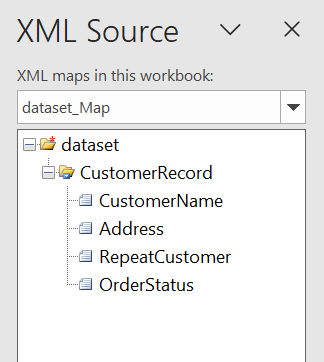
- Step 7: Click on the first column header in the CustomerRecord table in the XML Source window, and drag the cursor to the first column header in the Excel sheet.

The chosen XML schema gets applied to the first column in the Excel data.
And repeat the process for the remaining three columns.
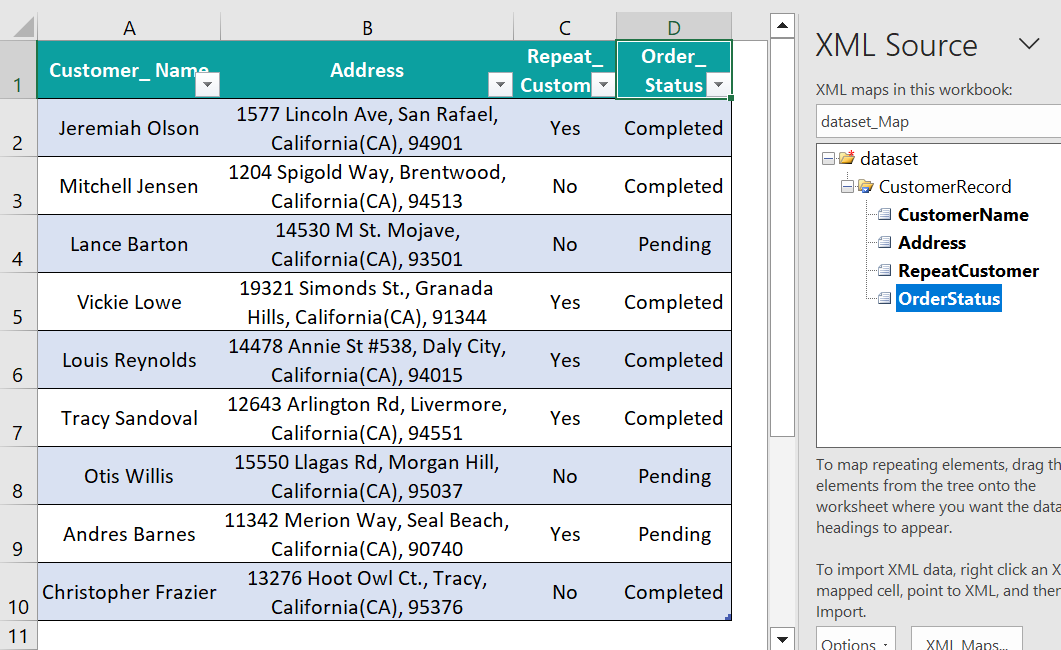
Thus, we obtain an Excel table enabled with all the XML schema features.
- Step 8: Click Developer → Export.

The Export XML window will open to enter the file name for the XML file.

Clicking Export will create an exported XML file.

Now, opening the exported XML will show the Excel data converted into the required XML file format.

Thus, using the XML data schema created for rows 2 and 3 Excel data, we can apply and extract the entire Excel data in the XML format.
Import XML Data Into Excel
We can import data in XML in Excel using the three methods, namely,
- Import From The Developer Tab.
- Import From The Data Tab.
- Import From The Web.
Let us see each method with an example.
The following image shows the contents of an XML file, Employee Record_Export.xml.

Method #1 – Import From The Developer Tab
- Step 1: Open an Excel file, and choose Developer → Import.

The Import XML window will open, where we must choose the XML file to import into Excel.

On clicking Import, we will receive the below warning message stating that Excel will develop a schema based on the chosen XML source data. Click OK to proceed.

- Step 2: The Import Data window will open, where we must update the reference to the cell in the sheet where we require to view the imported XML data.

Finally, clicking OK will show the required XML data imported into the Excel sheet.

Method #2 – Import From The Data Tab
- Step 1: Open an Excel file, and choose Data → Get Data → From File → From XML.

The Import Data window opens, where we must select the required XML file to import.
Here, we shall use the XML file Employee Record_Export1.xml, which contains the same data as the original file, for the convenience of explaining the different importing methods.

On clicking Import, the Navigator window opens, where we must select the table name, EmployeeRecord, used in the XML file.

- Step 2: Click Load to load XML in Excel.

And clicking Load will update a new Excel sheet with the imported XML file data.

[However, if the requirement is to edit XML in Excel, click Transform Data in the Navigator window.

Clicking Transform Data will open the Power Query Editor, where we can edit and transform the imported XML data according to the requirement.

Once completed with the editing, click the Close & Load option in the Home tab.

Furthermore, if the XML data to import into Excel is on the web. Then, we can use the third method.
Method #3 – Import From The Web
- Step 1: Open an Excel file, and select the Data tab → Get Data feature → From Other Sources option → From Web option.

The window in the image below opens, where we must update the URL of the website containing the XML data to import. Assume the URL is the site index link of the Forbes website.

Clicking OK will show the below warning message about accessing web content. Click Connect.

- Step 2: The Navigator window will open. Click the table name sitemap to preview the XML data to import into Excel.

And clicking Load will complete the importing XML data from the web process. And we will achieve the result shown below.

Moreover, we can also click Edit in the Navigator window to edit XML in Excel, as explained in the previous section.
Important Things To Note
- Before opening the schema script of XML in Excel, ensure it contains the mandatory declaration. And follow the correct coding structure to apply the XML schema to the Excel data properly.
- Ensure to include at least two schema samples for applying the same format to the entire worksheet data and export it as an XML file.

Frequently Asked Questions (FAQs)
• XML is not the same as XLSX. However, there are no practical differences between the two data file formats.
• XML is an Open-Source file format. On the other hand, XLSX is a proprietary Microsoft file format and is a group of XML files.
• Viewing XML file data may require some parsing. An XLSX file shows data in a table format.
We can convert XML to Excel by importing XML data into the worksheet using the following methods:
• Importing XML data using the Import option from the Developer tab.
• Here, importing XML data using the Get Data option from the Data tab.
• Importing XML data from the web.
We can remove XML maps in Excel using the Delete option in the XML Maps window.
For example, a worksheet contains XML maps, dataset_Map, and dataset_Map1. And the requirement is to remove the XML maps in the Excel sheet.
The steps to remove XML maps in Excel are as follows:
• Step 1: Select Developer → Source.
The XML Source pane opens, showing the currently chosen XML map, where we must click the XML Maps option.
The XML Maps window opens.
• Step 2: Select the first XML map, and click Delete in the XML Maps window.
Excel will show a warning message stating that deleting the XML map will no longer allow us to import and export XML data using the specific XML map. Click OK to continue.
Likewise, repeat the deletion process for the second XML map.

• Step 3: Click OK in the XML Maps window.
And we will see the XML Source window empty, as shown below.
We can’t open an XML file in Excel if the XML file does not refer to an XML schema.
Excel requires a schema based on the data in the XML file we wish to open in Excel. And an insufficient, incorrect, or missing schema can lead to the XML file in Excel not opening.
Download Template
This article must help understand the Excel Open XML, with its formula and examples. You can download the template here to use it instantly.
Recommended Articles
This has been a guide to Excel Open XML. Here we discuss how to convert, import data into XML (3 methods), remove XML maps with examples & downloadable template. You can learn more from the following articles –

Leave a Reply