
What Is Excel VBA Code?
VBA code is a human-readable and editable programming language that is written from scratch, else Excel generates its own code when we record a macro. Using VBA macros, we can automate all difficult tasks in Excel.
VBA is a programming language built by Microsoft for Office Applications. In Excel, we do a lot of manual work on a regular basis. It takes a considerable amount of time and affects productivity. Hence, in Excel, we have an automation coding language called VBA that can automate tasks.
Use this VBA Code Template to follow along with the examples in this article.
Download Excel TemplateKey Takeaways
- VBA (Visual Basic for Applications) code is a programming code that we can write, read and edit with ease.
- Using VBA macros helps us automate tasks and reduce a tremendous amount of time and work.
- The Record Macro option will record all activities done in Excel and create VBA code.
- VBA Macro codes are executed line by line.
- Once the VBA code is generated, we must save the workbook as a “Macro-Enabled Workbook”.
Enable Developer Tab
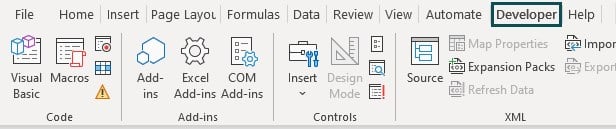
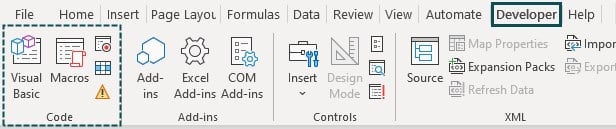
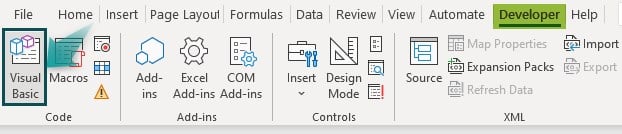
Visual Basic for Applications is available under the Developer tab in Excel. The following image shows Visual Basic under the Developer tab in Excel.
However, we may not see the Developer tab sometimes. The following steps will guide you to enable the Developer tab.
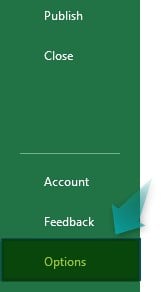
Step 1: Go to the File tab.

Step 2: Click on Options.
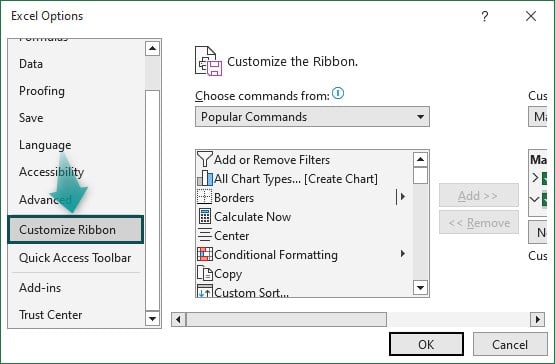
Step 3: This will bring the Excel Options window. Click on Customize Excel Ribbon.
Step 4: Check the Developer tab box under Main Tab.
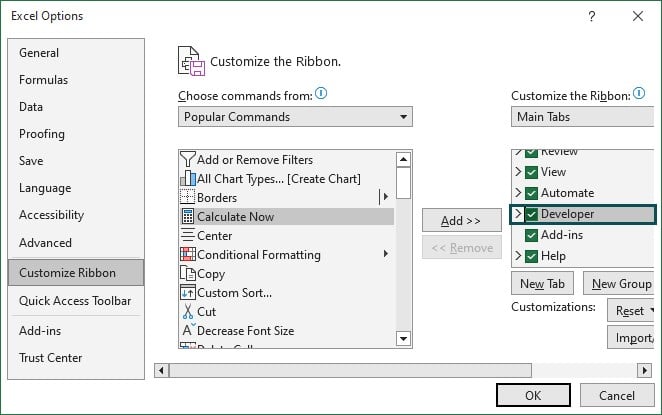
Step 5: Click on OK. Now we will be able to see the Developer tab. Under the Developer tab, we have Macros.
How To Write VBA Code In Excel?
As a beginner in VBA, it is tough to understand the VBA code from scratch. However, we have an option called Record Macro to get our journey going.
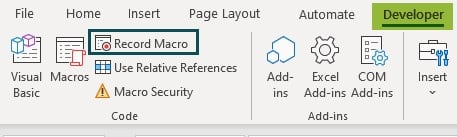
Record Macro is a feature available in Excel to record all the activities that we perform in Excel. It is like a recorder that captures all the activities. Recording Macros is available under the Developer tab.
We will show you a simple example of recording a macro and reading the code.
Step 1: Go to the Developer tab and click on the Record Macro option.

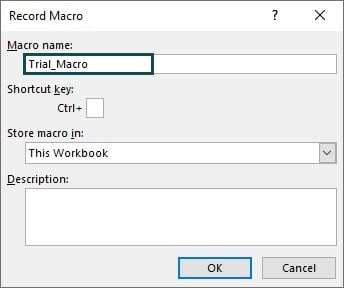
Step 2: This will open the Record Macro window as follows.

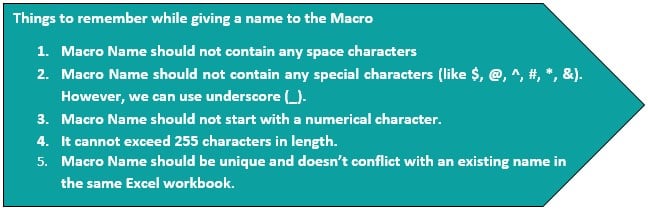
Step 3: Give a name for the macro. While naming a macro, please look into the following criteria.
Step 4: Click on OK, and the recording starts. Now, Excel will record all the activities and store them in the VBA code.
The first activity we do is to select cell A1.

Step 5: Enter the text My First Macro in the selected cell.

Step 6: We are still in cell A1. After entering the text, hit the Enter key, and it will select the below cell i.e., cell A2.

As we can see, it has selected cell A2.
Step 7: Now, again select cell A1 and apply the following formatting.
Font Name = Times New Roman
Font Size = 14
Font Color = Blue
Font Style = Bold

Step 8: To get started with VBA, these activities are enough. Click on Stop Recording under the Developer tab.

Now the recording has stopped, and no activities will be recorded.
Execute The Macro
Step 1: Delete the cell A1 value and select any other value.
Step 2: Go to the Developer tab and click on the Macros option.

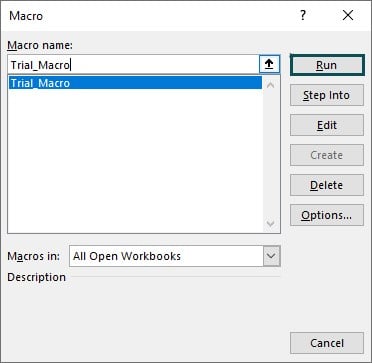
Step 3: This will bring the Macro window with the list of all the macros. Choose the macro name that we have given while recording the macro i.e., Trial_Macro, and click on OK.
The moment we click on OK, it will perform all the activities that we did while the recording was on, and we can see the text in cell A1.

Understand The Code
Recording is done through codes in VBA. To view the codes of all the activities, we must go to the Visual Basic Editor window.
Go to the Developer tab and click on the Visual Basic option.
This will open the Visual Basic Editor window as shown below.
Note: The shortcut keys to open the Visual Basic Editor window is ALT + F11.

Double-click on Module1 to see the code.

At first look, the code may look alien, but let us explain it to you in simple terms.
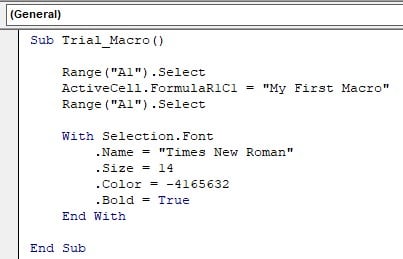
The first word is Sub Record_Macro.
SUB is the word to start the macro name. Hence, we can see this word in blue color.
The very first thing we did while recording the macro was give a name to the macro i.e., Trial_Macro. So, Excel considers it as the start of the program, so the program starts with the word Sub and is followed by the macro name i.e., Record_Macro.

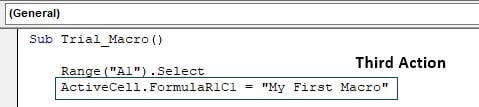
After the recording started, we selected the cell A1, and Excel recorded it as Range(“A1”).Select

After we select cell A1, we entered the value My First Macro. It has recorded cell A1 as ActiveCell because the moment we select cell A1 it has become an active cell. VBA treats this as an active cell; hence, cell A1 is an active cell.
Next, again we have selected cell A1 to format, so VBA code for this is Range(“A1”).Select

After cell A1 is selected, we applied some formatting, so VBA segregated this into multiple parts.

The several lines of code can be trimmed to a single block. The following is the trimmed code.

All four formatting tasks are under one block now. So, the overall code reads like this.
Execute Macro Line By Line To Understand It Better
To understand how VBA macro lines work, we must execute them line by line. Delete the value in cell A1 and select any other cell.

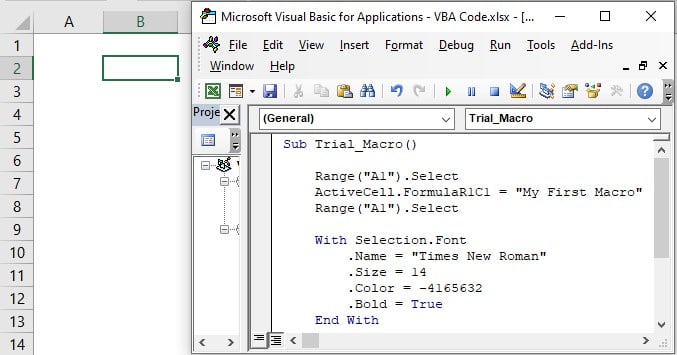
Open the Visual Basic Editor using the shortcut key ALT + F11, and we will see a code window like the following image.
Place the cursor inside the macro and press the shortcut key, F8.

As we can see, the first line of the macro is highlighted in yellow color. It means this line is about to execute; so, press the F8 key to start the macro running.

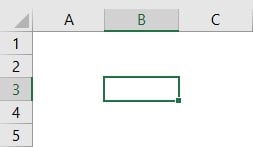
The first line of the macro is Range(“A1”).Select, i.e., it will select the cell A1 in the current worksheet. Currently, the active cell is B3; so, press the F8 key to execute this line, and cell A1 will be selected.

The next line will insert the value My First Macros in cell A1. Press the F8 key to execute this line.

- Next, it will again select cell A1. Press the F8 key to execute this line.
- The next line will initiate the WITH statement for FONT property.
- It will change the font name to Times New Roman.
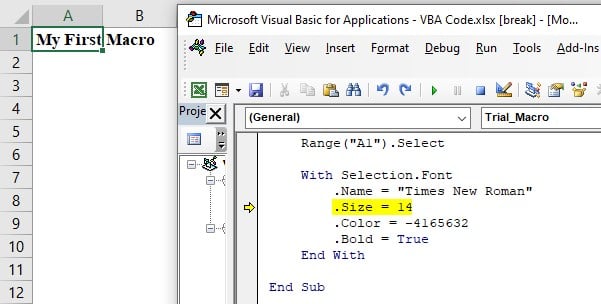
Next, it will change the font size to 14.

Next, the line will change color to BLUE (in VBA Record Macro, the blue color is represented by this number -4165632).
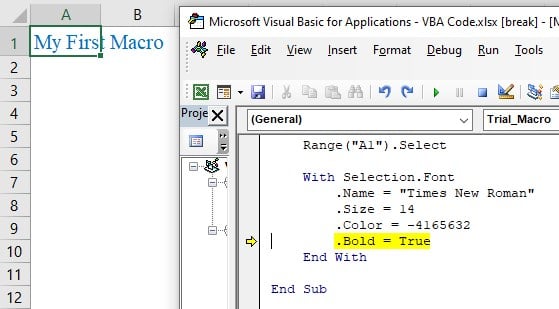
Then, the line will make the font Bold.

In this way, VBA macro codes are executed line by line.
VBA Code Examples
Example #1: Write Your Own Code From Scratch
Let us guide you to write VBA code from scratch on your own. Assume we need to automate the following things.
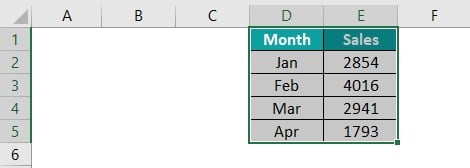
- Task #1: Copy the data from range A1:B5.
- Task #2: Paste the copied data to range D1:E5.
- Task #3: Delete the data in range A1:B5.
We have the following data in Excel for writing the code.

Next, quickly open the Visual Basic Editor window by pressing the ALT + F11 shortcut keys in Excel.
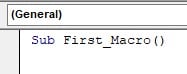
Step 1: Start the macro by entering the keyword “SUB” followed by the macro name.
Step 2: Hit the Enter key, and “End Sub” automatically comes up.
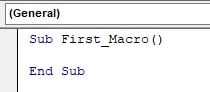
Step 3: Between SUB and END SUB, we must write our code.
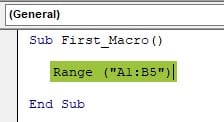
Next, the first task we must do is copy the range A1:B5. So, to select this cell range, we nmust use the RANGE property in VBA.

Step 4: Enter the range of cells in double quotes as followed.
Step 5: In the entered range, we must copy, and enter a dot (.) to get the IntelliSense list of properties and methods of the RANGE property.
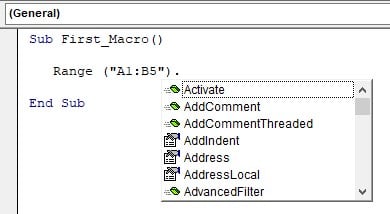
As soon as we entered the dot VBA IntelliSense list showed us the properties and methods of the RANGE property.
Step 6: Choose copy method from the list.

Step 7: This will copy the range, A1:B5. Next, we need to paste the copied data into range “D1:E5”, so again, enter the RANGE property and enter the paste area.

Step 8: In the given range, we need to paste, so choose the “paste special” method.

Step 9: Task #3 is to delete the values in the range A1:B5. So again, enter the range property and choose the “Clear” method.

Next, by pressing the F5 key to execute this code, and we will get the following result.
In this way, we can write our macros from scratch.
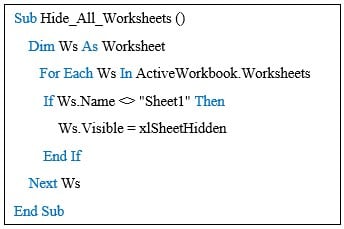
Example #2: Hide All Worksheets
The following code will help you to hide all the worksheets except the worksheet “Sheet1”.
Copy the above code and paste it into the Visual Basic Editor window.

When you execute this code, it will hide all the worksheets in your workbook except the one named “Sheet1.”
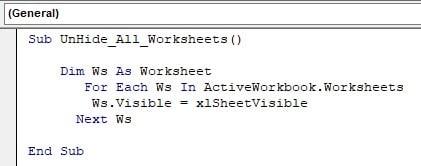
Example #3: Unhide All Worksheets
Similarly, if we want to unhide all the worksheets, then we can use the following code.

The above code will make all the hidden worksheets visible.
Saving VBA Macro Workbook
Once the recording macro is done, there is another important thing that we need to do, i.e., save the workbook as a Macro-Enabled Workbook file extension.
After the VBA code creation, if you click on the Save button, we will get the following prompt.

Because of the earlier saved file versions, XLSX, we have created the macro code in this file, it is giving a warning message stating, “The following features cannot be saved in macro-enabled workbooks.”
To save it, we need to save the file with the file type “Excel Macro-Enabled Workbook”.

Once the file saves in the “Excel Macro-Enabled Workbook” file type, we will see an icon difference between the normal file extension and the macro file extension.

XLSM is the macro file, and XLSX is the non-macro file.
Important Things To Note
- VBA stands for Visual Basic for Applications.
- The developer tab is hidden by default in Excel.
- The macro name should not start with a numerical value, and it should not contain any space or special characters except the underscore (_) character.
- ALT + F11 is the shortcut key to launch the Visual Basic Editor window.
- Ctrl + Space is the shortcut key to see the IntelliSense list while writing macros from scratch.
- F8 is the shortcut key to run the macro codes line by line.
Frequently Asked Questions (FAQs)
Once the recording macro stops, we can view the code in the Visual Basic Editor window. To launch the visual basic editor window, we have 2 ways.
Manual Way: Go to the Developer tab and click on the “Visual Basic” option.
This will launch the visual basic editor window as shown below:
Double-click on “Module1” to see the code.
Shortcut Way: We can also use the shortcut key ALT + F11 to launch the visual basic editor window.
Once we have the VBA code in our workbook, we need to save VBA Code in the file with the file type “Excel Macro-Enabled Workbook”.
Use Save As method and choose the Save as type: as “Excel Macro-Enabled Workbook”.
We can see the file extension as XLSM for all the “Excel Macro-Enabled Workbook”.![]()
To stop VBA code from running, we need to press the shortcut key Ctrl + Break key.
If we want to pause the VBA code from running for a while inside the macro, we need to use the functions Wait and Sleep.
Use this VBA Code Template to follow along with the examples in this article.
Download Excel Template