
What Is Consolidate Function In Excel?
The Consolidate function in Excel is an inbuilt function. It helps gather data from multiple sheets in the same workbook or different workbooks to get the consolidated data in one master worksheet. And excel allows the consolidation of data by position or category. Users can use the Consolidate function to collect data in one location. For instance, creating a corporate-level budget sheet from various branch offices’ expense sheets can be done.
For example, consider the below image. It shows the 2020-21 sales figures of the company’s two regional offices in two worksheets of the same workbook.
Use this Consolidate Function In Excel Template to follow along with the examples in this article.
Download Excel Template

And suppose we require to determine the overall sales figures in a master worksheet in the same workbook. Then, based on the above Consolidate function in Excel definition, we can use the Consolidate option in the Data tab. By doing so, we can gather the required data in a new worksheet.

In the above Consolidate function in Excel example, we need to use the Consolidate function twice. The first is to determine the 2020 overall sales. And, the second is to consolidate the sales figures for 2021 in the master worksheet, Sales Report_Overall. The sales values in the new worksheet for each product will be the sum of the sales figures in the corresponding years specified in the respective regional office’s sheet.
Key Takeaways
- The Consolidate function in Excel collects data from sheets in the same or different workbooks. And based on the selected Excel function, it consolidates the data in the specified master worksheet, with the consolidation being by category or position.
- Users can apply the Consolidate function in scenarios such as when they need to consolidate regional offices’ sales data in one master sheet for a company-level report.
- The Consolidate function is available in the Data tab as a feature. We must select the required Excel function and add the references to the source data in different worksheets to consolidate the specified source data.
Consolidate() Excel Formula
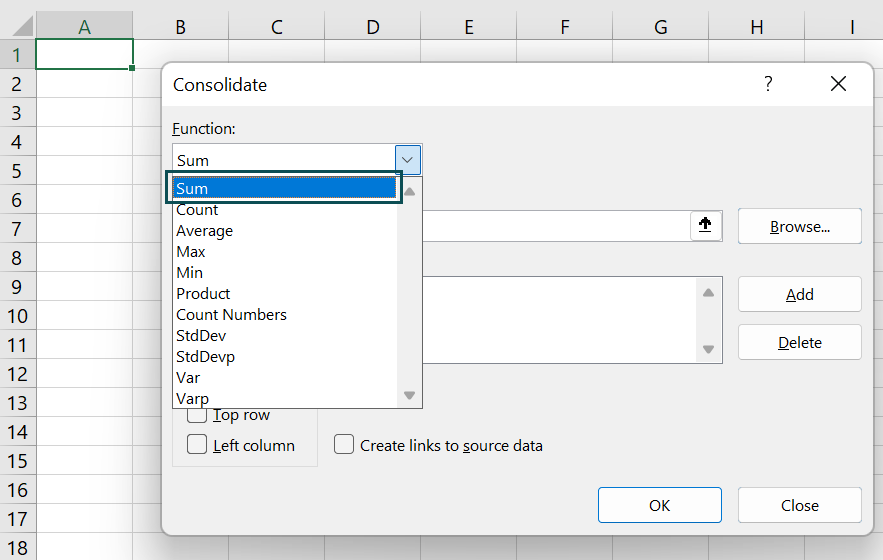
The Consolidate function in Excel is a feature in the Data tab. We can open the worksheet where we require to show the consolidated data and click Data → Consolidate.

The above action will open the Consolidate function in Excel window.

For using the Consolidate function in Excel, we must first choose the required function from the drop-down list in the Function field in the Consolidate window. The chosen function will decide how the source data will get consolidated in the master sheet.

Then, we can add the specific references using the Browse, Add, and Delete options.
Finally, we get three options at the end of the window. These will enable us to set the required label settings, apply the Consolidate function in Excel and keep rows together for the contributing source data values.
It will help us understand the components of each consolidated value in the master sheet.
How To Use Consolidate Excel Function?
The steps to use the Consolidate function in Excel are as follows:
- First, keep all the workbooks that contain the data we require to consolidate open. And if we must gather data from the worksheets of the same workbook, ensure the file is open.
- Then, open the master sheet, where we must display the consolidated data, and click Data → Consolidate to apply the Consolidate function in Excel.
- Choose the required Excel function in the Function field. And the Reference field will allow us to add the references to the data in multiple sheets we need to consolidate. Next, select the label and links to source data settings, if required, and click OK in the Consolidate window to view the consolidated data in the master sheet.
Consolidation By Position
When the data in the source sheets or workbooks have the same order and utilize the same labels, consolidate the data by position.
Consolidation By Category
When the data in the source sheets or workbooks have a different order but utilize the same labels, consolidate the data by category.
The following Consolidate function in Excel example explains the above steps in detail.
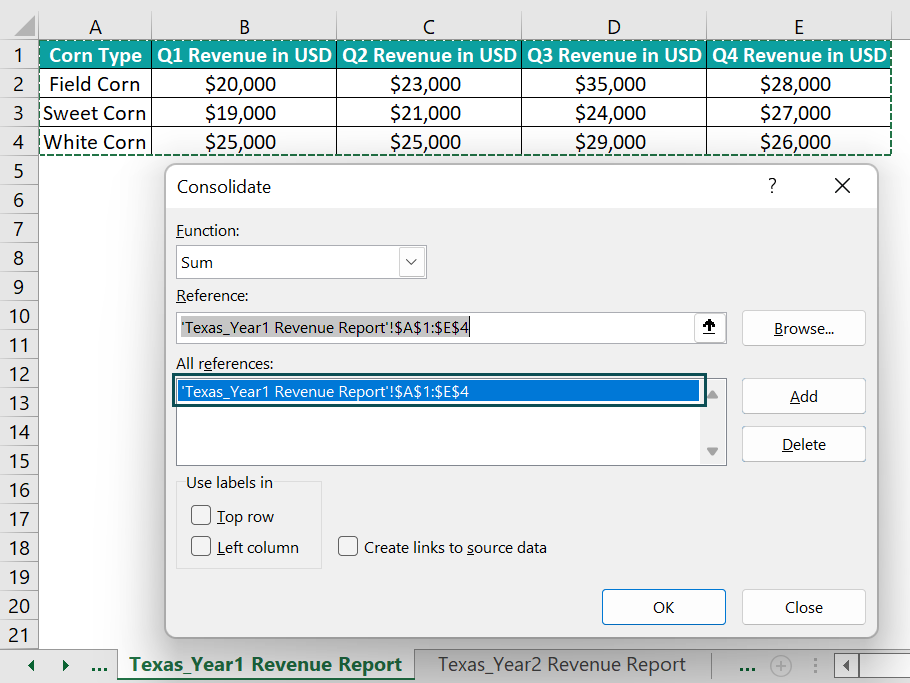
Consider the below worksheets of the same workbook containing three years’ quarterly revenue reports of a corn company, Texas branch.


And suppose we must consolidate the three years of revenue data. Also, we should display the figures in a master sheet in the same workbook.
Then, we can achieve the desired outcome using the Consolidate function in Excel, and the steps are as follows:
- Open a new spreadsheet in the same workbook and name it.

- With the master worksheet open, click Data → Consolidate to open the Consolidate window.


- Set the Function field as Sum as we need to add the three years quarterly revenue data.

- Next, click the Reference field, and go to the first source worksheet to add the first-year quarterly revenue data to the master sheet’s consolidated data. Click Add.


Likewise, select and add the second and third years’ quarterly revenue data. - Check all the boxes to enable the required label settings. The consolidated table will use the same labels as the source data in the three worksheets. Also, the last check box will ensure any changes made in the source data get automatically reflected in the consolidated data. It will create grouping tools, which we can expand to see the source data contributing to each consolidated data value.

- Click OK to view the consolidated data in the master sheet.

- Click the grouping tools icon (highlighted in the above image), ‘+’, to expand and view the components of each consolidated quarterly revenue value in the above table.

Here, the Consolidate feature settings execute the Consolidate function in Excel and keep rows together of the contributing source data above each sum value.
Let us consider the cell F13 formula to see how the consolidation works.
The three years Q4 revenue data of the corn type, White Corn, is available in cells F10:F12. The function fetches this data from the three source sheets.
And finally, we can see the sum of the three values in cell F13, $88,000.


Examples
Check out the below examples to effectively understand the Consolidate function in Excel definition.
Example #1
Consider the following two worksheets in the same workbook containing the marks scored by ten students in two assessments.


And suppose we need to determine the best of two assessment results for each student in every subject in the master sheet, Assessment_Best Of Two.
Then, we can use the Consolidate function in Excel and get the required data.
- Step 1: Go to the master worksheet, and click Data → Consolidate to open the Consolidate window.


- Step 2: Click the drop-down option in the Function field to select the option Max.

- Step 3: Add the required references to the source data in the two worksheets.


- Step 4: Finally, enable the label and links to source data settings, and click OK.


The source data in the two worksheets are in different orders. However, the Consolidate function in Excel automatically arranges them while consolidating the data in the master worksheet.
Let us consider the cell C4 formula to check how the consolidation by category works. The Mathematics score data is in the first and last columns in the first and second source worksheets, respectively. However, the Consolidate feature places it as the first subject in the consolidated data. And the feature determines the maximum Mathematics score out of the two given values in the two worksheets for the student Kayla Smith, 85 and 75. It thus displays the result as 85 in cell C4.

We can check the source data using the grouping tool and confirm the best of the two assessment scores for each student in each subject.
Example #2
The two worksheets below in the same workbook contain the smartphone order details of two dealers.


Suppose the requirement is to determine the total orders placed with the two dealers for each smartphone and display the month-wise consolidated data in a master worksheet. And the given master sheet, Dealers_Overall Order Data, contains a specific template.

Then, we can apply the Consolidate function in Excelby position in the target worksheet and get the required summed values.
- Step 1: Select the cell range B2:B6 in the specified master sheet and click Data → Consolidate to open the Consolidate window.


- Step 2: Set the Function field as Sum, as explained previously. And add the references to the required source data in the two worksheets.


- Step 3: Do not set the label settings, though we can check the last check box to create links to the source data for automatic updates of the consolidated data. Finally, click OK to view the total orders placed for each smartphone with the two dealers in January.


- Step 4: Select the target cell range C2:C6 and repeat the same process (explained in steps 2 and 3) for February by adding the required source data.

And click OK to view the total order data for February.

- Step 5: Finally, select the target cell range D2:D6 and repeat the same process (explained in steps 2 and 3) for March by adding the required source data.

And click OK to view the total smartphone order data for March.

In this example, the Consolidate function in Excel feature does not automatically update the gathered data in the master sheet, as we did not create links to the source data.
Example #3
This example explains how to use the Consolidate function in Excel to gather data from multiple workbooks.
The following images show two workbooks containing the two source tables.


Suppose the requirement is to add the values of each number specified in the two source tables to display the summed values in a master sheet in the first workbook. And assume the master worksheet is Final Table_Summed Data.
Then, we can apply the Consolidate function in Excel to achieve the required consolidated data in the specified master worksheet.
- Step 1: Go to the master worksheet and select Data → Consolidate to open the Consolidate window.

- Step 2: Set the Function field as Sum, as explained previously. Next, click the Reference field, and go to the Table1_Data worksheet to select the reference to the required source data. Click Add.


- Step 3: Next, with the Consolidate window open, go to the Table2_Data worksheet in the Data Worksheet workbook to add the reference to the required source data.


Excel shows the entire path of the second table in the Reference field, as it is in another workbook.
- Step 4: Enable the label settings and check the last box for links to the source data.

And once we click OK in the Consolidate window, we will get the required consolidated data in the specified master sheet.

Let us see the cell C10 formula to see how the consolidation happens. And we shall use the grouping tool to expand and view the source data.

Though the source tables do not have the given numbers in a specific order, the Consolidate feature arranges them in one order. It then adds the values provided in the two sheets for Number 3, which is 30, to return the consolidated data as 60.
But in the case of the cell C12 formula, the Number 4 has only one value mentioned in the worksheet, Table 1_Data. And hence, the master sheet shows the consolidated data as 40.

Important Things to Note
- Ensure we select the correct Excel function from the Function field drop-down list to achieve the desired consolidated data.
- If we check the label setting boxes, ensure to select the entire source data with the row and column labels while adding the references to the required source data.
- Suppose we require the Consolidate function in Excel to update the consolidated data with the changes made to the source data, then, we should select the option to get the links to the source data enabled in the Consolidate window.
Frequently Asked Questions (FAQs)
The Consolidate function in Excel is in the Data tab. We can select Data → Consolidate to apply it in the required master worksheet.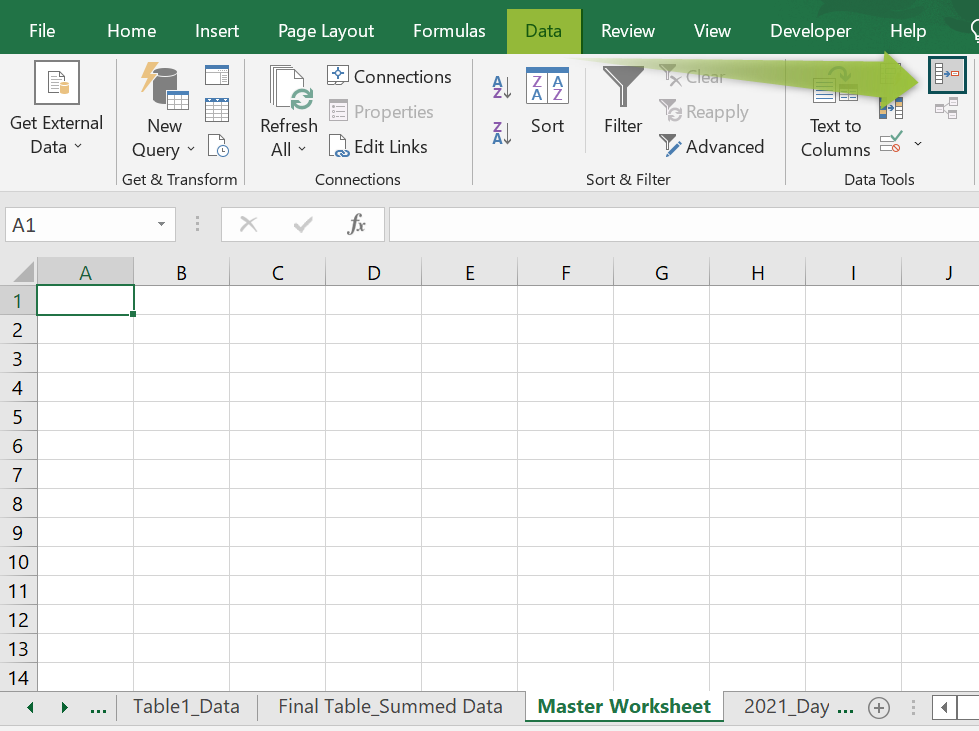
We can use the Consolidate function in Excel in the following scenarios:
• We need to summarize results, available in different worksheets, in one master worksheet.
• We must gather data in one sheet to make any data update and aggregation requirements more straightforward.
We can use the Consolidate function in Excel to consolidate data row-wise.
Let us see the steps with an example.
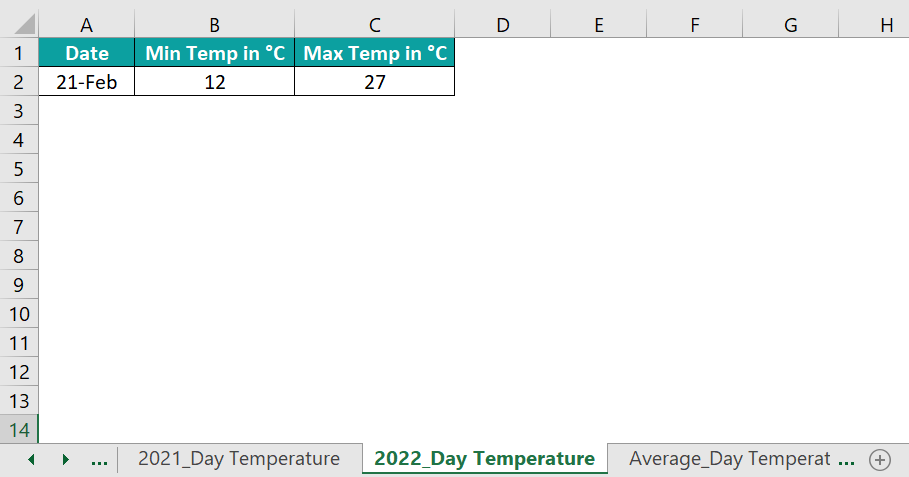
Consider the following two worksheets containing the minimum and maximum temperature on 21st Feb in 2021 and 2022.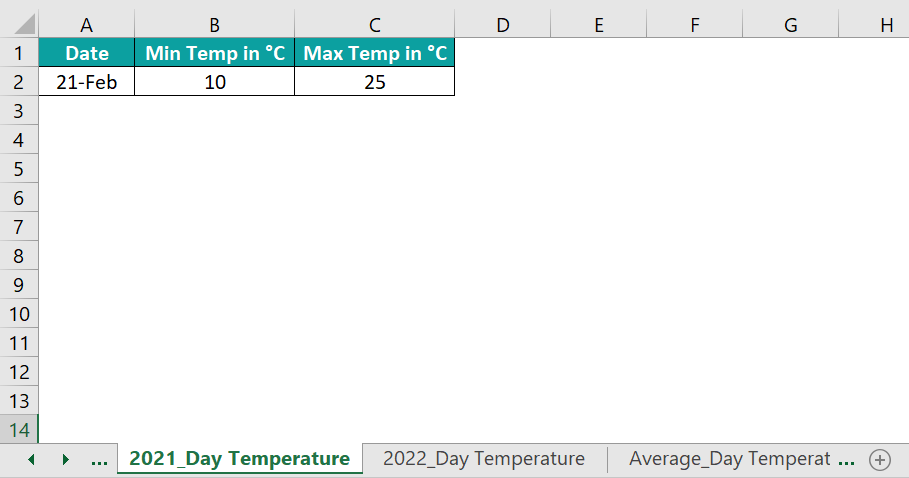
And suppose the requirement is to determine the average of the given temperature values in the master sheet, Average_Day Temperature, in the specified format.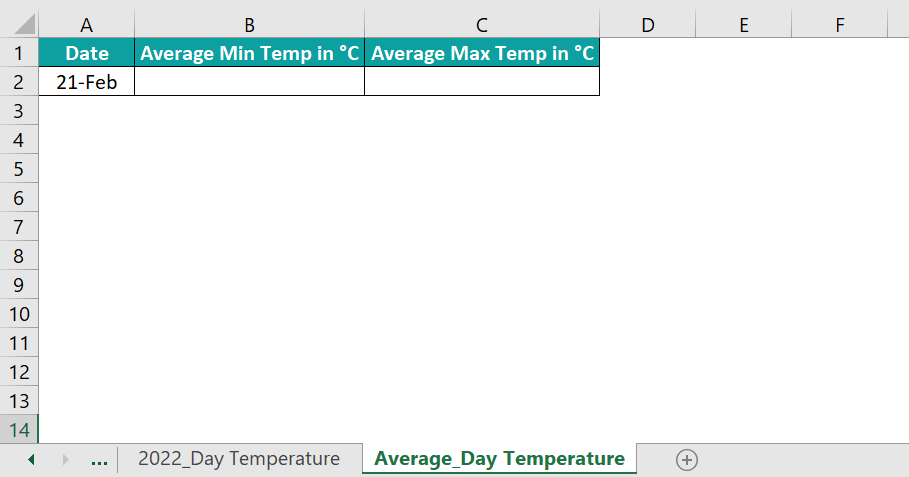
Then, the steps to apply the Consolidate function in the master sheet to achieve the required data are as follows:
• Step 1: Select the cell range B2:C2 in the master sheet and click Data à Consolidate to open the Consolidate window.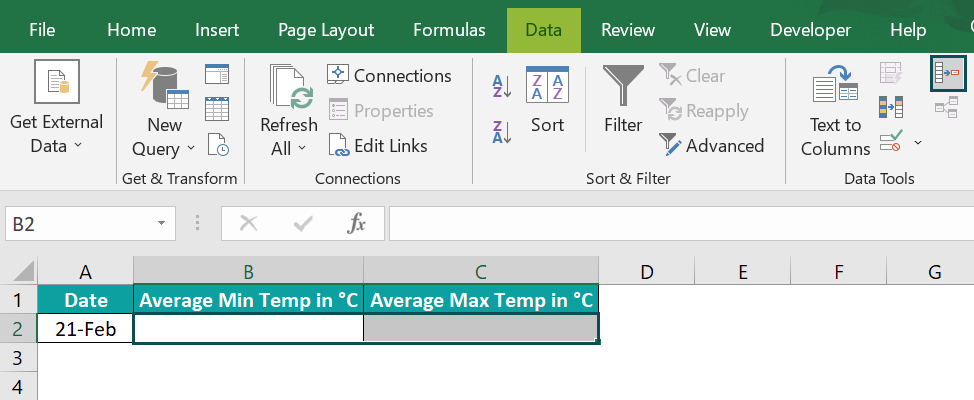
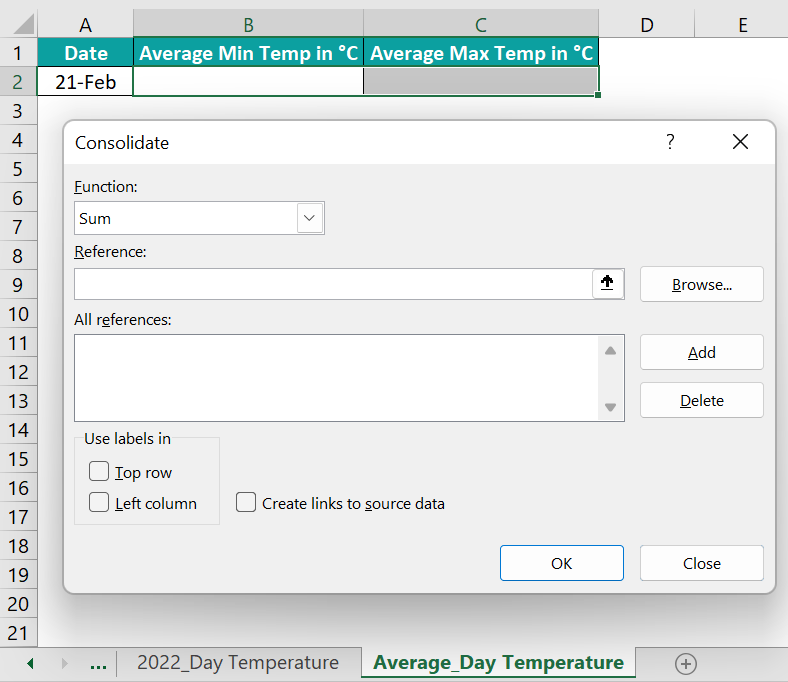
• Step 2: As we need the average of the given temperature values, click the drop-down button in the Function field to select the Excel function, Average.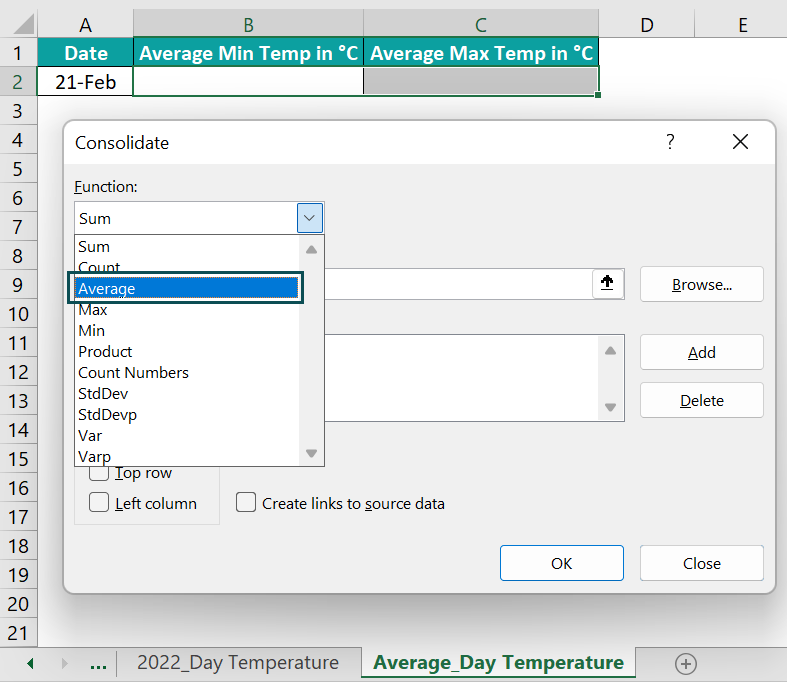
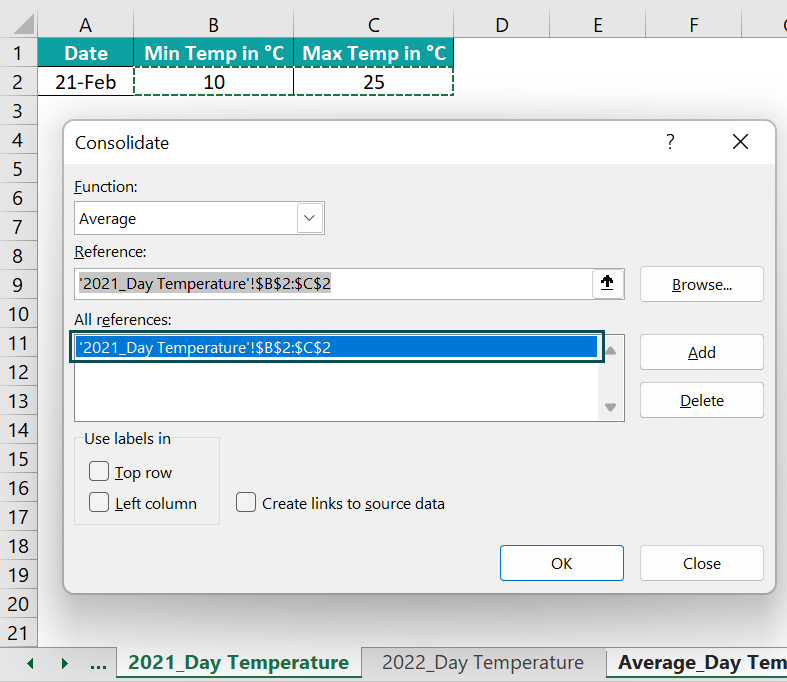
• Step 3: Click the Reference field. Then, go to the first source worksheet, select the required data as depicted below, and click Add to add the reference to the first source data.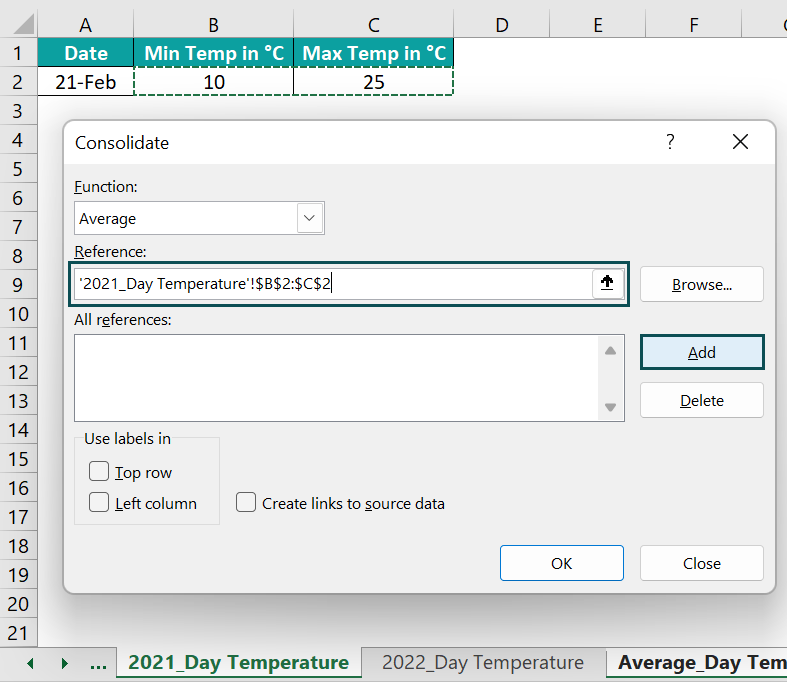
• Step 4: Go to the second source worksheet, select the required source data, and click Add.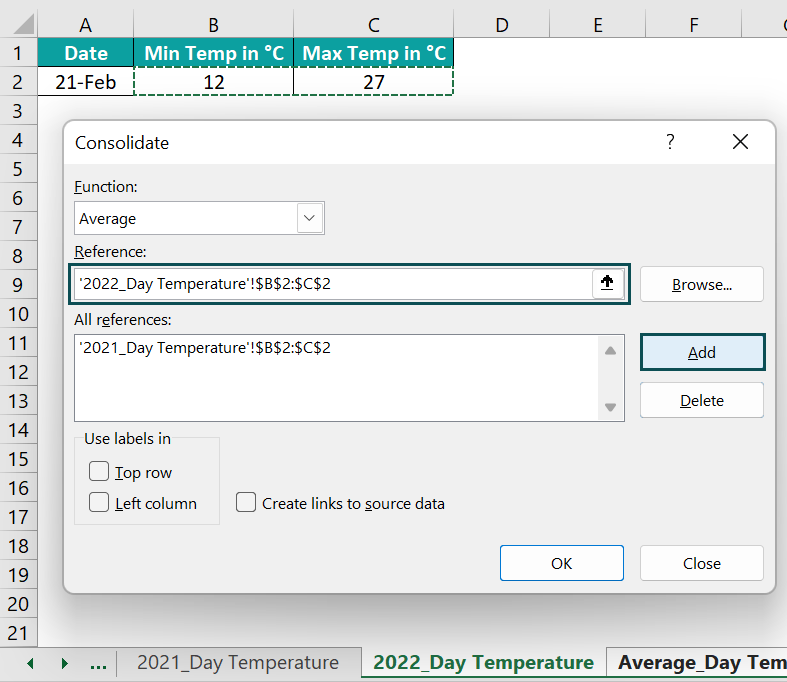

• Step 5: Click OK to view the row-wise consolidated data in the specified master worksheet.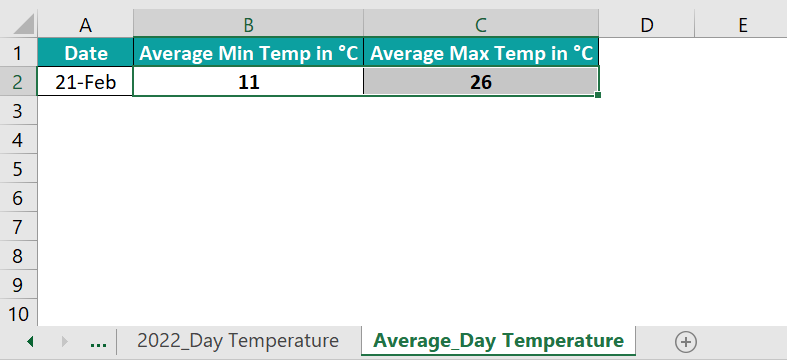
The Consolidate function determines the average of the given minimum temperature values, 10°C, and 12°C, to return the consolidated data as 11°C. Likewise, it averages the given maximum temperature values, 25°C, and 27°C, to return the consolidated data as 26°C.
Use this Consolidate Function In Excel Template to follow along with the examples in this article.
Download Excel Template