
What is SORT in Google Sheets?
The SORT function in Google Sheets arranges the rows of a range based on the values in one or more columns. It’s very useful when you wish to organize your data in ascending or descending order without manually rearranging rows. It is like SORTN, but the difference is that while SORTN which returns only a limited number of rows, SORT displays the entire dataset.
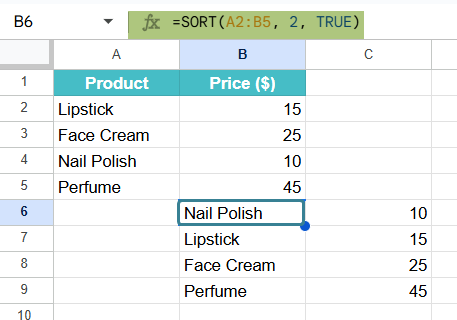
For example, if you have a list of products with their prices and want to sort them from the cheapest to the most expensive, you can use SORT. Suppose your data is in cells A2:B5, we use the following formula:
=SORT(A2:B5, 2, TRUE).
It will sort the entire table by prices in ascending order, keeping product names aligned with their respective prices. This makes it quick and easy to analyze data trends.
Use this SORT in Google Sheets Template to follow along with the examples in this article.
Download Excel TemplateKey Takeaways
- The SORT function in Google Sheets arranges rows of data based on one or more columns, in ascending or descending order.
- Its syntax is as follows: =SORT(range, sort_column1, is_ascending1, [sort_column2, is_ascending2], …).
- The function sorts the data without altering the original dataset, producing the sorted output in the location where the formula is entered.
- SORT in Google Sheets is powerful when combined with other functions like FILTER, UNIQUE, or QUERY to create dynamic reports and dashboards.
Syntax
The syntax of the SORT function is straightforward, allowing you to sort data by one or more columns.
SORT in Google Sheets formula
=SORT(range, sort_column, is_ascending, [sort_column2, is_ascending2], …)
- range – The range of data you want to sort.
- sort_column – The index number of the column in the range to sort by.
- is_ascending – TRUE to sort in ascending order, FALSE to sort in descending order.
- sort_column2, is_ascending2 (optional) – Additional column and sort order pairs for multi-level sorting. The data will be sorted first by sort_column, then by sort_column2 and so on if there are ties.
How to Use SORT Function in Google Sheets?
Let us look at how to use the SORT function in Google Sheets while working with sorting a range. You can use the SORT function in two main ways:
- Manually typing the SORT formula
- Using the Google Sheets menu
Manually Entering the SORT Function
Let’s go step-by-step and see how to manually use the SORT function to arrange a list of products by their sales in ascending order.
Step 1: First, create your dataset by entering the product names in Column A and their corresponding sales numbers in Column B.

Step 2: Next, decide where you want your sorted list to appear. Click on that cell (for example, D1) and start typing your formula. Begin with the = sign followed by the SORT( function. Now, specify the range of data you want to sort, the column number to sort by, and whether you want it in ascending or descending order. In this example, type:
=SORT(A2:B6, 2, TRUE)
Here, A2:B6 is the data range, 2 tells Google Sheets to sort based on the second column (sales), and TRUE means you want the results in ascending order from lowest to highest.

Step 3: Once you have entered the formula, press Enter. Instantly, Google Sheets will return the full dataset sorted according to your chosen criteria, and the results will begin from the cell where you entered the formula. This process ensures you don’t overwrite your original data, allowing you to keep both the raw and sorted versions.

Using the Google Sheets Menu Bar
One can also insert the SORT function using the menu:
- Select the cell where you want your sorted data to appear.
- Go to the Insert menu-> Function -> Lookup -> SORT.
- Enter the required arguments and click OK. Or yo can press Enter to see the sorted results.
- By using SORT, you can make your spreadsheets more structured, readable, and useful for decision-making.
Examples
The SORT function in Google Sheets is a powerful yet simple tool for reorganizing your data without altering the original dataset. Whether you are working with sales numbers, student grades, or any other list, this function allows you to arrange values in ascending or descending order in just a few seconds.
Example #1
In this example, let us look at how to sort data with multi-level sort. This can be done easily using SORT in Google Sheets. Here we have the details of flowers sold in different stores located in different parts of a city. To sort the data, first by item, and then by quantity, we use the SORT function. Let us look at how to implement the same.
Step 1: We enter all the details in a Google Sheet.

Step 2: Let us apply the SORT in Google Sheets formula. To sort by the item first and then by quantity, we write the following formula:
=SORT(A2:C11, 2,TRUE, 3,TRUE)
Here
- A2:C11 is the source data to sort
- 2 is the sort index, since we are sorting the items in the second row
- TRUE indicates sorting in ascending order followed by 3,TRUE, which means we next sort Column 3 in ascending order.

Step 3: Press Enter. We get the data sorted in the ascending order first by column 2, followed by column 3.

Example #2 – SORT Data From Another Tab
There is a fruit shop with sales recorded on a sheet named Data. The shop wants a clean, updated view on a separate sheet called Summary. Here, the sales must be sorted in descending order, followed by the item in ascending order. Instead of manually copying and sorting, let us use the SORT function on the Summary tab to pull and sort the data from the Data tab.
The following are the steps.
Step 1: Prepare the source data on the Data tab. We enter the details such as Region, Item, Quantity, and the sales rows below.

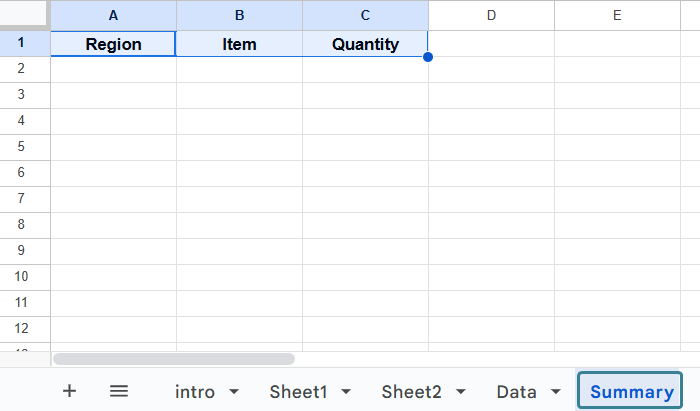
Step 2: Add a new sheet called Summary. Enter the same headers – Region, Item, Quantity- to make the output more readable and prevent the formula from sorting the header row.
Step 3: Enter the formula after clicking cell A2 on the Summary sheet, as shown below:
=SORT(Data!A2:C11, 3, FALSE, 2, TRUE)

Breakdown of this formula:
- RawData!A2:C11 — the source range on the other tab, excluding headers.
- 3, FALSE — first sort key: column 3 of the range, FALSE means descending.
- 2, TRUE — second sort key: column 2 of the range, TRUE means ascending.
Step 4: Press Enter and check the result. Now, the Summary sheet, beginning from A2 with the entire dataset from Data, is sorted by quantity and item. The output is dynamic, as any edits you make to the Data will immediately update the Summary output.
If you only want the top N rows, you can use SORTN.
Using SORT to pull data from another tab helps create summary sheets reflecting the latest information without manual copying.

Example #3 – Use SORT with FILTER Function
IN this example, let us try to filter data based on some criteria and arrange the output. For this, we can use the SORT and FILTER functions together. The FILTER function gets an array of values based on the criteria you define and passes that array to the first argument of SORT.
As an example, we are going to extract items with quantity equal to or greater than 100 (>=100) from the source data in A2:B11 and arrange the results in ascending order.
Step 1: Enter all the details in a sheet.
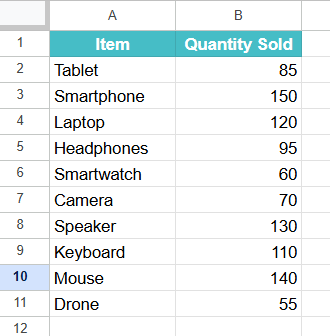
Step 2: Go to an empty cell like E2 and enter the following formula.
=SORT(FILTER(A2:B11, B2:B11>=30), 2, TRUE)
Here, the filter function selects those values in the range A2:B11 that have a quantity >=100. These values are passed to the SORT function, which then sorts in ascending order(TRUE), and the value 2 represents the second column, the one which will be sorted.

Step 3: Press Enter. You get the items sorted in ascending order for those whose quantity is greater than or equal to 100.

Important Things to Note
- For sorting across tabs, if the source sheet name contains spaces, wrap it in single quotes. For instance, =’Real Time Data’!A2:C11.
- Headers should not be passed to SORT. Else, it will also get sorted.
Frequently Asked Questions (FAQs)
As the data changes, the SORT order is automatically updated, making it very useful for data updating without any manual arrangements. Multiple columns can be sorted in different orders, such as ascending and descending. Keeps the original data intact and creates a separate sorted view.
The limitations are few, It does not automatically expand if new rows are added outside the specified range.
Unlike SORTN, SORT returns all rows and can’t directly limit results to a specific number.\
Yes. When we use the SORT Google Sheets formula, we can include multiple sort_column and is_ascending pairs. For example:
=SORT(A2:C10, 2, FALSE, 3, TRUE)
This sorts first by column 2 in descending order, and then by column 3 in ascending order if there’s a tie.
Some of the reasons SORT could work improperly:
1. If the sorting column contains mixed data types such as dates, text and integers, it can cause unexpected results.
2. Empty cells may shift results or cause the sort order to appear incorrect, especially when sorting numbers.
3. If the SORT formula’s result overlaps with existing data, you’ll get a #REF! error. 4. When multiple rows have the same value in the sort column and no secondary sort column is provided, the output order will be unpredictable.
5. Using TRUE (ascending) or FALSE (descending) incorrectly may lead to unexpected sorting.
Use this SORT in Google Sheets Template to follow along with the examples in this article.
Download Excel TemplateRecommended Articles
Continue with these related resources when you want the next practical step in this topic.
- Data Validation In Google Sheets
- Format Cells in Google Sheets
- Conditional Formatting In Google Sheets
- Filter Function In Google Sheets
- Alphabetized In Google Sheets
Explore the full Google Sheets Data Cleaning Validation and Formatting guide or browse Google Sheets Resources.