What Is VBA Check Box in Excel?
The VBA checkbox is a graphical user interface element typically used in forms or dialog boxes to allow users to make binary choices, such as selecting an option or indicating a yes/no decision. In Excel, for instance, you can insert checkboxes from the Developer tab. These checkboxes can be linked to specific cells, and their state (checked or unchecked) can be controlled through VBA code.
Consider the following example to build a VBA Check Box Macro to alert the user whether the checkbox is checked or unchecked.:

Using the ActiveSheet function, you can call the CheckBox.Add function to create and check the VBA Check Box.

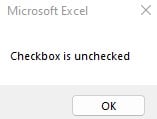
Table of Contents
Key Takeaways
- Checkboxes in VBA are graphical elements used to allow users to make binary choices or indicate yes/no decisions.
- Check Boxes can be inserted into Excel worksheets or UserForms using the Developer tab and ActiveX Controls.
- They can be linked to specific cells, reflecting their state (checked or unchecked) in the linked cell.
- Checkboxes can be used for user input validation, ensuring that users make the appropriate selections based on their requirements.
- You can write VBA code to handle events associated with checkboxes, such as click events, to perform actions based on their state.
Excel VBA 5-in-1 Course Bundle – (30+ Hours of Expert-Led Training)
If you want to learn Excel and VBA professionally, then the Excel VBA 5-in-1 Course Bundle (30+ hours) is the perfect solution. Whether you’re a beginner or an experienced user, this bundle covers it all – from Basic Excel VBA to Event Automation, Error Handling, Email Automation, and real-world applications with downloadable templates.
How to Create VBA CheckBox in a UserForm?
Follow these simple steps below to use a VBA Check Box sample properly.
Step 1: Once you open the Excel Workbook, in the title bar, choose the “Developer” tab and click on it.

After you click the Developer icon, select “Visual Basic”. It opens the VBA Editor window.

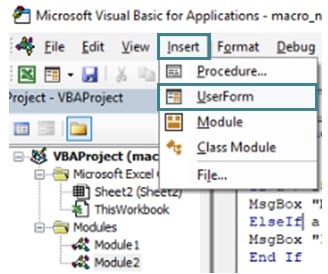
In that, in the VBA Editor’s title bar, click the “Insert” button and select the “UserForm” option.
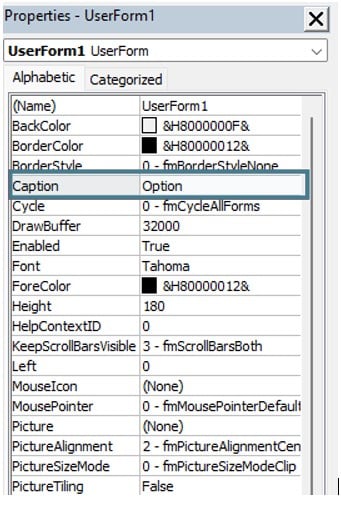
Step 2: Customize the name of the UserForm.

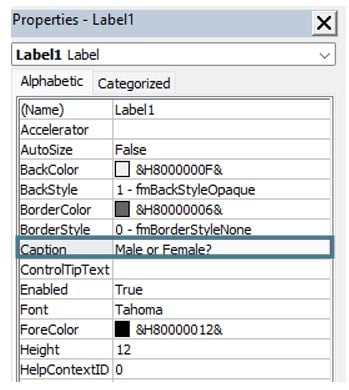
Step 3: Insert a label asking users to select their gender.
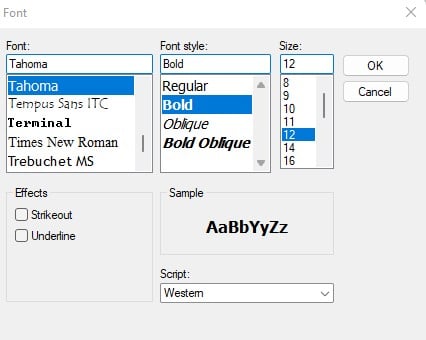
Customize the font size by clicking on Font and customizing it to your preference.

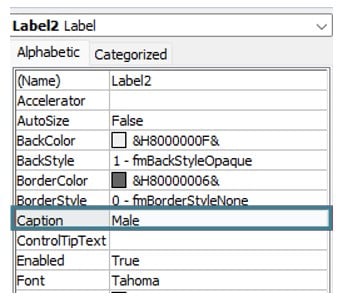
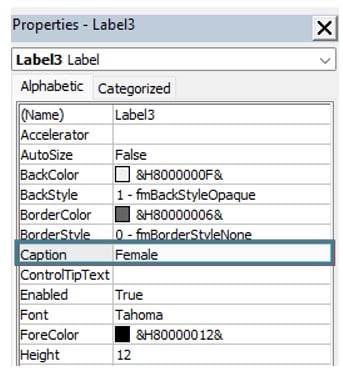
Step 4: Create two labels to show the checkboxes with so that the users can check for themselves.

Step 5: Double-click on the checkboxes and edit their VBA code as shown.

It is in case you click on the “Male” check box.
Step 6: Declare an If-statement to check if the value of the checkbox is true. If it is true, send a message box confirming that they have chosen that option and close the userform.

Step 7: Similarly, for the second checkbox to check if it is a woman, double click on the checkbox.

Step 8: Similarly, call an If-statement to check if the VBA Check Box value is True. If so, the message box confirming the “Female” option is shown.

Step 9: Close the UserForm in VBA after the Check Box code so that multiple options cannot be chosen.

Code:
Private Sub CheckBox1_Click()
If CheckBox1.Value = True Then
MsgBox “You are a man!”, vbInformation
End If
Unload Me
End Sub
Private Sub CheckBox2_Click()
If CheckBox2.Value = True Then
MsgBox “You are a woman!”, vbInformation
End If
Unload Me
End Sub
Step 10: Click “F5” or the “Run” icon on the activity bar in Excel VBA.
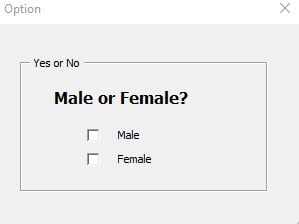
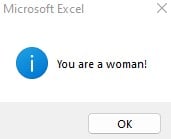
With that, Check Boxes are successfully implemented in a UserForm.
Examples
See the different ways in which you can implement a VBA Check Box macro to your Excel activities.
Example #1 – Add ActiveX Check Box Control
In this example, learn how to create checkboxes using the ActiveX controls in Excel.
Step 1: Under the Developer tab, turn on Design Mode to edit and move the checkboxes around.
Step 2: Under Insert, in the ActiveX controls, select Checkbox and draw it anywhere you prefer in the worksheet.
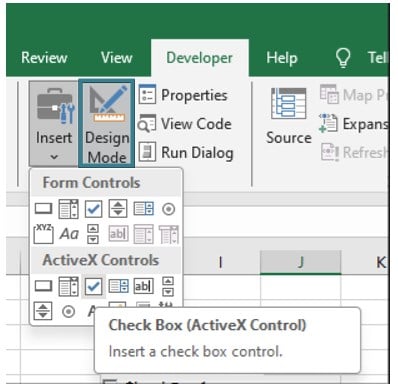
The resulting CheckBox looks like this.

Step 3: Customize the name of the CheckBox by clicking on the Properties bar next to the “Design Mode” icon.
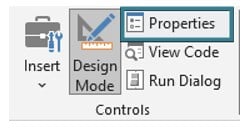

Step 4: To edit the functionalities of this check box, right-click on the checkbox and select “View Code”.

Step 5: Edit the conditions to occur when editing this subroutine.

Step 6: If the VBA Check Box value is true, then send a message box confirming that the user agrees. It is done using an If-Else condition.

Step 7: Declare an Else part for the check box being unchecked.

Code:
Private Sub Yes_Click()
If Yes.Value = True Then
MsgBox “The user agrees!”, vbInformation
Else
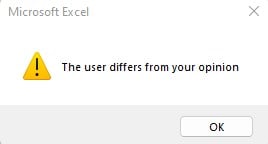
MsgBox “The user differs from your opinion”, vbExclamation
End If
End Sub
Step 8: Go to the worksheet and click on the check box after editing the VBA Check Box Macro. A message box will pop up.

Example #2 – Link Checkbox to a Cell
In this example, you will learn how to link VBA Check Box values to a cell and view its output.
Step 1: Turn on “Design Mode” under the “Developer” tab.
Step 2: Select Insert, and under the ActiveX controls, select the Check Box and draw it.
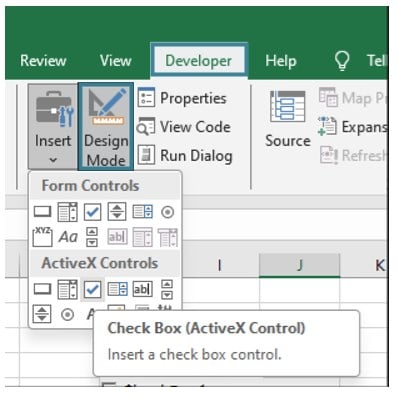
Step 3: Define a subroutine to link the results of the VBA CheckBox to the cell.

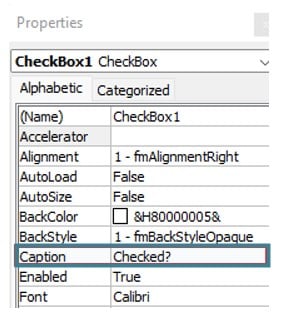
Step 4: Change the name of the Check Box in the Properties tab.
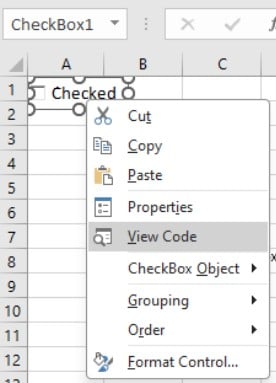
Step 5: View the Check Box’s code.
Note: There is no need to fill the subroutine; you can keep it blank.
Step 6: Create a new sub-procedure to define the VBA Check Box value to another cell.

Step 7: Define the number of columns you want the value to be printed at in a specific cell. Here, it is programmed as three columns away from the left.

Step 8: Using the With function in Excel VBA, use the linkedCell property of the checkbox to define the cell the result will be showing in.

Step 9: Using the VBA Offset function, put the variable leftCol defined earlier in the columns argument in the Offset function with the TopLeftCell keyword.

Then, end the With functionality.
Code:
Sub LinkCheckBoxToCell()
Dim leftCol As Long
leftCol = 3
With CheckBox1
.linkedCell = _
.TopLeftCell.Offset(0, leftCol).Address
End With
End Sub
Step 10: Run the subroutine once, and then go to the worksheet and click on the check box.


Example #3 – Check If CheckBox Is Checked via MsgBox in Excel
In this example, you will learn how to get confirmation from the Check Box code using a Message Box in VBA.
Step 1: Keep the “Design Mode” turned on or turn it on if not turned on already.
Step 2: Next to “Design Mode,” select “Insert,” and then in the ActiveX controls, select the “Check Box” option.
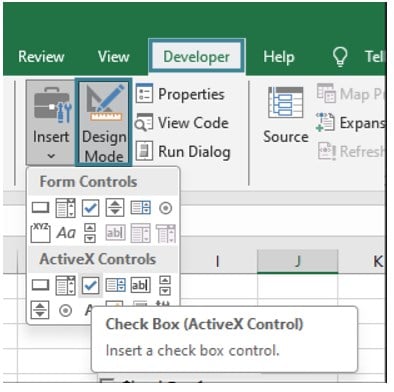
Step 3: Edit the properties of the check box.
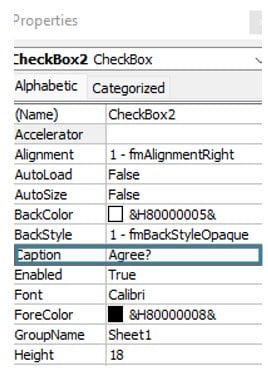

Step 4: Right-click on the checkbox and select “View Code” to edit its functionality.
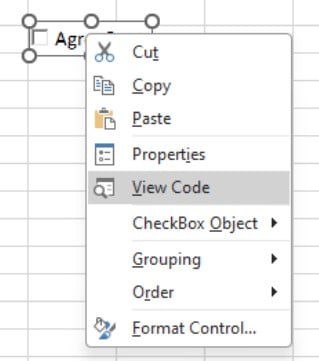

Step 5: Declare a Message Box printing a message when the check box value is True. vbInformation is a keyword used to include icons in the Message Box.

Step 6: Declare an Else condition when the VBA Check Box value is false. Make it print a different message using the MsgBox function.

Code:
Private Sub CheckBox2_Click()
If CheckBox2.Value = True Then
MsgBox “Checked!”, vbInformation
Else
MsgBox “Unchecked!”, vbExclamation
End If
End Sub
Step 7: Go to the worksheet and click on the Check Box after turning off “Design Mode” on the “Developer” section.
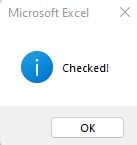

From this, you’ve successfully extracted confirmation for checking checkboxes by editing the VBA Check Box macro.
Example #4 – Delete Checkbox
Now that you know how to create and edit checkboxes according to requirements, how do you go on to delete a checkbox? You can follow the steps below to learn how to delete a check box.
Step 1: Turn on the “Design Mode” option under the “Developer” section.
Step 2: Select the check box you want to delete to get its name.

Step 3: Create a subroutine to delete a specific check box.

Step 4: Select the worksheet this check box is in.

Step 5: Declare the check box to be deleted as an OLEObject.

In VBA, OLEObject refers to an Object Linking and Embedding (OLE) object. OLE is a technology that allows you to create objects that can contain information from different applications.
In the context of Excel VBA, an OLEObject typically represents an embedded object or control in a worksheet, such as a checkbox, command button, or ActiveX control. It allows you to manipulate and interact with these embedded objects programmatically.
Step 6: Delete the check box using the Delete function.

Step 7: Print a message box successfully confirming that the check box has been deleted.

Code:
Sub DeleteCheckbox()
Dim ws As Worksheet
Set ws = ThisWorkbook.Sheets(“Sheet1”)
Dim chkBox As OLEObject
Set chkBox = ws.OLEObjects(“CheckBox3”)
chkBox.Delete
MsgBox “Deleted CheckBox successfully!”, vbExclamation
End Sub
Step 8: Run the above subroutine. You will see that that check box has been deleted successfully.


Important Things To Note
- Use checkboxes for binary (true/false) choices where users need to indicate whether an option is selected or not.
- Link checkboxes to cells for easy data representation and manipulation.
- Use checkboxes consistently throughout your application for similar types of choices.
- Avoid overcrowding your user interface with too many checkboxes, as it can overwhelm users.
- Don’t rely solely on the visual state of checkboxes for important logic or validation.
- Avoid labeling checkboxes ambiguously or inconsistently, as it can confuse users.

Frequently Asked Questions (FAQs)
By going to the Properties section, you can format check boxes in Excel VBA to your liking. You can also edit the VBA Check Box macro to further format its functionality.
Yes, you can use check boxes in Excel VBA to filter data in Excel. For example, consider a shop where users can pay immediately or later. They can be classified in the data as Yes/No regarding the payment. In this way, VBA Check boxes can be used to eliminate the need to manually type Yes/No and filter the data according to that.
Yes. Go to the properties by right-clicking on the check box and edit its properties.
Alternatively, you can also click on the properties next to “Design Mode” after selecting the check box you want to change the properties for.
Yes, you can use checkboxes in VBA for user input validation. Consider the example below:
Sub ValidateInput()
If CheckBox1.Value = True And CheckBox2.Value = True Then
MsgBox “Both checkboxes are checked.”
ElseIf CheckBox1.Value = True Then
MsgBox “Checkbox 1 is checked.”
ElseIf CheckBox2.Value = True Then
MsgBox “Checkbox 2 is checked.”
Else
MsgBox “No checkboxes are checked.”
End If
End Sub
In this case, if the user clicks one or both checkboxes, their inputs can be validated.
Recommended Articles
Guide to VBA CHECKBOX & its Meaning. Here we explain how to create VBA CheckBox in a UserForm along with examples & downloadable excel template. You can learn more from the following articles –

Leave a Reply