
What is Drawing in Google Sheets?
Drawing in Google Sheets is the feature by which users can create and insert visual elements like shapes, lines, text boxes, and images directly into a spreadsheet. This drawing is separate from the cell-based data. Using the Google drawing feature, we can add diagrams, charts, and other visual aids to enhance the presentation of information within the sheet.
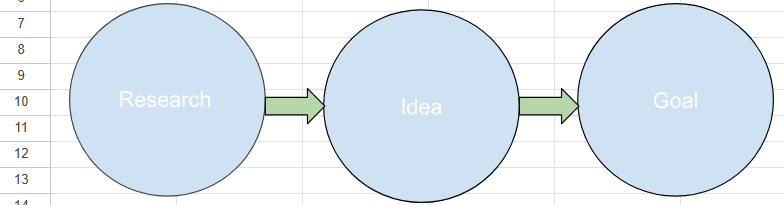
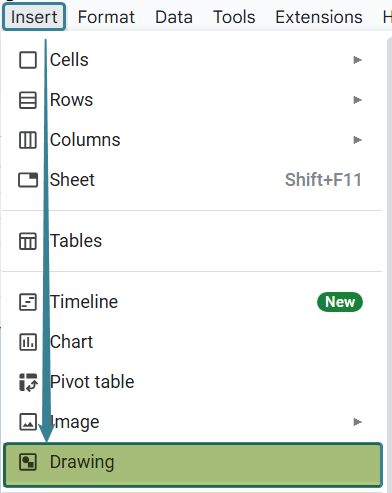
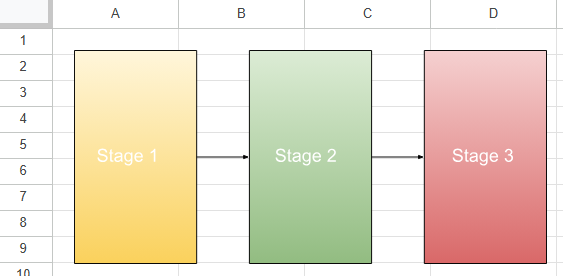
Let us look at how to use the drawing feature. To access this, we go to the “Insert” menu in Google Sheets and select “Drawing“. This opens a drawing panel from where you can create your visual elements. Below is a simple drawing created using this feature in Google Sheets. Using these steps, we have created a simple flow diagram in Google Sheets.
Use this Drawing in Google Sheets Template to follow along with the examples in this article.
Download Excel TemplateKey Takeaways
- The Drawing tool in Google Sheets allows you to create custom shapes, diagrams, and visuals like flowcharts or Venn diagrams, which appear as floating objects on your sheet.
- Go to Insert > Drawing, use shape, line, and text tools to design your visual, then click Save and Close to insert it.
- Double-click the inserted drawing to reopen and edit it anytime.
- Drawings don’t attach to cells, won’t move when sorting, and can be copied across sheets or into Docs and Slides.
What Are the Different Drawing Tools in Google Sheets?
Once you choose to draw through the drawing feature, you get a range of tools to draw different shapes.
To access this, we must go to Insert > Drawing menu. These tools allow users to add lines, shapes, text boxes, and images to their spreadsheets. Thus, you can add visual elements like flowcharts, tree structures and diagrams within your documents. Let us look at some of the drawing tools.
Lines
Line, Elbow Connector, Curved Connector, and Arrow:

These tools allow us to draw straight lines, lines with right-angle bends, curved lines, and lines with arrows, respectively.
Curve and Polyline:
Using these, we can create lines with multiple segments and curves for complex shapes.
Scribble:
This tool enables users to draw freehand lines and shapes.
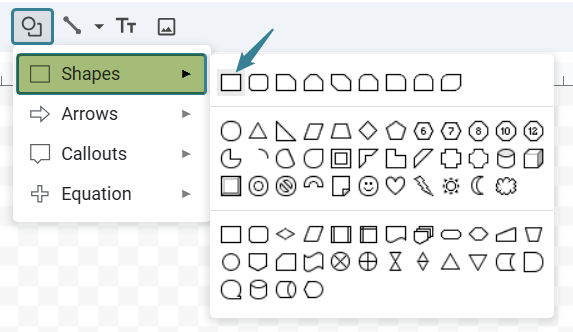
Shapes
The shape tool provides users with many pre-defined shapes like rectangles, circles, triangles, and more, which users can use and customize according to requirement.

Text Box:
This tool allows users to add text to their Google drawings, useful for labeling elements or adding notes.
Images:
Users can insert images from their computer, Google Drive, or by searching the web.
How To Draw in Google Sheets?
Drawing in Google Sheets is not a tedious process, as we have several tools readily available.
Now that you know what tools are available, let’s create your first drawing. Suppose you want to make a simple flowchart to illustrate a process. Here’s how you can do it:
Step 1: Let us first open the Drawing Tool. Click on “Insert” in the menu bar, then choose “Drawing.”
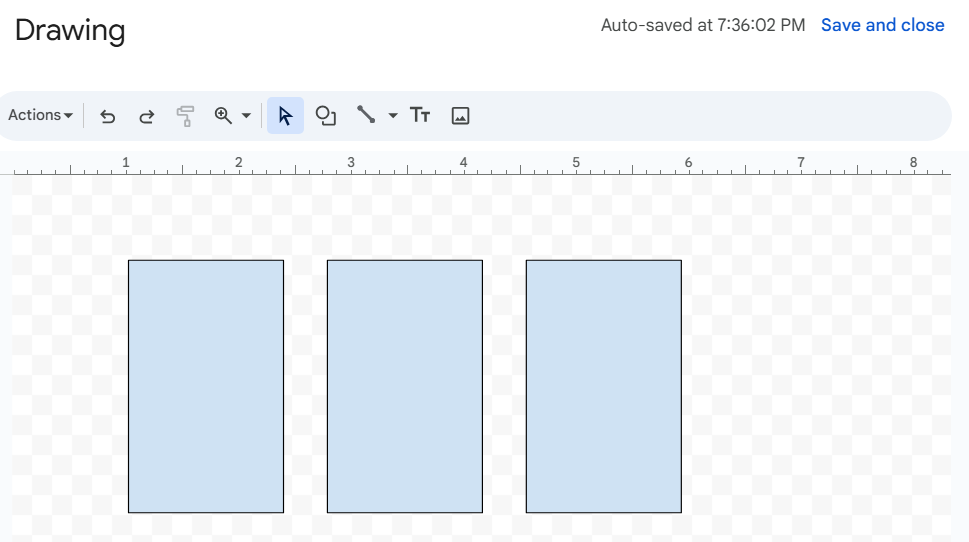
Step 2: The next step is to select a shape. Use the shape tool to draw rectangles representing different steps in your process. Click on the canvas and drag to size your shape.
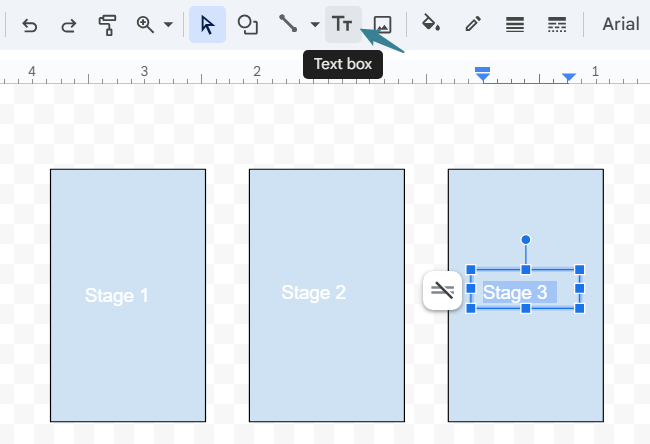
Step 3: The next step is to click the text box tool to label each shape with a step name or description.
Step 4: Now, we connect the steps using the line tool to draw arrows. This shows the process flow.
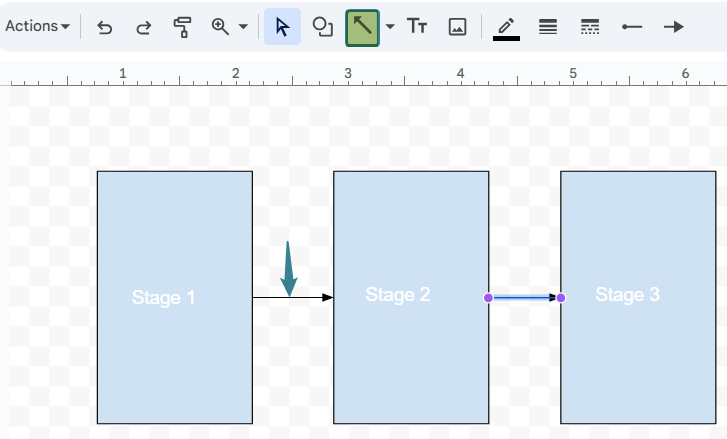
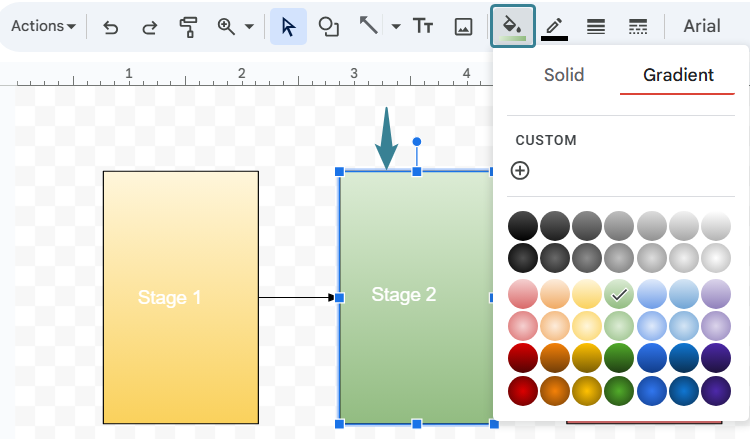
Step 5: One can now customize the drawing by adjusting the colors and line styles to improve clarity or add visual appeal.
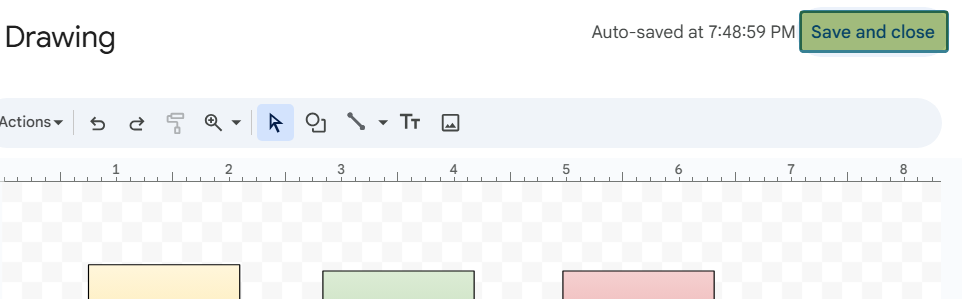
Step 6: Once the drawing meets the requirement, click “Save and Close” to insert it into the sheet.
We can draw many diagrams this way to include flowcharts and other visual elements in our sheet.
Examples
Let us look at some examples on how to implement the Drawing tool to add visual elements to our sheet. It’s a pretty interesting way to make our sheet more attractive and readable.
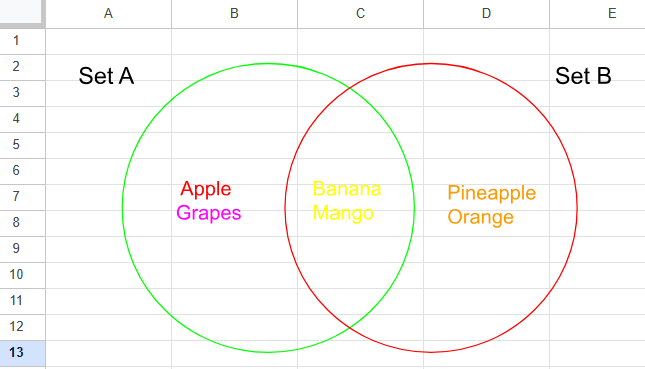
Example #1 – Venn Diagram for Overlapping Data Sets
Let us try to construct a Venn diagram. We have two sets as shown below
Set A = {Apple, Banana, Grapes, Mango}
Set B = {Banana, Mango, Pineapple, Orange}
Overlap = {Banana, Mango}
Step 1: Open the drawing tool. For this, go to Insert > Drawing.
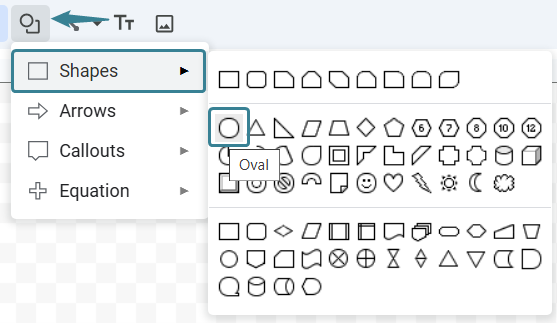
Step 2: Draw the two overlapping circles. Go to the Shape tool → Shapes > Oval.
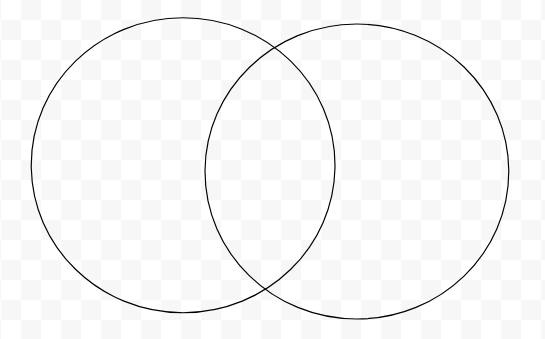
Step 3: Draw the first circle representing Set A and the second circle overlapping the first, to represent Set B.
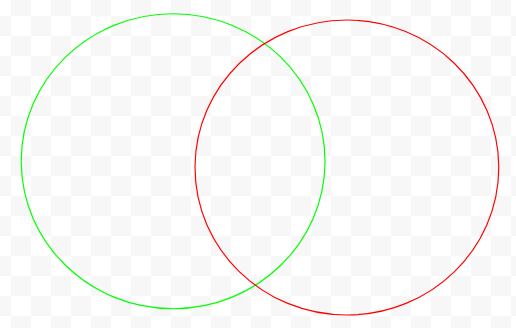
Step 5: Use Fill color to make them semi-transparent. Click the circle > Fill color > Custom > set opacity.
Step 6: Add text boxes. Let the left circle: “Set A.” Label the right circle: “Set B”
Label the overlapping area with: “Banana, Mango”
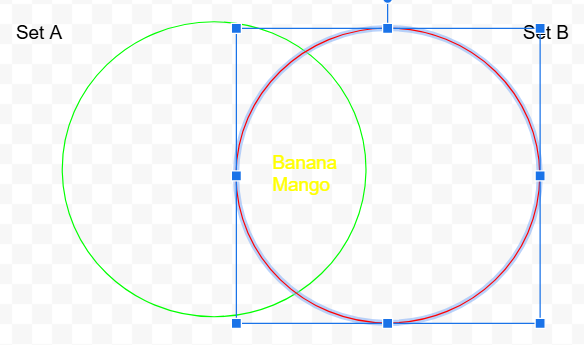
Step 7: Finalize and insert and then save the diagram.
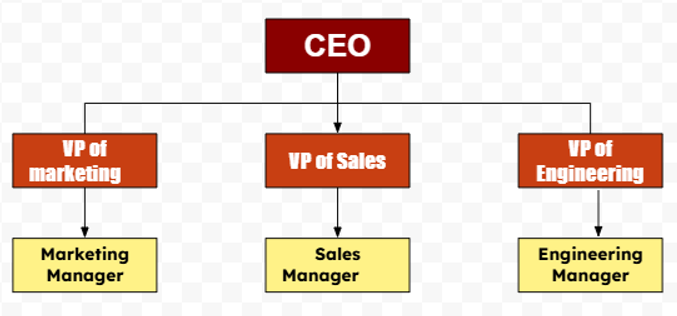
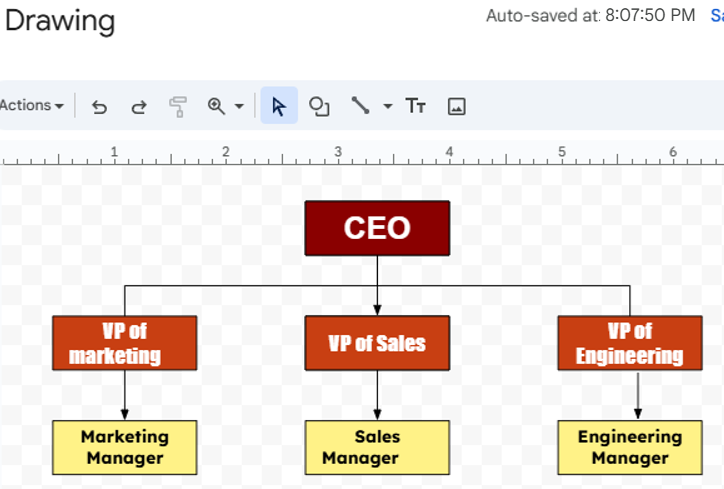
Example #2 – Create An Organizational Chart to Represent Hierarchy Levels
Let us consider a basic company hierarchy with three levels. We have the hierarchy as follows:
CEO
├VP of Marketing
└── Marketing Manager
├VP of Sales
└── Sales Manager
├ VP of Engineering
└── Engineering Manager
Let us consider the steps to create an organizational chart in Google sheets
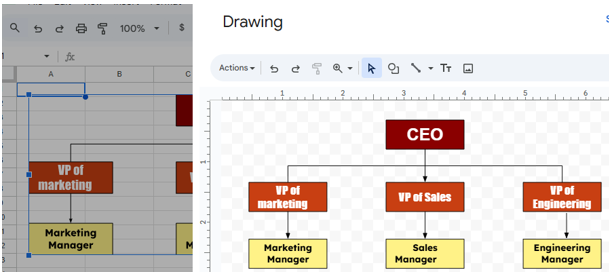
Step 1: Open the Drawing Tool
Go to Insert > Drawing.
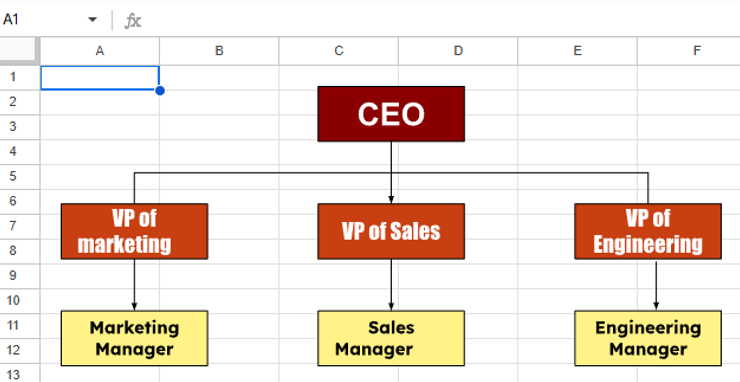
Step 2: Next, we will click the Shape tool → choose Shapes > Rectangle.
Step 3: Here, we will create boxes for the CEO, the three VPs and three managers.
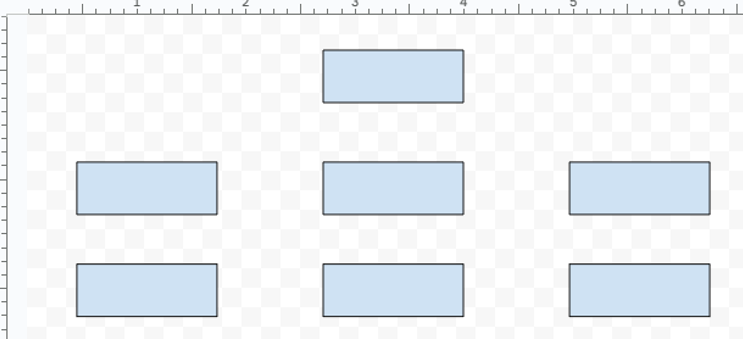
You can copy and paste shapes to keep sizing consistent, as seen above.
Step 3:Let us add the following labels using the text box tool.
“CEO”
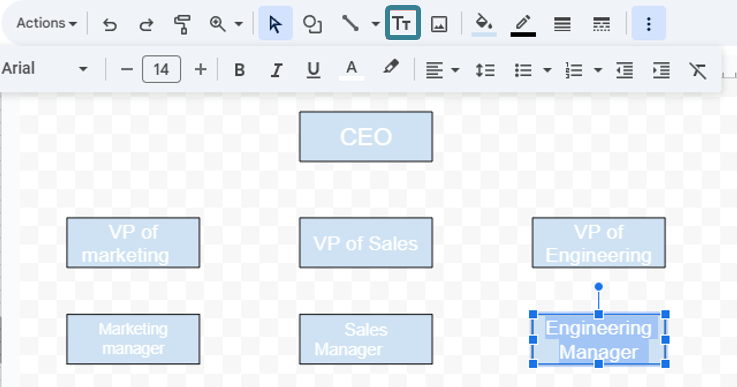
“VP of Marketing”, “VP of Sales”, “VP of Engineering” and their corresponding managers
Step 4: Connect these shapes to show hierarchy by clicking the Line tool → choose Elbow Connector or Arrow

Step 5: Format it by using Fill Color, line thickness, fonts, etc. You get a wonderful image as shown below.
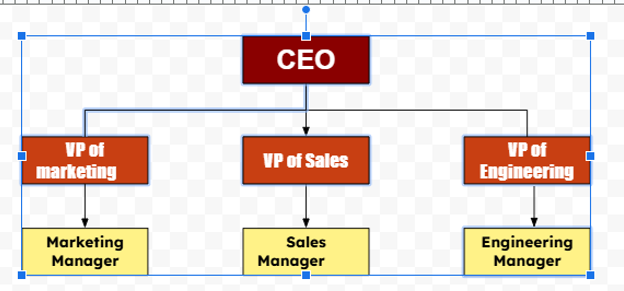
Step 6: Click Save and Close
The chart appears in your Sheet as a movable image
Copying a Drawing To a Different Sheet
It is easy to copy a drawing from one sheet to another. This is because Drawings are treated like floating images, and not cell contents.
Copy-Paste Between Sheets
- Click the drawing on your sheet, which you want to copy.
- Press Ctrl + C.
- Navigate to the target sheet at the bottom.
- Click on an empty spot and press Ctrl + V.
- The pasted drawing retains all the formatting, size, and positioning and is a floating image like the original.
Use the Edit Option to Copy From Drawing Tool
To copy a drawing, another method we use is:
- Double-click the existing drawing → Drawing window opens.
- Click and drag to select all elements inside.
- Press Ctrl + C. Close the drawing tool.
- Open a new drawing on the other sheet (Insert > Drawing).
- Press Ctrl + V to paste it in.
Thus, you recreate and edit a drawing while keeping the original intact.
Important Things To Note
- You can double-click any image to re-edit it at any time.
- The drawing in Google Sheets we create behaves like floating objects; they are not embedded in cells.
- Sometimes the drawings get misaligned when exported to sources like PDF. Always do a Print Preview before exporting.
Frequently Asked Questions (FAQs)
There is no option to lock a drawing in place in Google Sheets. However, the sheets we use can be protected from editing by going to Data -> Protect Sheets and Ranges. This will limit others from editing or deleting the drawing. Thus, we learn how to lock drawings in Google Sheets.
A: When resizing, we must hold the Shift key to maintain the aspect. Do not stretch from side handles unless you want to intentionally reshape it.
Let us remember some important points when using Google Sheets.
1. Google Sheets does not directly support drawing within a cell.
2. All drawings are inserted as separate elements on the sheet, not as part of the cell’s content.
3. One can use the IMAGE() function to insert a drawing as an image. It can be resized and positioned.
It is a simple process to create effective drawings in Google Sheets. But remember these important points to get your optimal and perfect image.
Avoid cluttering the drawing with excessive information, which is an eye sore. Focus on only the most important points.
There should be consistency in colors, fonts, and line styles to get a professional drawing which attracts the end users.
Utilize the alignment and distribution tools to ensure your elements are neatly arranged.
Use this Drawing in Google Sheets Template to follow along with the examples in this article.
Download Excel Template